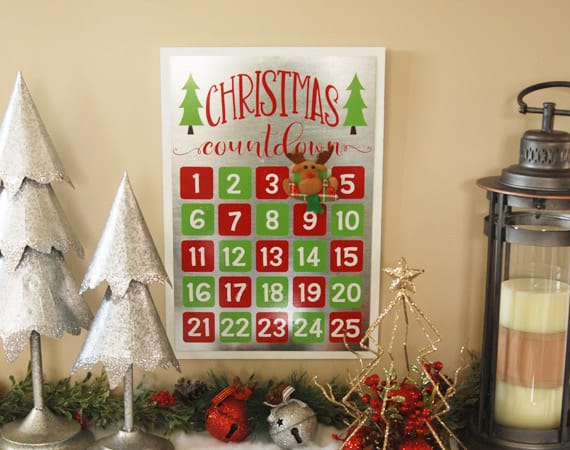
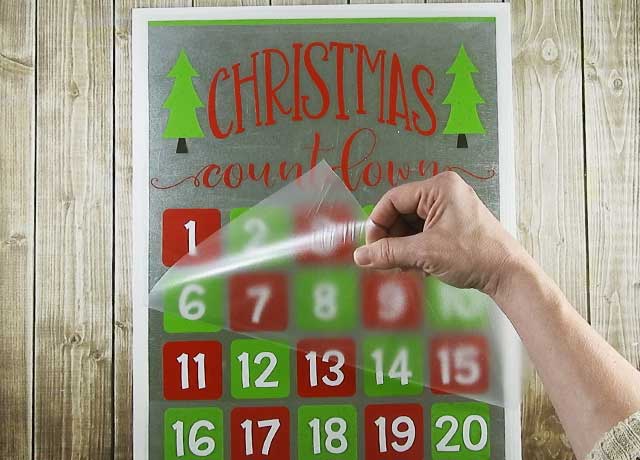
This magnetic Christmas countdown calendar is one of the easiest ways to track the days until Christmas! All the numbers are already in place—just move the cute magnet from day to day as Christmas gets closer. It’s simple, reusable, and adds a fun festive touch to your holiday décor. Plus, it looks adorable hanging on a wall or displayed on a mantel. Read on for the full tutorial!
HERE’S WHAT YOU NEED
- Wood (13″ x 19″)
- Metal Sheet (12″ x 18″)
- White Paint
- Brush or Roller
- Vinyl (I used Red, Lime-Tree Green, White, and Brown)
- Sawtooth Hanger
- Construction Adhesive
- Christmas Magnet
- Transfer Tape
- Electronic cutter (cricut explore, silhouette or other cutter)
- Cut File (available for free in my resource library)
HERE’S WHAT YOU DO
The first thing you’ll need to do is get the free SVG file you’ll use for this project. I keep all the SVG files I use for the projects I make in my SVG Library. These SVG files work with Cricut and Silhouette machines, as well as many others. This library is open to everyone and is free! You can access the library here. Look for the file called Christmas Countdown for Magnet Board. It will either be listed under the Christmas category-25 Days of Craftmas 2018 – Day 4.
Cut your wood to size and sand until it’s smooth (I used 1/4″ mdf for my sign). Paint several coats of white paint until the wood is covered.

While the paint is drying, open the design in your software program. Size the vinyl decal to about 11.5″ x 16.25″. To make the design easier to position on the metal sheet, add a horizontal line about 1″ above the top of the design. Centered the line with the rest of the design.

Cut the vinyl with your machine, weed away the excess vinyl, and apply the transfer tape.
Do you need help cutting this multi-color design? Check out this step by step tutorial for Silhouette Users here and for Circut Users here.
Once the board has dried, it’s time to glue on the metal. Apply construction adhesive to the back of the metal. Make sure to get it around the edges.

Flip the metal over and center it onto your wood. Place a few heavy objects on the metal until it dries.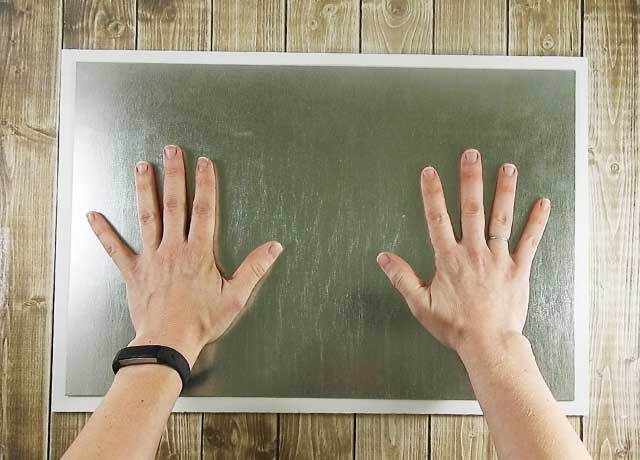
Now, it’s time to put on the vinyl. Fold down about an inch of the vinyl backing so the adhesive of the horizontal line is exposed. Center the horizontal line from left to right with the metal sheet and be sure the edge of the metal and top of the line match up. By doing this, your design should go on perfectly straight.
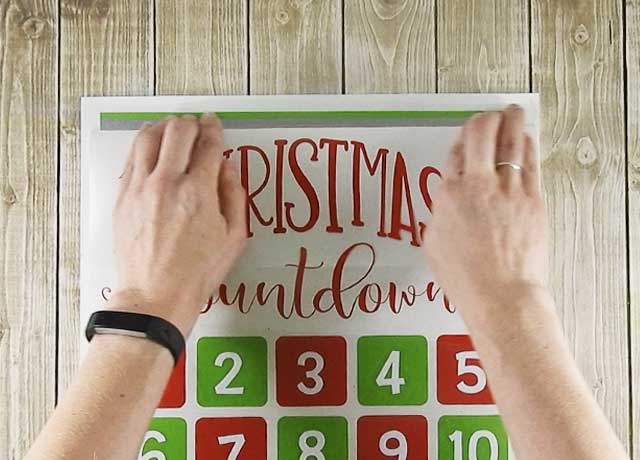
Carefully, start to remove the rest of the vinyl backing.
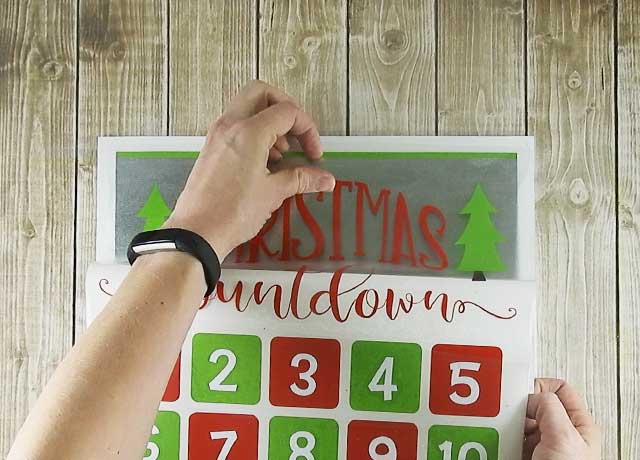
Use some type of scraper to push down the vinyl as you are removing the backing.

Once everything is pressed into place, remove the transfer tape.
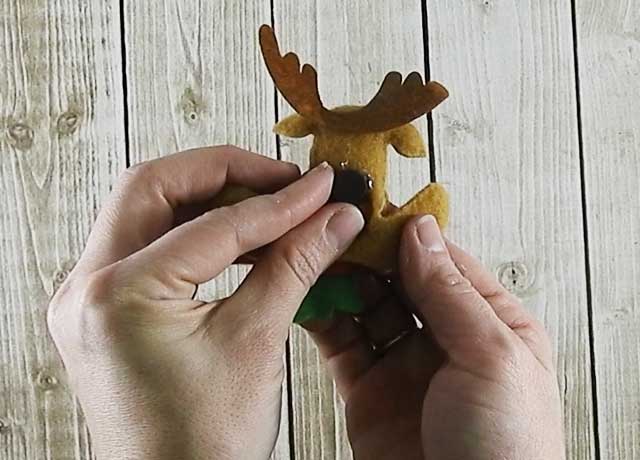
Now, all you need is a magnet. I made my magnet from this cute Christmas headband I got from the Dollar Store. 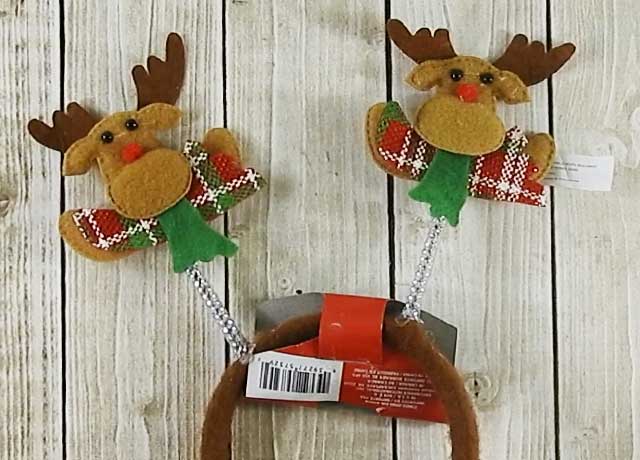
I just cut off the reindeer and glued on a magnet.
And that’s all there is to it! Another easy Christmas countdown project. What do you think?
Did you enjoy this post? I’d love for you to pin it to your favorite pinterest board.

Want to make your own? Get the free cut file for this project in the resource library
</div
I really loved this idea! I wanted to make it even easier, so I purchased a cookie sheet from the Dollar Tree along with the same headband you used.
Mine came out a little crooked,how did you put it all on one transfer sheet and have it all lined up?
Going to put matching ribbon on the edges and hubby is going to put two holes at the top to put a ribbon on it to hang it up. Or it can just lay flat for the grandgirls to play with.
I did not have white for the numbers so I used gold was so pleased how it looks.
Thank you for this design.
I always use registration marks to align multi-color vinyl designs. This tutorial shows the method I use.