Last month, I shared this fall door hanger I made from Dollar Tree supplies. It was really easy to make and turned out super cute. When I was getting the supplies for the fall sign, I picked up an extra pumpkin and a few other things to create one for Halloween. I used the same technique, so this version was super quick, too. I really love how it turned out. Read on for the full tutorial!
HERE’S WHAT YOU NEED
- Pumpkin Sign (I found mine at Dollar Tree)
- Vinyl (I used Black and White)
- Ribbon, Pipe Cleaners, Spiders (also from Dollar Tree)
- Hot glue and glue gun
- Exacto Knife (Optional)
- Application Tool
- Transfer Tape
- Electronic cutter (cricut explore, silhouette or other cutter)
- Cut File (available for free in my resource library)
HERE’S WHAT YOU DO
STEP 1: DOWNLOAD THE FREE SVG FILE
The first thing you’ll need to do is get the free SVG file you’ll use for this project. I keep all the SVG files I use for the projects I make in my SVG Library. These SVG files work with Cricut and Silhouette machines, as well as many others. This library is open to everyone and is free! You can access the library here.
STEP 2: REMOVE INNER PUMPKIN AND TRACE ONTO VINYL
Disconnect the inner pumpkin from the rest of the sign. Trace the shape of the pumpkin onto the back of your vinyl.

STEP 3: CUT OUT PUMPKIN
Cut out the pumpkin shape

STEP 4: REMOVE VINYL BACKING AND APPLY VINYL TO PUMPKIN
Remove the vinyl backing and center it over the pumpkin shape. Use an application tool to smooth it down. You can use an Exacto knife to trim off any excess vinyl from the edges.

STEP 5: CUT AND WEED VINYL STENCIL
Open the design in your software program and size it to fit on your pumpkin. I sized my design to about 7.5″ x 5″.
When everything is sized correctly, you can cut the design with your Cricut or Silhouette. Once it has finished cutting, weed away the excess vinyl.

STEP 6: APPLY TRANSFER TAPE
Cut a piece of transfer tape a little bigger than the design. Place the vinyl on the transfer tape and smooth it down. Then, trim off the excess transfer tape.
![]()
STEP 7: REMOVE VINYL BACKING
Rub over the design with an application tool to help the vinyl stick to the transfer tape. Then, carefully pull off the vinyl backing.

STEP 8: POSITION VINYL ON PUMPKIN
Position the design over the pumpkin. You can use a ruler to center it, but I just eyed it. Once everything is centered and straight, press down on the design.

STEP 9: REMOVE TRANSFER TAPE
Rub over the design with an application tool. Then, pull off the transfer tape.
![]()
STEP 9: ATTACH PUMPKIN TO SIGN
Poke a small hole in the top of the pumpkin and attach it back to the original sign.

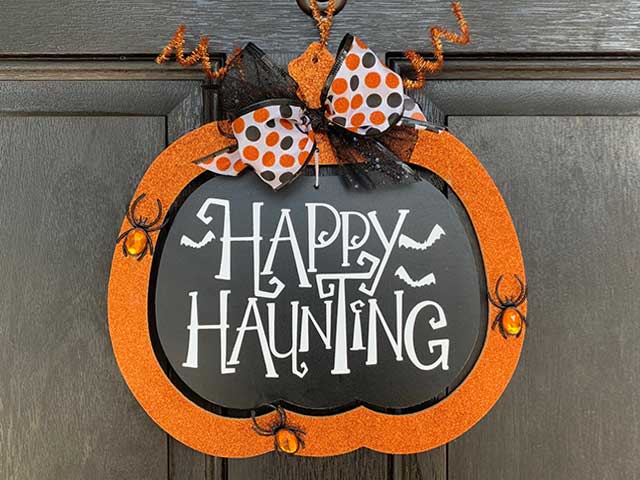
STEP 10: ADD A BOW AND OTHER DECORATIVE ITEMS
Use hot-glue to attach a bow to the stem of the pumpkin. Then, add some spiders around the outside.


That’s it! This sign is so easy to customize with your Silhouette or Cricut. I really love how it turned out!

Did you enjoy this post? Help spread the word! Share this post on your favorite Pinterest board. Thanks!

I never thought to cover the sign that was already there! Theres a whole new world I’m just now seeing! Thanks!!!
Thank you!