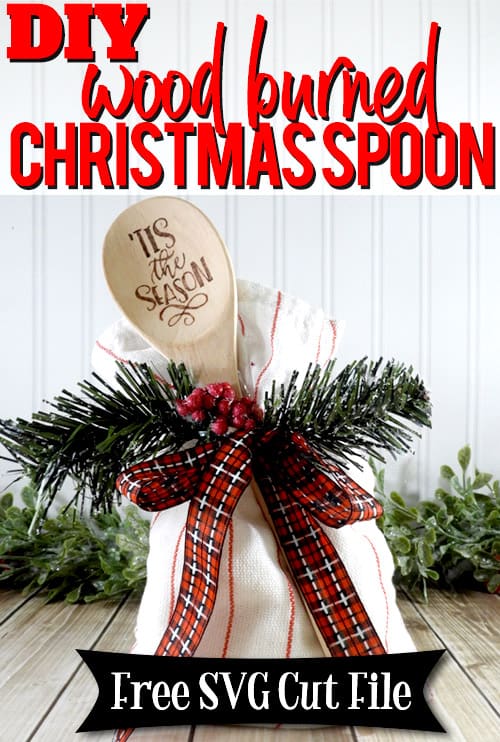
Welcome to day 25 of my 25 Days of Craftmas series – the final day! Today I’m showing you how to make your own wood burned Christmas spoons. This project is my absolute FAVORITE! That’s why I saved it for the last. I love these for so many reasons. They are unique, the designs are permanent, and they are food safe.
Up until I made this project, I had never used a wood burning tool. So, you don’t need a lot of experience to make these work. But, you might want to practice on some scrap wood until you get the hang of it. And, a word of caution, the tool can get extremely HOT, so be careful. Use the tool rest when you need a break and be sure to unplug it when you’re finished.
HERE’S WHAT YOU NEED
- Wooden Spoons (I found mine at Walmart)
- Vinyl (Color Doesn’t Matter)
- Wood Burning Tool (I purchased this one)
- Transfer Tape
- Electronic cutter (cricut explore, silhouette or other cutter)
- Cut File (available for free in my resource library)
HERE’S WHAT YOU DO
The first thing you’ll need to do is get the free SVG file you’ll use for this project. I keep all the SVG files I use for the projects I make in my SVG Library. These SVG files work with Cricut and Silhouette machines, as well as many others. This library is open to everyone and is free! You can access the library here. Look for the file called Tis the Season w/Flourish. It will either be listed under the Christmas category-25 Days of Craftmas 2018 – Day 25.
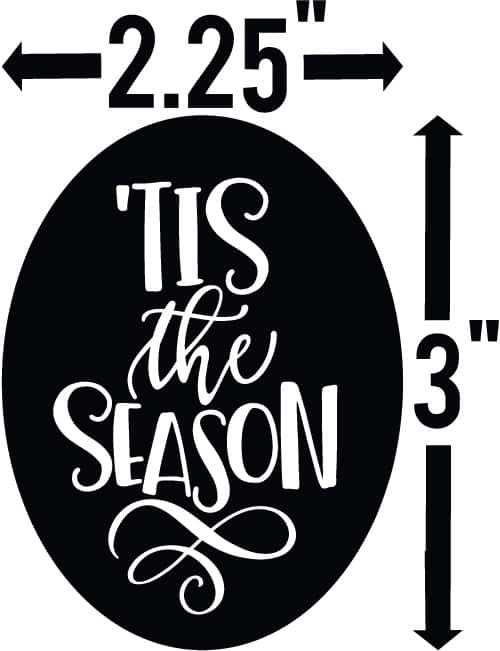
Start by measuring the width and height of the head of the spoon. In your software program, draw an oval that is that same size. Then, place the design inside the oval and fit to size. The spoon I used measured about 2.25″ x 3″. So, this is what my stencil looked like. After everything is sized correctly, cut out the vinyl stencil.
I found my spoons at Walmart and I like that they have a jumbo head, it gave me a bigger work area for the stencil.
Do you need a little help creating a stencil design? Check out this step by step tutorial for Silhouette Users here and for Circut Users here.
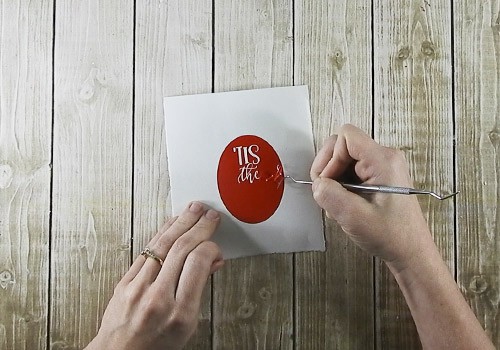
Weed away the excess vinyl.
Apply transfer tape over the design and trim to size.
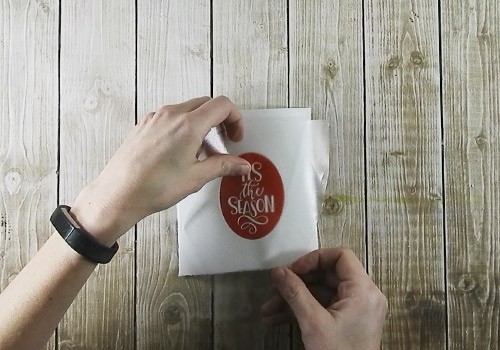
Rub over the vinyl to get it to stick to the transfer tape and remove the vinyl backing.
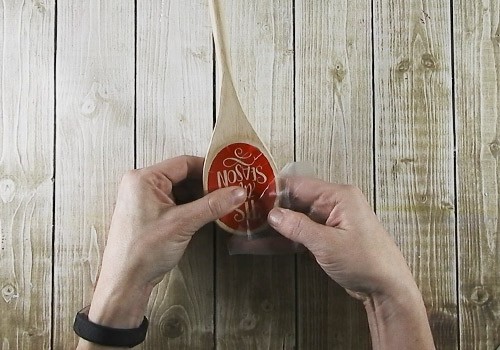
Apply the vinyl to the spoon. Since it’s a curved surface, the vinyl won’t lay flat. You’ll probably have a few creases, but that’s ok.
***UPDATE*** Since making this tutorial, I have tried a couple of other wood-burning projects. Instead of leaving the vinyl on the project and tracing around it with the wood burning tool, I have found it is easier to trace around the stencil with a pen or marker. Then, remove the vinyl stencil and trace around the letters with your tool. You can see how I did it in this project.
Plug in your wood burning tool and get it hot. Then start tracing around the design.
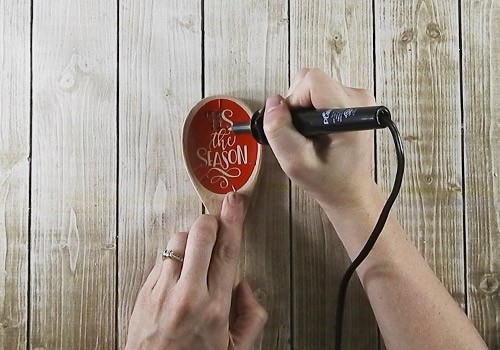
There are several tips in the package. I used the round tip with a round pointed end for this project. I used the tool and traced around the outside of the letters and then filled in the letter, kind of like coloring a picture.
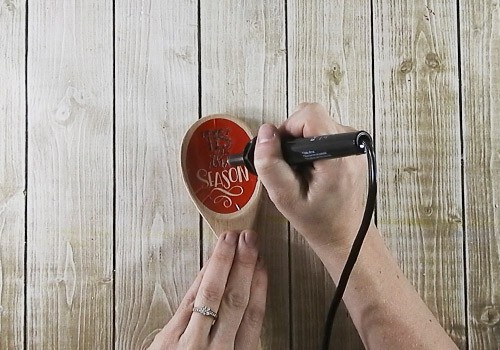
Don’t touch the tool right by the tip. You’re hand goes about half way up the tool, so it takes a bit of time to get used to it. It can also get hot, so be careful. Take a break if you need to.
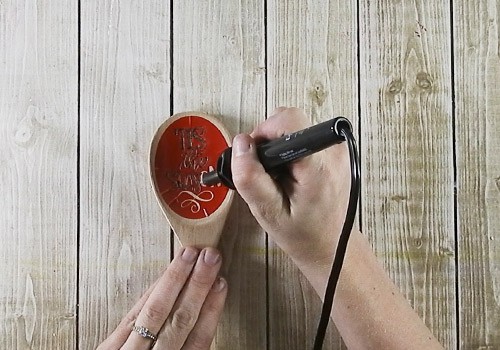
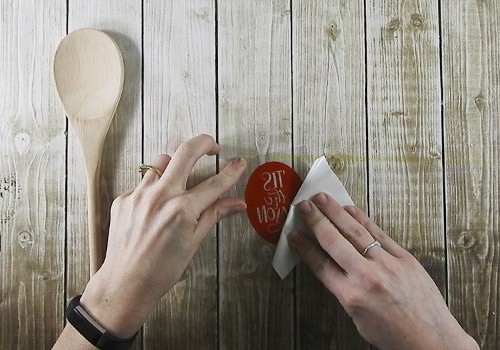
Once you’ve filled in the design, removed the vinyl stencil.
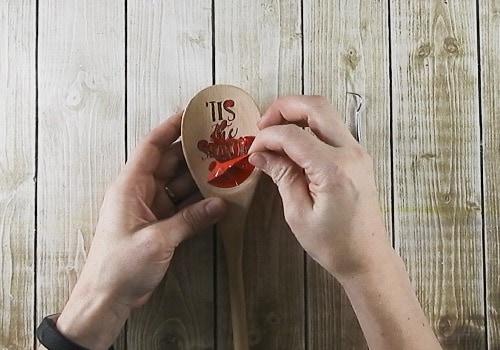
Touch up any spots that need fixing.
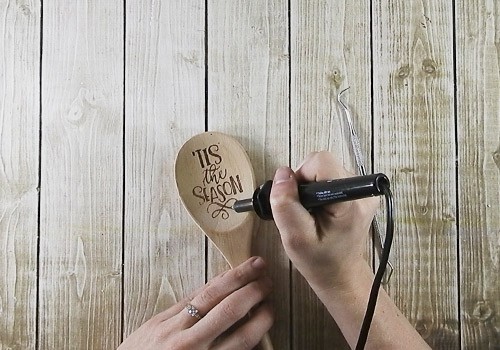
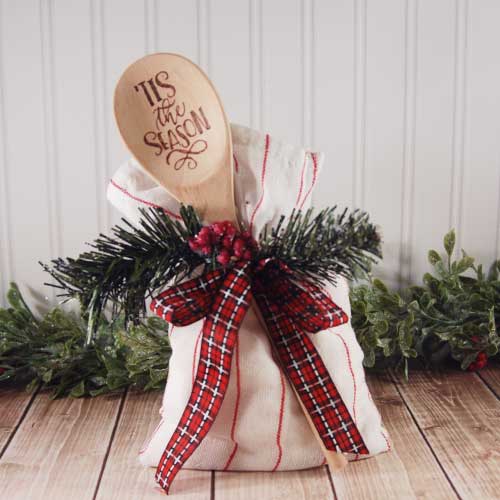
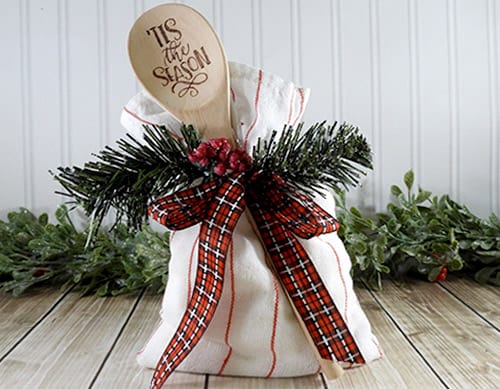
This is such a cute gift Idea for Christmas. 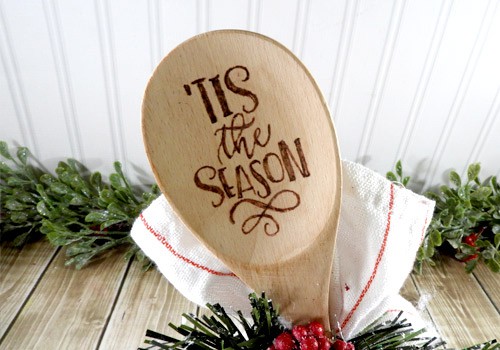
I attached it to a gift bag full of cookie mix with and added a cute bow.
Did you enjoy this post? I’d love for you to pin it to your favorite pinterest board.
Want to make your own? Get the free cut file for this project in the resource library