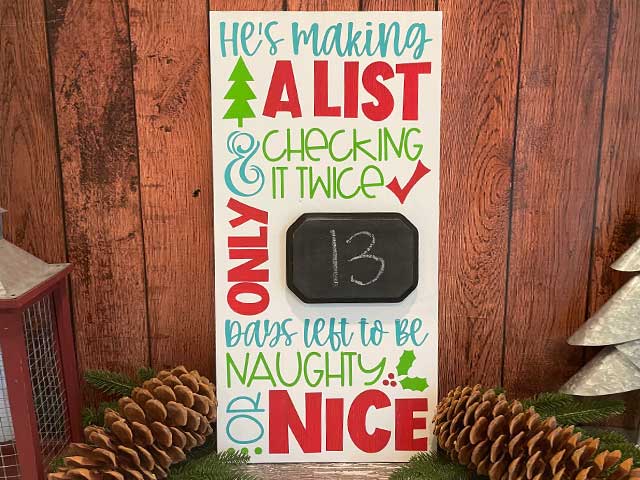
This chalkboard Christmas countdown sign is a fun and festive way to track the days until Christmas! The black rectangle is painted with chalkboard paint, so it works just like a mini chalkboard—simply write the number of days left with chalk, then erase and update it daily. The bright colors and playful design make it a perfect addition to your holiday décor. Read on for the full tutorial.
HERE’S WHAT YOU NEED
-
- Wood for Sign – 12″ x 24″
- Adhesive Vinyl (color doesn’t matter)
- Transfer Tape
- Weeding Tool
- Scraper
- Acrylic Paint & Brushes
- Chalkboard Paint
- Wood plaque & Glue (Optional)
- Sawtooth Hanger (Optional)
- Electronic cutter (cricut explore, silhouette or other cutter)
- Cut File – He’s Making a List Countdown file BA1813 (available for free in my resource library)
HERE’S WHAT YOU DO
STEP 1: DOWNLOAD THE FREE SVG FILE
The first thing you’ll need to do is get the free SVG file you’ll use for this project. I keep all the SVG files I use for the projects I make in my SVG Library. These SVG files work with Cricut and Silhouette machines, as well as many others. This library is open to everyone and is free! You can access the library here. Look for the file called He’s Making a List Countdown file BA1813. It will be listed under the Craftmas 2021 Category-Day 2.
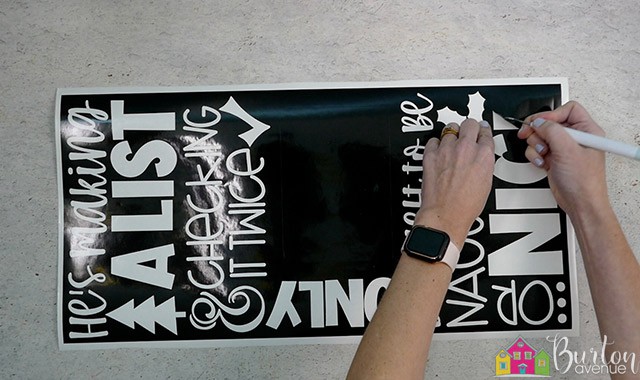
STEP 2: CUT AND TAPE VINYL DESIGN
Open the design in your software program. I resized the design to about 11″ x 23″.
Draw a rectangle around the design that is 23.5″ x 11.5″ to create a stencil. I used Oracal 651 in black for the stencil, but you can use any color of vinyl.
Do you need more help with creating a vinyl stencil? Check out these posts.
How to Make a Vinyl in Cricut Design Space.
How to Make a Vinyl Stencil in Silhouette Studio
When everything is sized correctly, you can cut the stencil with your Cricut or Silhouette. Once it has finished cutting, weed away the excess vinyl.
Since this is a stencil, you’ll want to pull the letters and shapes out from inside the rectangle.
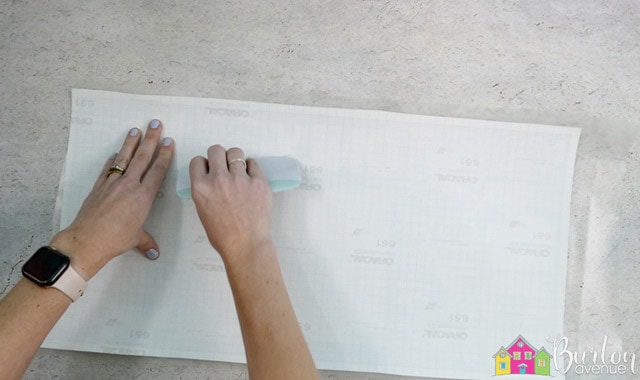
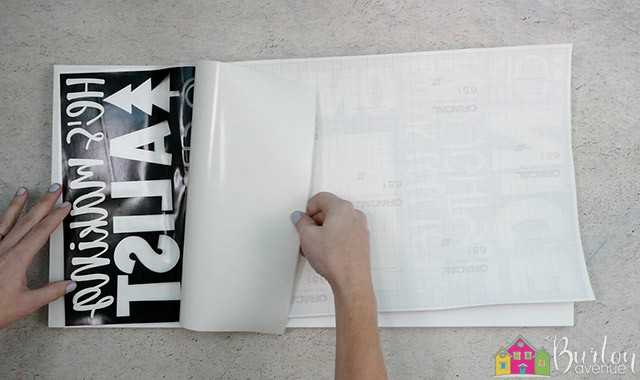
Cut a piece of transfer tape and place it sticky side up on your surface. Then place the vinyl on top of the transfer tape and smooth it down.
![]()
Rub over the design firmly with your scraper tool.
Then, trim off the excess transfer tape and vinyl backing.

Now that the vinyl is ready to go, let’s work on the sign.
STEP 3: PREPARE WOOD SIGN
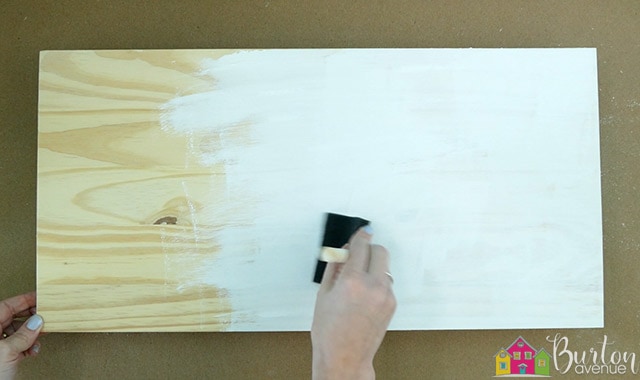
For the sign, I used a piece of wood that measures 12″ x 24″.
Sand over the wood so it’s nice and smooth. Brush off any sawdust and then paint it white. You’ll probably need a couple of coats.
Painting the back is optional, but I like to do just one quick coat to make it look nice and finished. Allow the white paint plenty of time to dry.
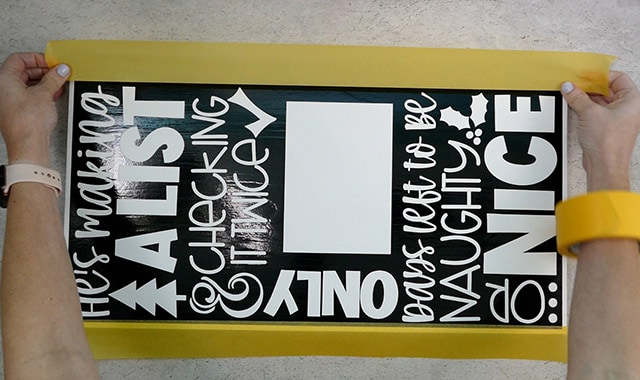
Once the paint is dry, it’s time to apply the vinyl stencil. Place the vinyl so it’s facing down, and then pull off the vinyl backing. I like to do it this way so the vinyl doesn’t curl.
Now, place the vinyl on the piece of wood. Center the design and make sure it’s straight. There should be about a 1/4″ gap between the stencil and the edges of the wood,

Once it’s in place, use a scraper and rub over the entire design.

Carefully pull off the transfer tape. There are a lot of small pieces that can come up with the transfer tape. Just go slow and use your fingers to hold those pieces in place.
![]()
Once the transfer tape is off, rub over the design again with your scraper.
Add some painter’s tape around the edges of the stencil to prevent unwanted paint from getting on the wood.
STEP 4: FILL IN THE STENCIL
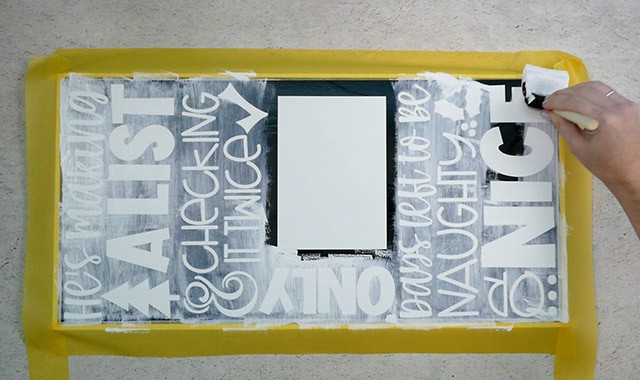
Paint a light coat of white paint over the stencil.
Why do we do this? To help prevent bleeds.
Sometimes there are small gaps between the stencil and the wood. Our hope is that the white will fill in these gaps, instead of the black paint.
Once the white paint is dry to the touch, it’s time to fill in the stencil.
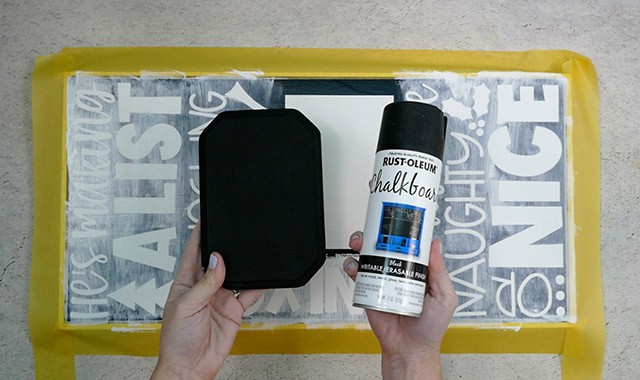
The rectangle in the center needs to be painted with chalkboard paint, so you can write and erase the letters. There are two options for this. You can either brush on chalkboard paint onto the rectangle. Or you can use a piece of wood that is about 5 x 7 and spray it with chalkboard paint. I found this cute wood plaque that I sprayed with chalkboard paint and I’ll glue it in place when the stencil is finished
Fill in the stencil with the colored paints. You’ll probably need to do 2-3 coats to cover up the white paint underneath.

Once the paint is dry to the touch, you can carefully pull off the vinyl stencil.
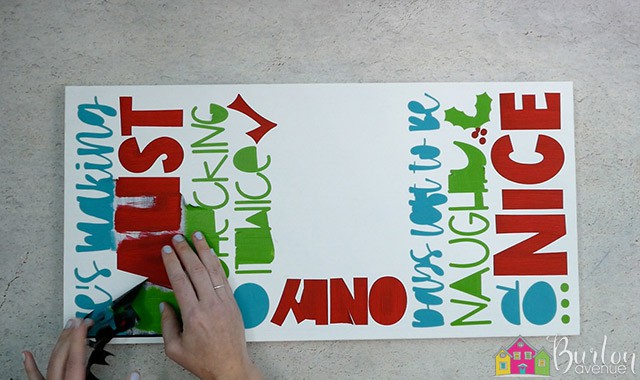
You can use a weeding tool or craft knife to pull out the centers of the letters. If there’s any bleeding, you can touch it up with a small paint brush.
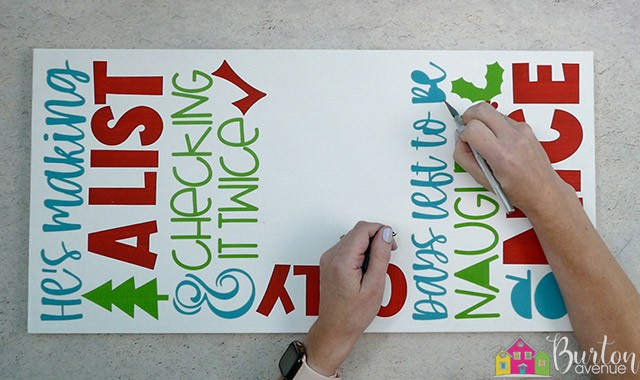
If you painted a piece of wood for the chalkboard, you can glue that into place.

If you want to hang the sign, you can flip it over and attach a sawtooth hanger to the back.
STEP 4: PRIME THE CHALKBOARD
Before you can write on the chalkboard, you need to prime it. First, take your chalk and hold it sideways. Then cover the surface of the board with chalk, rub horizontally, and then vertically.
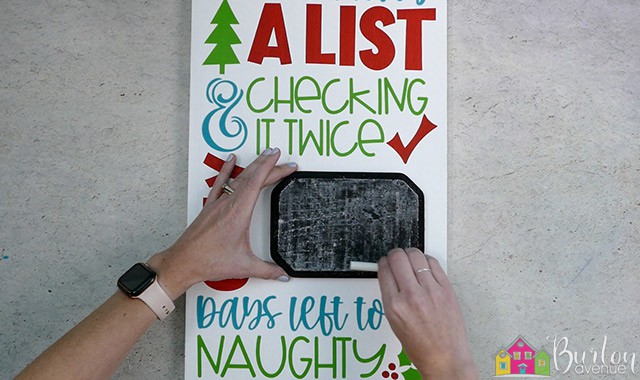
Let it sit for a few minutes and then wipe the chalk off with a paper towel or cloth.
Now, you can start writing on the chalkboard!
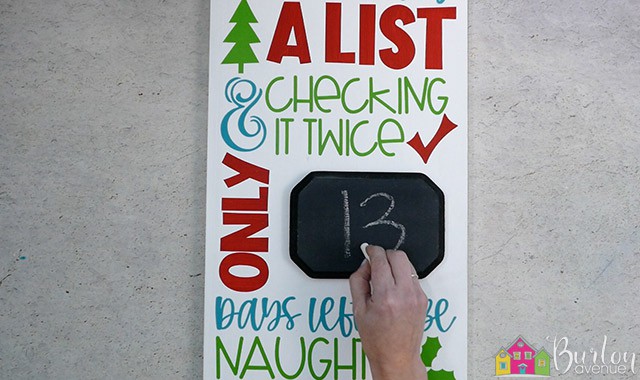
This project is finished! It’s such a cute way to countdown the days until Christmas.
Did you enjoy this post? Help spread the word! Share this post on your favorite Pinterest board. Thanks!
