This week, I’m creating gifts on a budget for Teachers. I took a trip to the dollar store and found a bunch of supplies to make some fun gifts for those special teachers. If you missed yesterday’s project, be sure to check it out.
Today, I’m showing how to make this cute sign.

HERE’S WHAT YOU NEED
- Small Frame with Wood Circle & Block (I found mine the Dollar Tree)
- Vinyl (I used white, dark gray, and lime-tree green)
- Transfer Tape
- Paint & Brush
- White Cardstock
- Glue
- Electronic cutter (cricut explore, silhouette or other cutter)
- Cut File (available for free in my resource library)
HERE’S WHAT YOU DO
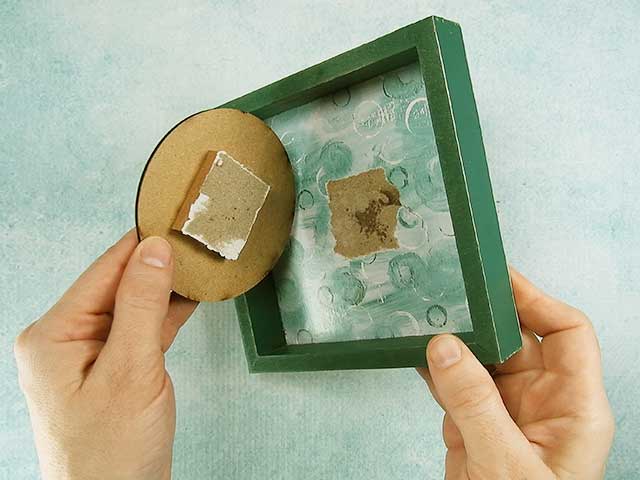
I found this frame from Dollar Tree. I loved the dimension it had and I knew I could turn it into a cute teacher gift. If you can’t find one like this, you can make your own or find something similar. For the inside, just glue a small piece of wood to a wood circle.
Start by painting the frame and the circle. I used a bright turquoise and it took about 3 coats of paint.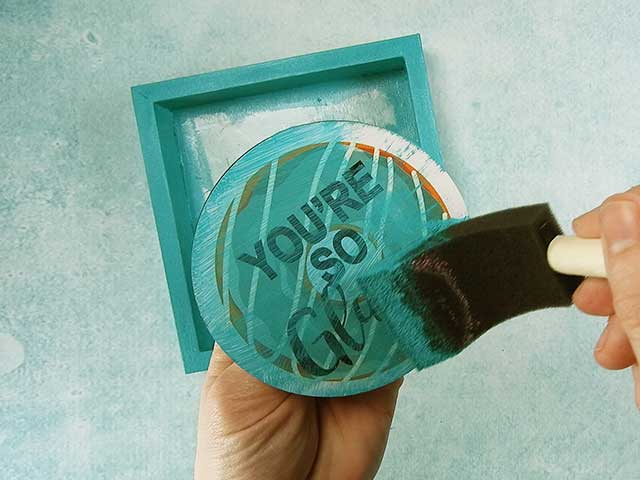
You can also paint the inside of the frame white. I decided just to cover it with white cardstock.
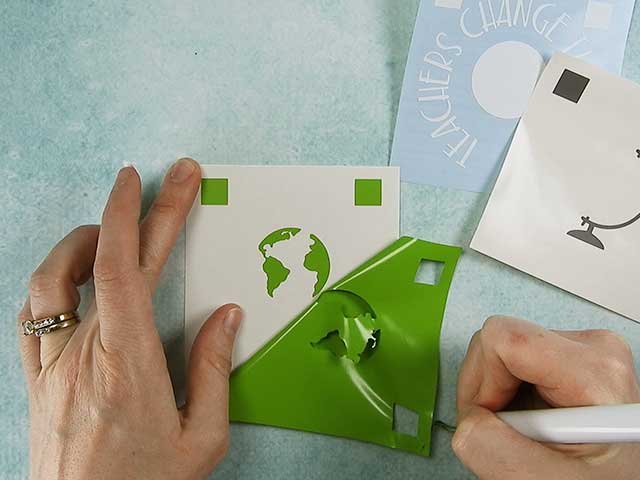
 Open the design in your software program. Measure the circle and size your design accordingly. Add registrations marks to make layering easy. Cut and weed the vinyl.
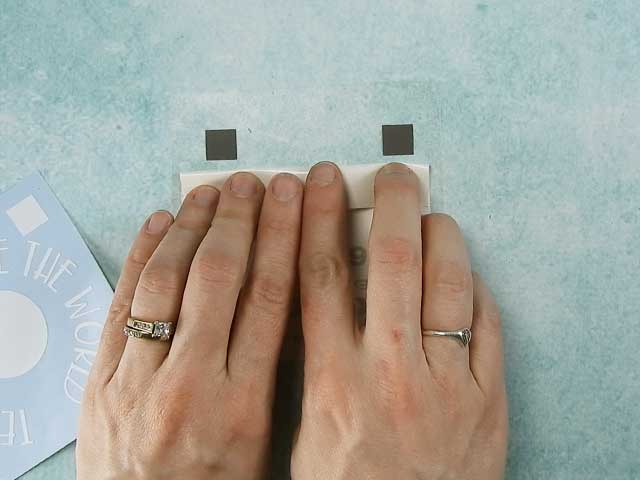
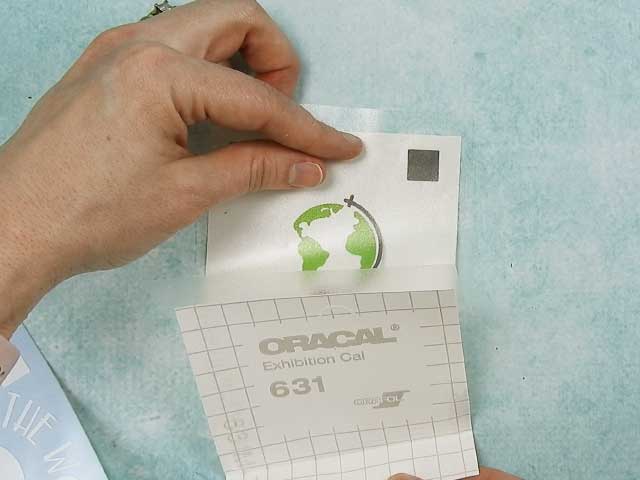
Cut a piece of transfer tape just a little large than your design. Place it over the gray layer. Rub over the design to help the vinyl stick to the transfer tape.
![]()
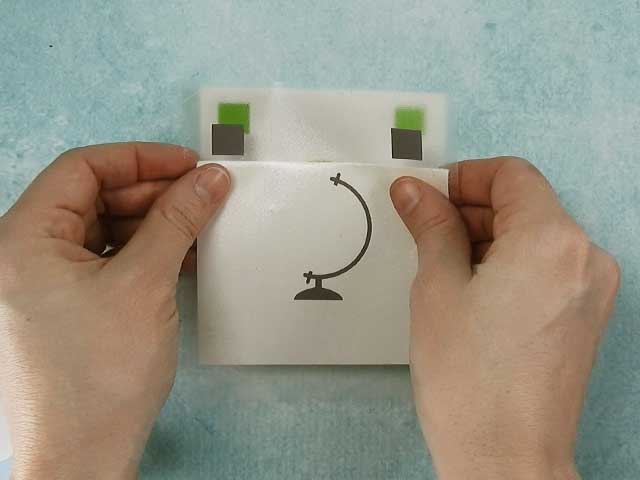
Flip the vinyl over and fold down a small section of the backing, just enough to expose the registration marks.
Place the gray vinyl over the green vinyl and match up the registration marks.
Once the layers are aligned, remove the backing from the gray layer. Then, rub over the transfer tape again.
Now, flip over the vinyl and fold down a small section to expose the registration marks.
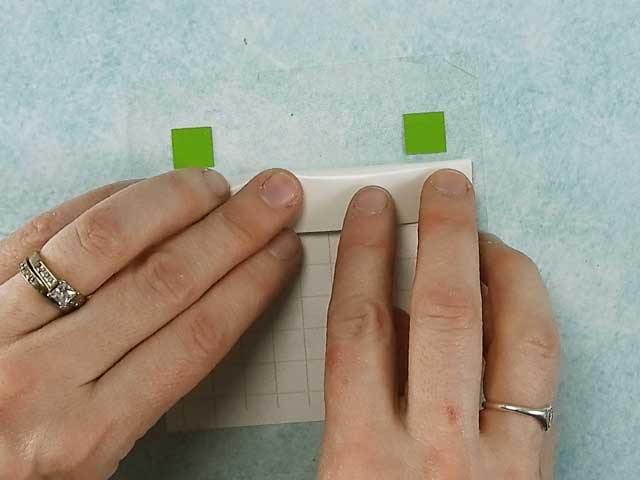
Place the vinyl over the white layer and match up the registration marks.
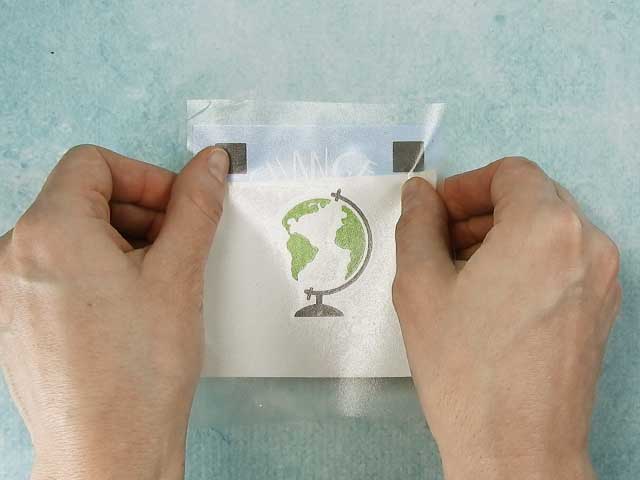
Once the layers are aligned, remove the backing from the gray/green layer. Then, rub over the transfer tape again.

Remove the backing from the white layer and place the design on the circle. Once it’s centered, press into place and pull off the transfer tape.

Glue the circle back into the center of the frame. Now, you’ve got a super cute (super inexpensive) gift to give to a teacher. This is why I LOVE vinyl!

Did you enjoy this post? Help spread the word! Share this post on your favorite Pinterest board. Thanks!

Want to make your own? Get the free cut file for this project in the resource library
THANK YOU for this idea! I made 12 of these adorable gifts for teachers at my school and they LOVED them! They felt so special and thought I worked really hard on them (haha, the gifts were quick & easy!). Love all of your stuff!
Yay! I’m so glad you made them!