This clock-style Christmas countdown sign is such a fun and creative way to track the days until Christmas! It works just like a clock—you simply rotate the hand each day as the holiday gets closer. It’s a festive, eye-catching project that’s easy to make and looks great as part of your Christmas décor. Read on for the full tutorial.
 This post contains affiliate links for your convenience (which means if you make a purchase after clicking a link I will earn a small commission but it won’t cost you a penny more)! Read my full disclosure policy.
HERE’S WHAT YOU NEED
- Round Wood for Sign (Mine measured approx. 12″)
- White Vinyl
- Transfer Tape
- Acrylic Paint & Brushes (I used Tuscan Red)
- Clock Hand
- Washer & Screw
- Drill
- Rope for Hanging
- Bow
- Staple gun
- Weeding Tool
- Scrapper Tool
- Electronic cutter (cricut explore, silhouette or other cutter)
- Cut File (available for free in my resource library)
HERE’S WHAT YOU DO
STEP 1: DOWNLOAD THE FREE SVG FILE
The first thing you’ll need to do is get the free SVG file you’ll use for this project. I keep all the SVG files I use for the projects I make in my SVG Library. These SVG files work with Cricut and Silhouette machines, as well as many others. This library is open to everyone and is free! You can access the library here. Look for the file called It’s Beginning to Look a lot Like Christmas. It will either be listed under the most recent projects/cut files or under the Christmas Category – 25 Days of Craftmas 2020 – Day 2
STEP 2: PREPARE THE VINYL DESIGN
Open the design in your software program. Resize the design to fit on your sign. I sized my design to about 10.8″ wide.
When everything is sized correctly, you can cut the vinyl with your Cricut or Silhouette. Once it has finished cutting, weed away the excess vinyl.

Use a weeding tool to pull out the center of the letters.

Cut a piece of transfer tape a little larger than the design. Place the vinyl on the transfer tape.
![]()
Use an application tool to rub over the design. Then, trim off the excess transfer tape and vinyl backing.

STEP 3: PREPARE THE WOOD PIECES
You’ll need a wooden circle for this project. I used a 12″ wood round I purchased from Lowes. Paint the wooden circle red. I used Tuscan Red for my sign. It will probably take 2-3 coats to get good coverage. Painting the back is optional. I usually just do one quick coat on the back.

STEP 4: APPLY VINYL TO THE WOOD SIGN
Once the sign is completely dry, it’s time to add the vinyl
Flip the design over and then pull off the vinyl backing.
Place the vinyl on the wooden circle. Do your best to center it on the sign. You can use a ruler if you want, but I just kind-of eyed it.

Once it’s in place, use a scraper and rub over the entire design.
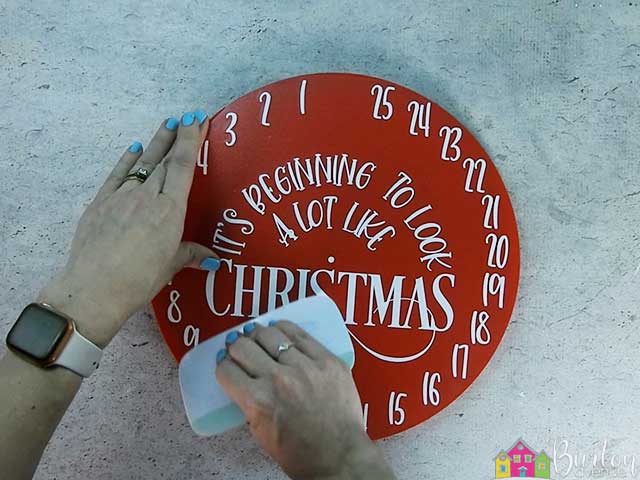
Carefully pull off the transfer tape.
![]()
STEP 5: ADD FINISHING TOUCHES
Drill a small pilot hole in the center of that little dot. That should be the center of your sign.


Place a small washer over the hole you just drilled and thread a small screw through the hole on the clock hand.

Then, screw the clock hand into place.

You want the screw to be tight enough that the hand stays in place as you move it, but loose enough that you can rotate the hand. You can use a screwdriver to make small adjustments.

If you want to hang your sign, you’ll need to add a hanger on the back. To do this, cut a piece of rope about 12″ long. Then, flip the sign over and use a staple gun to attach to rope to the back of the sign.

You can also add a cute Christmas bow.

That’s it! Your sign is finished!

Did you enjoy this post? Help spread the word! Share this post on your favorite Pinterest board. Thanks!

Want to make your own? Get the free cut file for this project in the resource library
Another great project! Thank you again.