 This post contains affiliate links for your convenience (which means if you make a purchase after clicking a link I will earn a small commission but it won’t cost you a penny more)! Read my full disclosure policy.
HERE’S WHAT YOU NEED
-
- St. Patrick’s Day or Green Cardstock
- Clear Transparency Sheet
- Glue
- Thin Twine
- Ribbon
- Glue Dots
- Candy
- Electronic cutter (cricut explore, silhouette or other cutter)
- Cut File – St. Patrick’s Day Milk Carton BA1460 (available for free in my resource library)
HERE’S WHAT YOU DO
STEP 1: DOWNLOAD THE FREE SVG FILE
The first thing you’ll need to do is get the free SVG file you’ll use for this project. I keep all the SVG files I use for the projects I make in my SVG Library. These SVG files work with Cricut and Silhouette machines, as well as many others. This library is open to everyone and is free! You can access the library here. Look for the file called St. Patrick’s Day Milk Carton BA1460. It will be listed under the St. Patrick’s Day category.
STEP 2: MAKE THE MILK CARTON
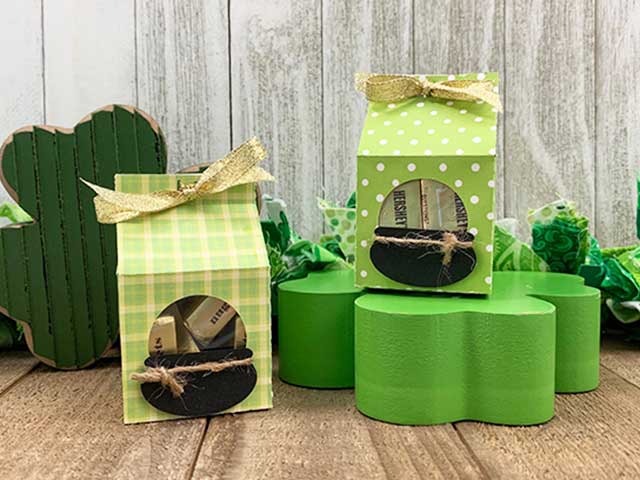
Open the design in your cutting software and resize the design. The bigger you make it, the more candy you’ll be able to fit. The max width you can cut with most cardstocks in 11.5″ You might need to group together to milk carton and the perforation lines, depending on your software program. Once everything is sized correctly, cut out the pieces with your Cricut or Silhouette. I cut the milk carton out of some green printed cardstock, the pot out of black, and the square piece out of a transparency sheet.
Once the cardstock is finished cutting, remove it from the cutting mat. It’s best to flip over the mat and gently bend it over until the cardstock releases. This way, the cardstock shouldn’t get bent.

To make the milk carton, you’ll want to fold along the perforation lines. You’ll want to fold the lines along the sides and the bottom back.
Fold the angled lines and the lines between them forward.

Flip the cardstock over and add some glue around the edges of the circle.

Place the clear square over the center of the circle. Make sure it doesn’t go over any of the perforation lines.
![]()
Now, add some glue along the side tab.

Fold the tab back and then fold the box in half to glue the tab in place.

Once that’s dry, it’s time to glue the bottom. Add some glue to each to tab and press them all together. Fold the smaller tabs in first, followed by the larger tabs.

Place the box right-side up and place something heavy inside to keep the tabs in place.

STEP 3: ADD CANDY
Fill the box up with some gold wrapped candy.

Then, press the sides in like on a milk carton.

Once it’s folded closed, the cutouts along the top should all line up.

STEP 4: ADD FINISHING TOUCHES
Thread some ribbon through the holes and tie in a bow.

Trim off any excess ribbon on the ends.

You can add some detail to the little pot by tying on some thin twine.

Roll up a couple of glue dots and put them on the back of the pot.

Press the pot on to the bottom of the milk carton.

And that’s all there is to it! This cute little treat box is ready to go!

Did you enjoy this post? Help spread the word! Share this post on your favorite Pinterest board. Thanks!

