
HERE’S WHAT YOU NEED
-
- Oven Mitt
- Heat Transfer Vinyl
- Weeding Tool
- Iron/Heat Press/Easy Press
- Baking Mix
- Spatula
- Ribbon
- Electronic cutter (cricut explore, silhouette or other cutter)
- Cut File – Christmas Baking Designs BA1828 (available for free in my resource library)
HERE’S WHAT YOU DO
STEP 1: DOWNLOAD THE FREE SVG FILE
The first thing you’ll need to do is get the free SVG file you’ll use for this project. I keep all the SVG files I use for the projects I make in my SVG Library. These SVG files work with Cricut and Silhouette machines, as well as many others. This library is open to everyone and is free! You can access the library here. Look for the file called Christmas Baking Designs BA1828. It will be listed under the Craftmas 2021 Category-Day 12.
STEP 2: CUT AND WEED VINYL DESIGN
Open the design in your software program. There are 4 different designs to pick from. Resize the design, so it fits on your oven mitt. I signed mine to about 5.5″ wide.

Since we are using heat transfer vinyl, you’ll need to mirror the design before you send it to your machine to cut.
When everything is ready to cut, load the heat transfer vinyl onto your cutting mat with the shiny side facing down. Then, cut out the design. When everything is finished cutting, remove the vinyl from your cutting mat and trim off any unused vinyl.
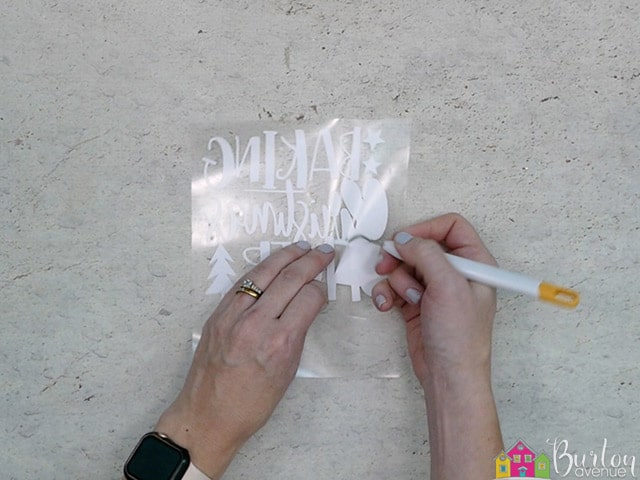
Weed away the excess vinyl from around the design. Start in the corner and use a weeding tool to separate the vinyl from the clear carrier sheet. Keep pulling up on the vinyl until you’ve removed all the excess from around your design.

Use the weeding tool to help remove the excess vinyl from inside the letters and shapes.
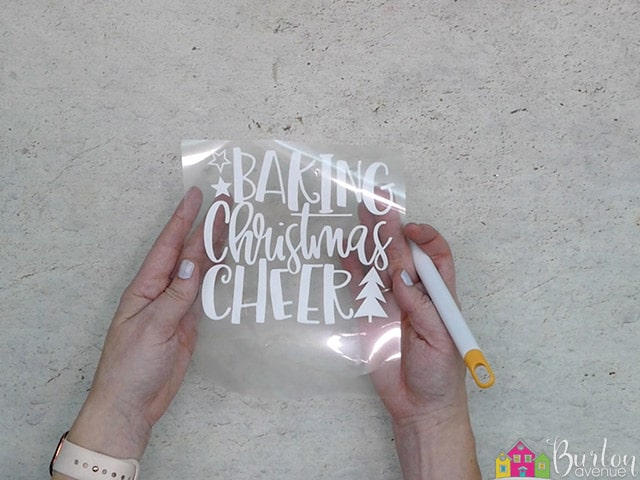
Once you’ve removed all the excess vinyl, you can flip over your design to see what it will look like.
STEP 3: APPLY DESIGN TO OVEN MITT
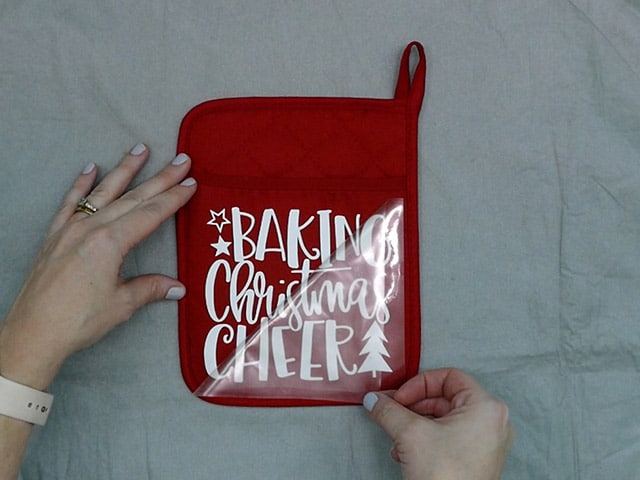
Grab the vinyl design and place it on the oven mitt. Adjust the design so it’s straight and centered.
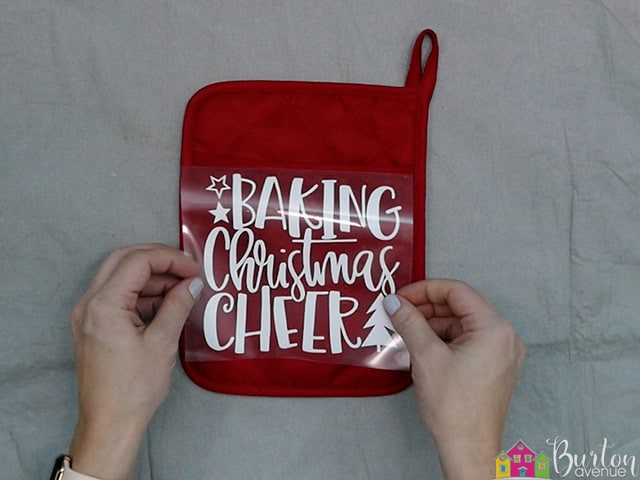
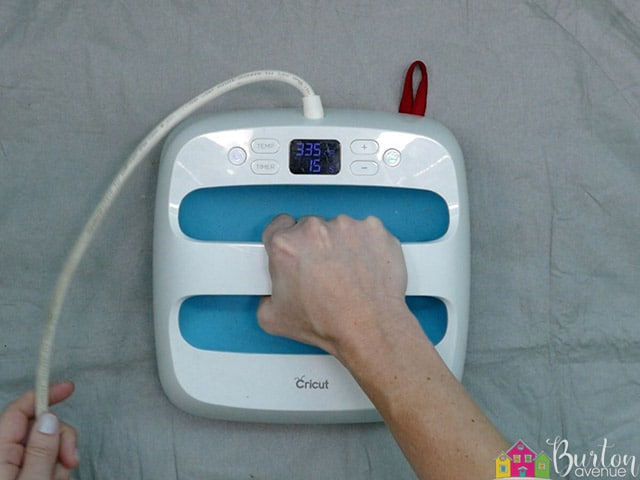
Next, we need to add heat and pressure. You can use an iron, heat press, or Easy Press. If you’re using an iron, turn it to the cotton setting and make sure the steam is turned off. If you’re using a heat press or easy press, set the temp according to the manufacturer’s instructions. Use your heat source to apply pressure to the design. You’ll want to press the design for about 15 seconds.
 Once you’ve applied even pressure to the entire design, you can carefully remove the carrier sheet.
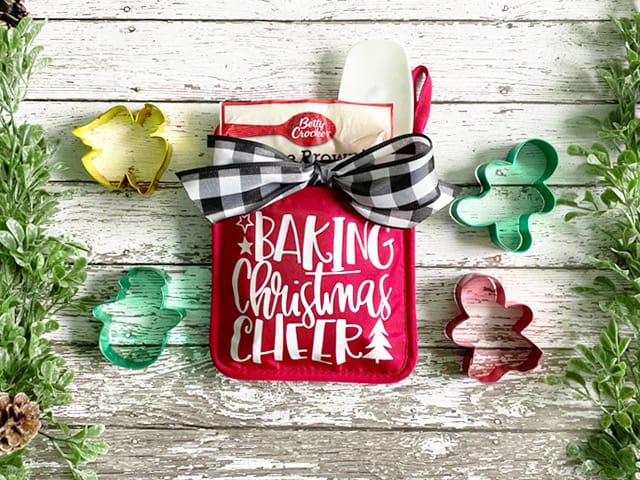
STEP 4: ASSEMBLE THE GIFT
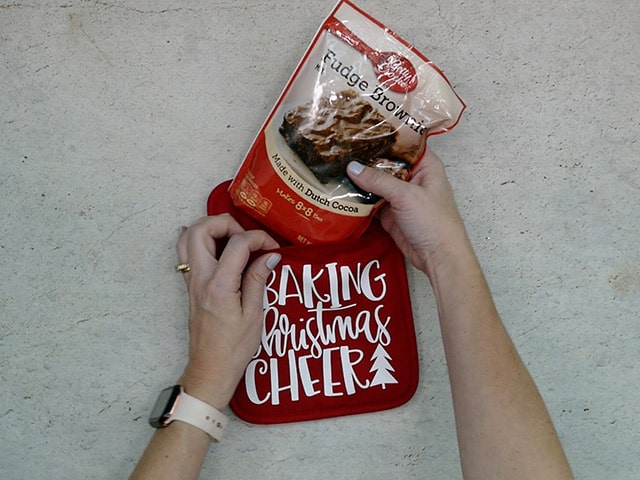
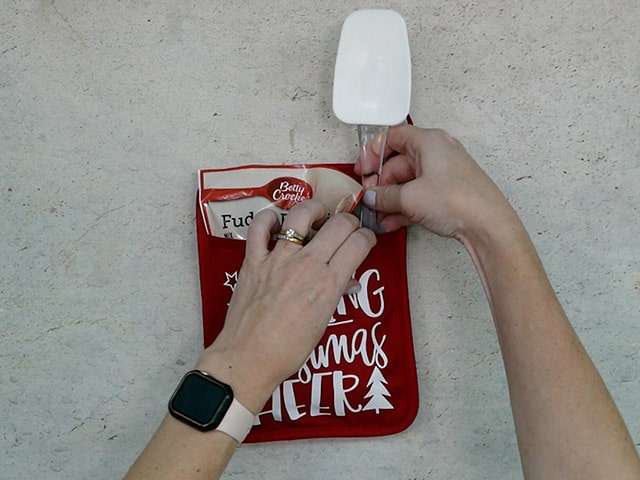
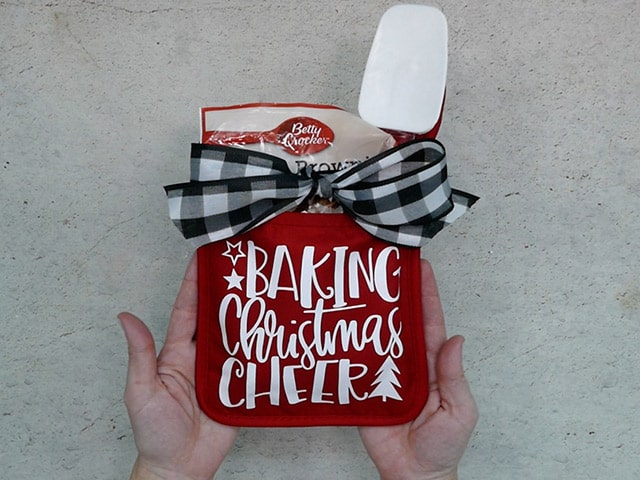
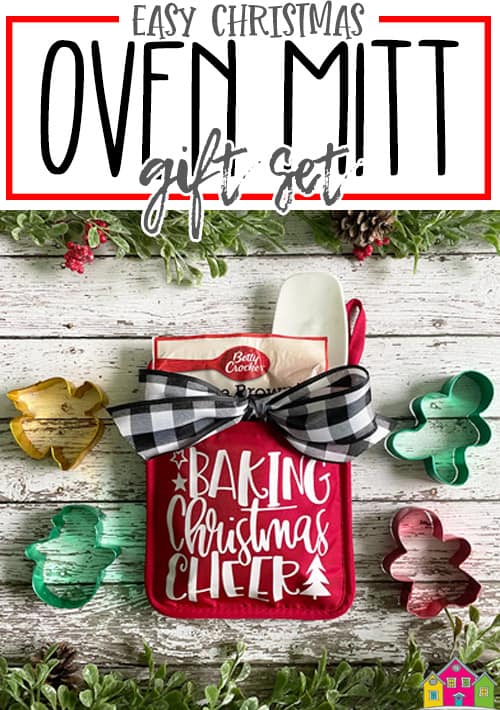
All that’s left is to assemble to gift. Just place a baking mix and spatula inside the oven mitt.
Tie a pretty bow around the oven mitt.
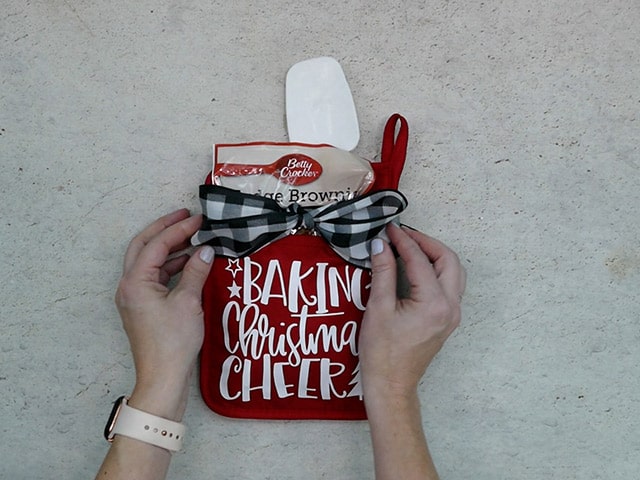
And that’s it, this gift is ready to give!
Did you enjoy this post? Help spread the word! Share this post on your favorite Pinterest board. Thanks!
Want to make your own? Get the free cut file for this project in the resource library