
HERE’S WHAT YOU NEED
- Cardstock (black, white, red, and flesh)
- Liquid Glue
- Hot Glue Gun and Glue
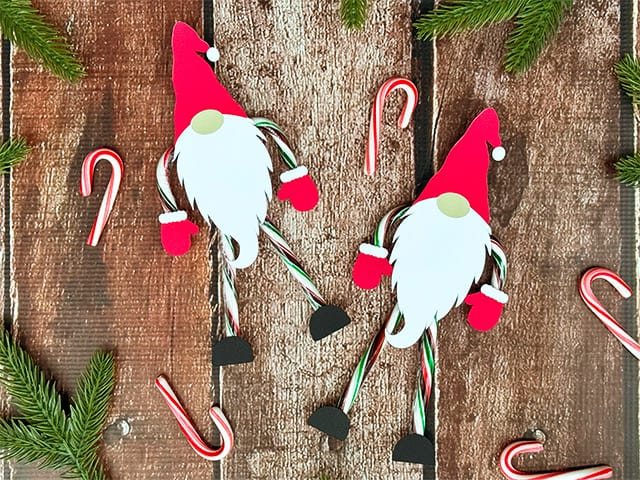
- Candy Canes
- Electronic cutter (cricut explore or maker, silhouette or other cutter)
- Cut File – Gnome Candy Cane Favor BA2108 (click here to get the SVG file for free from my free SVG Library)
HERE’S WHAT YOU DO
STEP 1: DOWNLOAD THE FREE SVG FILE
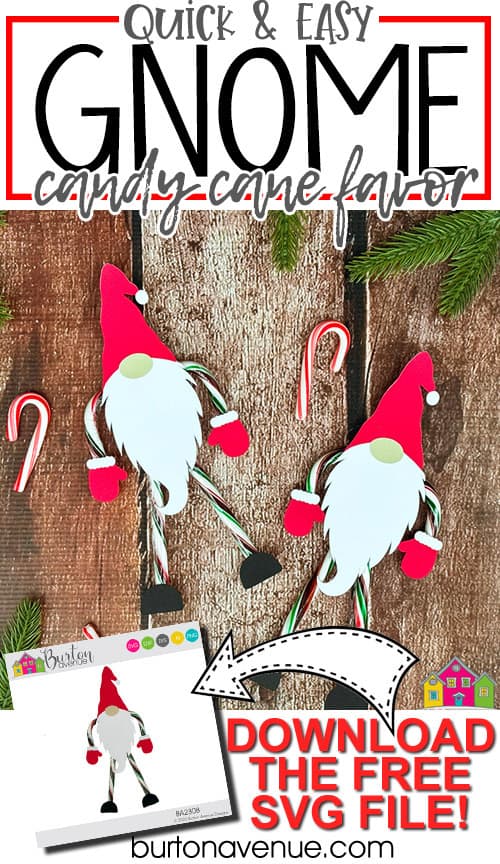
The first thing you’ll need to do is get the free SVG file you’ll use for this project. I keep all the SVG files I use for the projects I make in my SVG Library. These SVG files work with Cricut and Silhouette machines, as well as many others. This library is open to everyone and is free! You can access the library here. Look for the file called Gnome Candy Cane Favor BA2108. It will be listed under the Craftmas 2023 Category-Day 8.
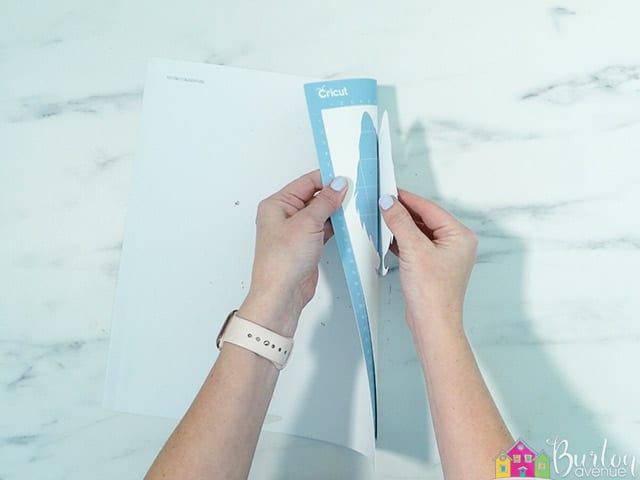
STEP 2: CUT THE CARDSTOCK PIECES
Open the design in your software program. Keep everything grouped together and resize the design to 6″ high. This will fit standard-size candy canes. Once everything is resized, you can cut the cardstock pieces.
Once the cardstock is finished cutting, remove it from the cutting mat. Slightly bend the mat to remove the cardstock pieces.
STEP 3: ASSEMBLE THE GNOME FAVOR
Start by gluing the red hat onto the white background piece.
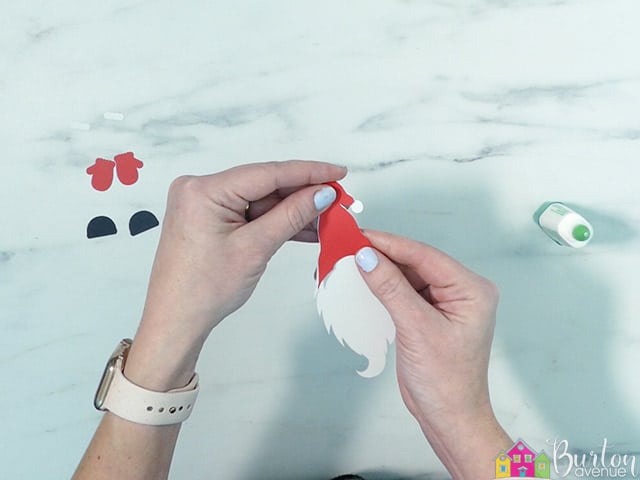
Next glue on the nose. It should fit into the half-oval cutout on the hat.
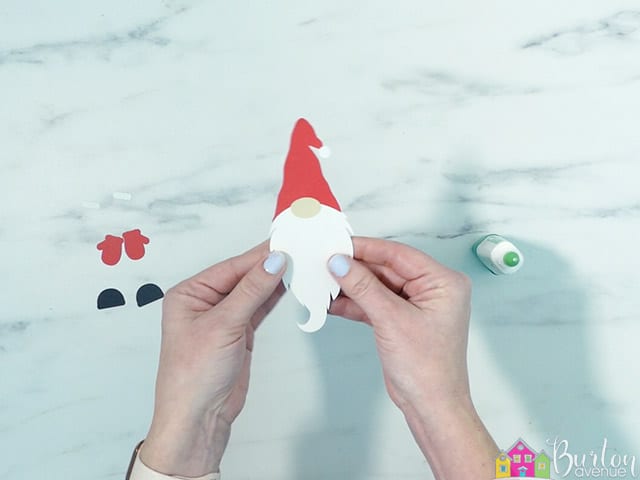
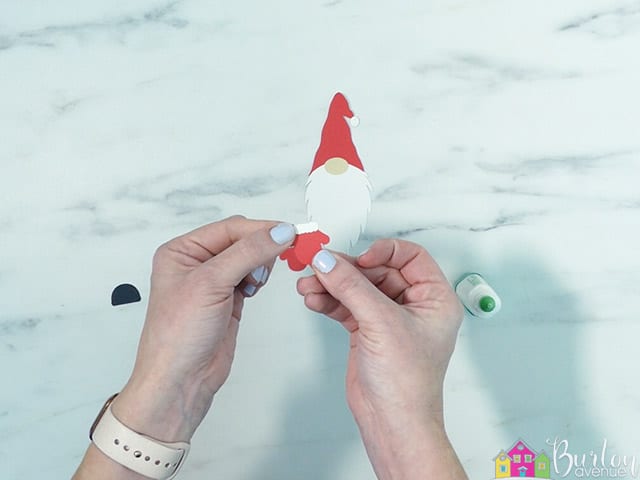
Glue a white cuff onto each of the mittens.
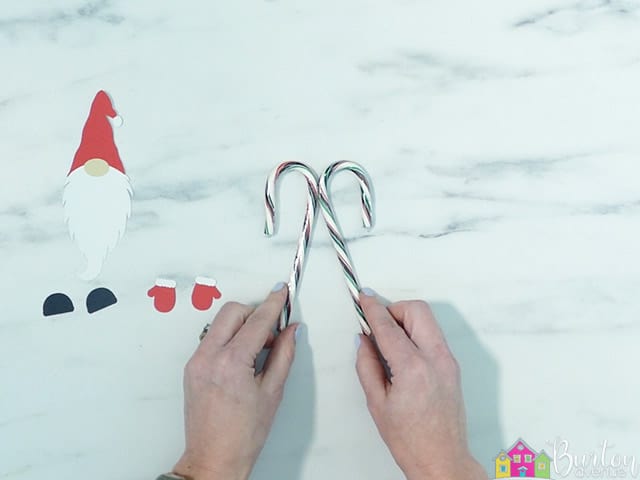
Place the candy canes back to back.
Add some glue onto one of the candy canes where they touch.
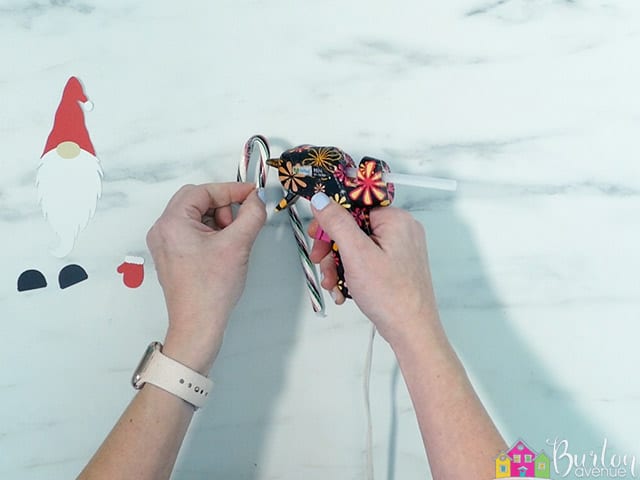
Push the two candy canes together.

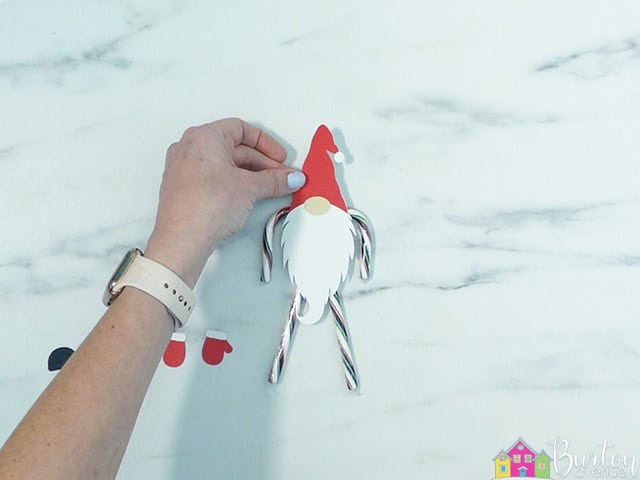
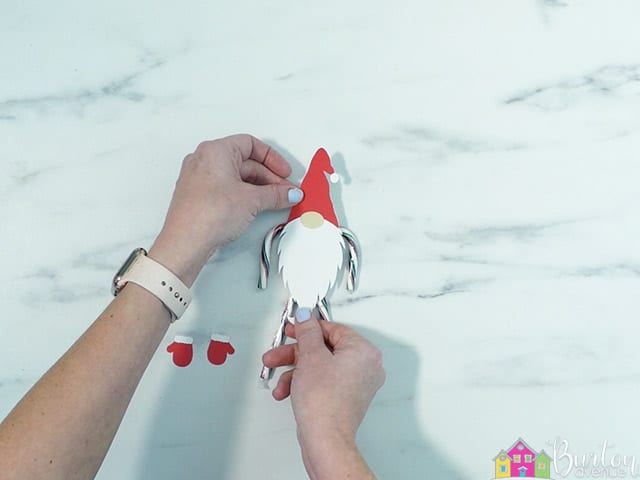
Place the gnome over the candy canes. Pay attention to where the gnome covers the candy cane so you’ll know where to put the glue.
Add hot glue to both candy canes.

Press the gnome head into place.
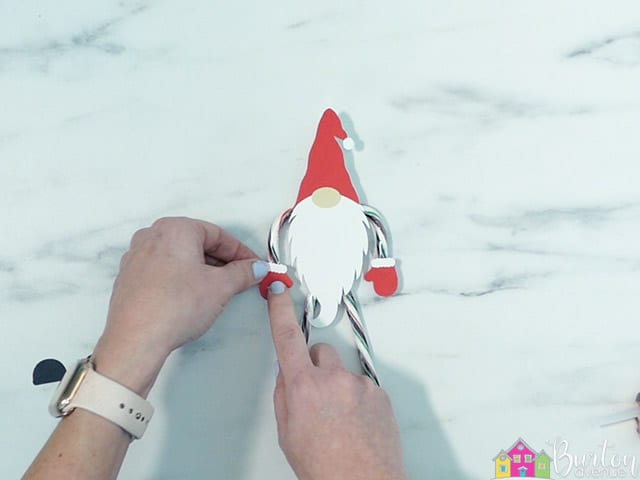
Glue on both mittens. Make sure both thumbs of the mittens are facing in.
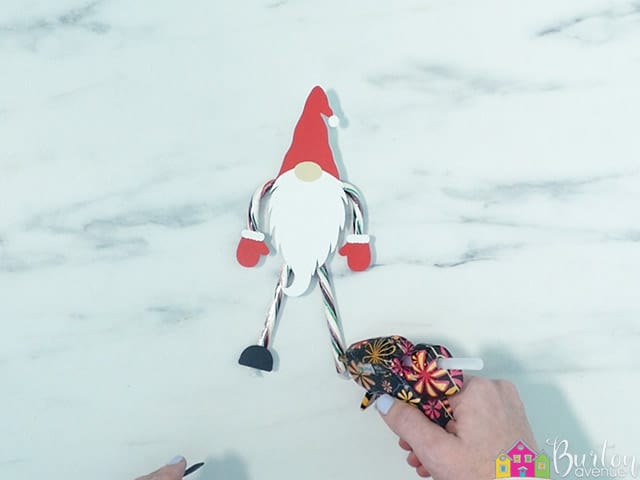
Finally, glue the shoes onto the bottoms of the candy canes. The shoes are symmetrical so it doesn’t matter which side you glue them on.
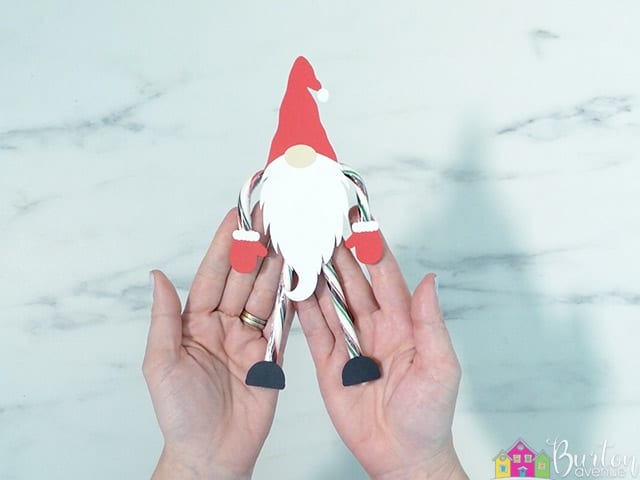
And that’s all there is to it. This project is finished!
Did you enjoy this post? Help spread the word! Share this post on your favorite Pinterest board. Thanks!
Want to make your own? Get the free cut file for this project in the resource library