
 This post contains affiliate links for your convenience (which means if you make a purchase after clicking a link I will earn a small commission but it won’t cost you a penny more)! Read my full disclosure policy.
HERE’S WHAT YOU NEED
- Pint Size Mason Jars
- Twine, Ribbon, or Raffia
- Vinyl for Stencil (Color Doesn’t Matter)
- Glitter Adhesive Vinyl (I used Emerald, Brick Red, and Gold)
- Application Tool
- Transfer Tape
- Chalked Spray Paint
- Electronic cutter (cricut explore, silhouette or other cutter)
- Cut File (available for free in my resource library)
HERE’S WHAT YOU DO
STEP 1: DOWNLOAD THE FREE SVG FILE
The first thing you’ll need to do is get the free SVG file you’ll use for this project. I keep all the SVG files I use for the projects I make in my SVG Library. These SVG files work with Cricut and Silhouette machines, as well as many others. This library is open to everyone and is free! You can access the library here. Look for the file called Christmas Silhouettes with Outline. It will either be under the most recent projects/cut files or under the Christmas category-25 Days of Craftmas 2019 – Day 18.
STEP 2: PREPARE THE VINYL DESIGN
Open the design in your software program and size it to fit on your mason jar. If you’re using pint-size mason jars, you can make the height 3″ and keep the width proportional.
When everything is sized correctly, you can cut the vinyl with your Cricut or Silhouette. Cut each color separately. The light gray layer will be your stencil, so you can use regular vinyl. You’ll use glitter adhesive vinyl for the outline of the star, tree, and snowflake.
Once it has finished cutting, weed away the excess vinyl. I just love the finishing touch the glitter adhesive vinyl gives to this project!

Cut a piece of transfer tape a little larger than the design and place it over the vinyl designs.
![]()
Rub over the top of the designs with a scraper.

Then, trim off the excess transfer tape and cut apart the individual designs.

Rub over the design a few times with a scraper or application tool (you could even use a credit card). Then, flip the design over and pull off the vinyl backing.

STEP 3: STENCIL THE MASON JAR
Center the design over the mason jar and press into place.

Rub over the design with your fingers to help it stick to the mason jar.

Then, pull off the transfer tape.
![]()
Paint the mason jar with chalk paint. There are two reasons you should use a chalked spray paint. First, you need a smooth finish to put the foil vinyl on. You won’t get that if you use a brush. Second, it stays on the jar when you pull off the stencil I tried using regular spray paint and even frosted glass spray paint and they both peeled off when I took off the stencils. You still need to be careful when handling the jars, because this paint can scrape off.

After the paint has completely dried (I think I waited an hour or so), carefully pull off the stencil. Be super careful not to scrape any of the paint off.

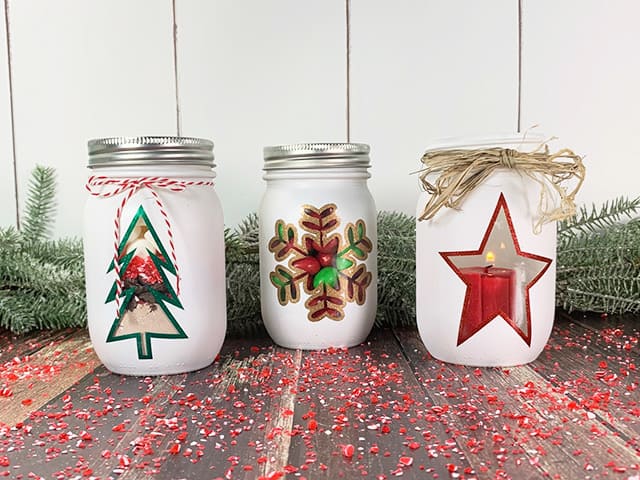
This last step is what really makes these mason jars pop, The glitter adhesive vinyl is so pretty and is just perfect for Christmas!
Remove the vinyl backing and place the design over the mason jar. Rub over the design and then peel off the vinyl backing.
Position the design over the mason jar.

Rub into place with your thumbs.

Then, pull off the transfer tape.
![]()
That’s it! Now you just need to fill these mason jars up. They are so cute and are great for gift giving during the holiday season!
Did you enjoy this post? Help spread the word! Share this post on your favorite Pinterest board. Thanks!

