HERE’S WHAT YOU NEED
-
- Wood for Pumpkin – 1 x 8″ pine and 1 x 4″ pine
- 7/8″ wood dowel
- Adhesive Vinyl (White)
- Paint & Brushes
- Sandpaper
- Wood Glue
- Twine
- Drill & Small Bit
- Burlap Leaves
- Wired Jute Cord
- Hot Glue Gun & Glue
- Electronic cutter (cricut explore, silhouette or other cutter)
- Cut File – Fall Pumpkin Signs BA1701 (available for free in my resource library)
HERE’S WHAT YOU DO
STEP 1: DOWNLOAD THE FREE SVG FILE
The first thing you’ll need to do is get the free SVG file you’ll use for this project. I keep all the SVG files I use for the projects I make in my SVG Library. These SVG files work with Cricut and Silhouette machines, as well as many others. This library is open to everyone and is free! You can access the library here. Look for the file called Fall Pumpkin Signs BA1701. It will be listed under the Fall category.
STEP 2: CUT AND WEED VINYL DESIGN
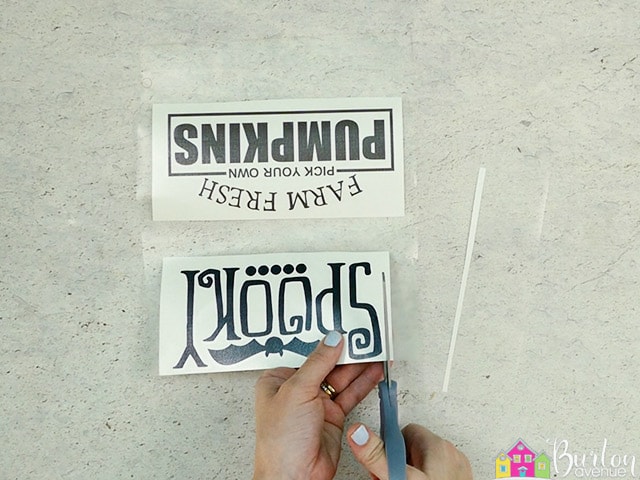
Open the design in your software program and resize the designs so they will fit on your wood sign. The dimensions of my wood for the sign are about 8″ x 3.5″. I made the spooky design about 6.5″ wide and the pumpkin design about 7.25″ wide. Be sure to check the height and make sure it will fit on your sign. Once you’ve resized the design, you can cut it with your machine. I used Oracal 651 in black and chocolate for this project
When everything is finished cutting, remove the vinyl from your cutting mat and trim off any unused vinyl.
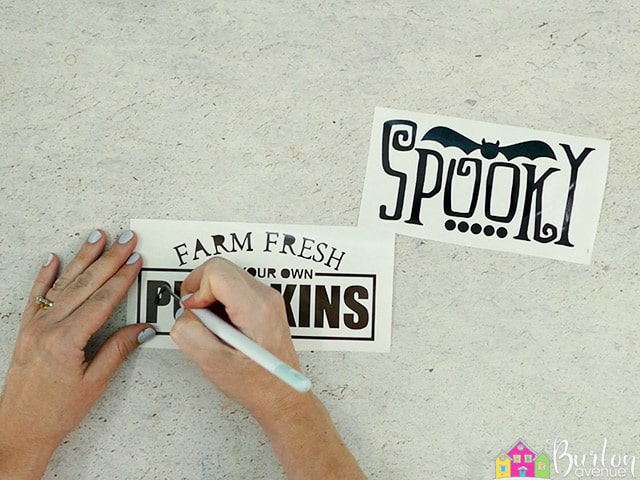
Weed away the excess vinyl from around the design.
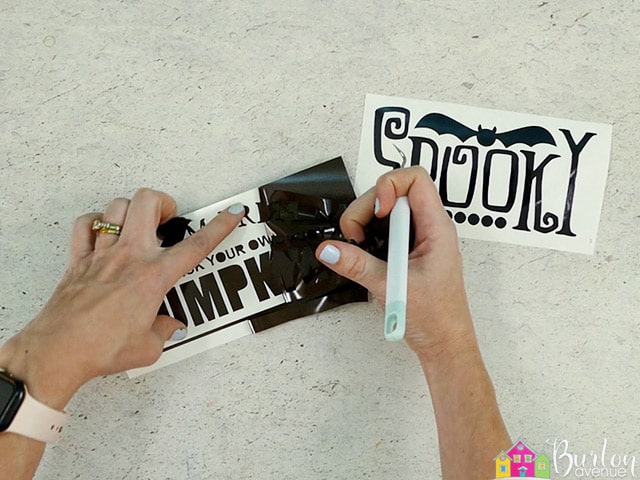
Use the weeding tool to help remove the excess vinyl from inside the letters.
Cut a piece of transfer tape and place it sticky side up on your surface. Then place the vinyl on top of the transfer tape and smooth it down.
![]()
Rub over the designs firmly with your scraper tool.
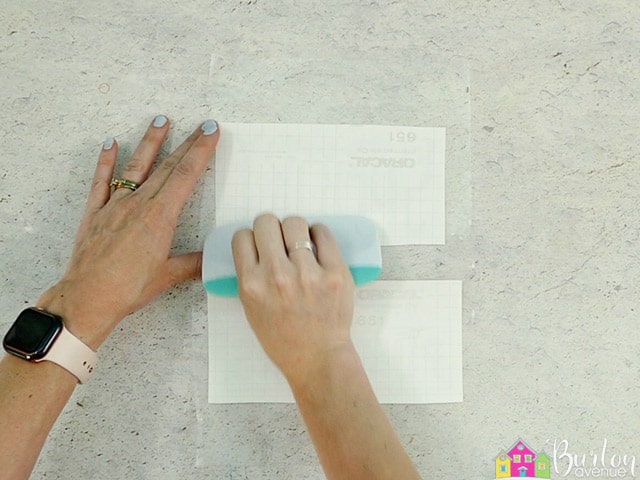
Then, trim off the excess transfer tape and vinyl backing and cut apart the two designs.
Now that the vinyl is ready to go, let’s work on the pumpkins.
STEP 3: MAKE THE WOOD PUMPKINS
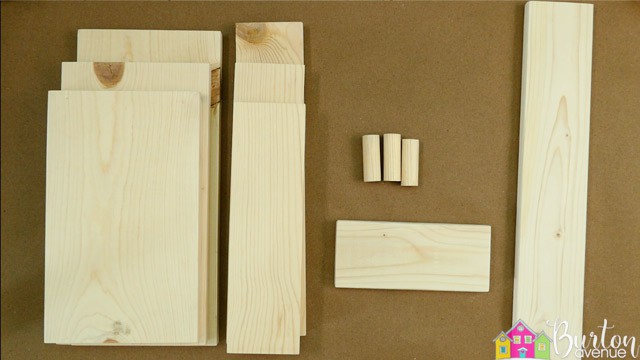
For the pumpkins, you’ll need to cut a 16″, 14″, & 12″ piece from a 1″ x 8″. You’ll also need a 16″, 14″, & 12″ piece cut from a 1″ x 4″.
For the stems, you’ll need 3 – 3″ pieces cut from a 7/8″ wood dowel.
You’ll need an 8″ piece cut from a 1″ x 4″ for the sign
You’ll need a 21″ piece, also cut from 1″ x 4″ for the stand.
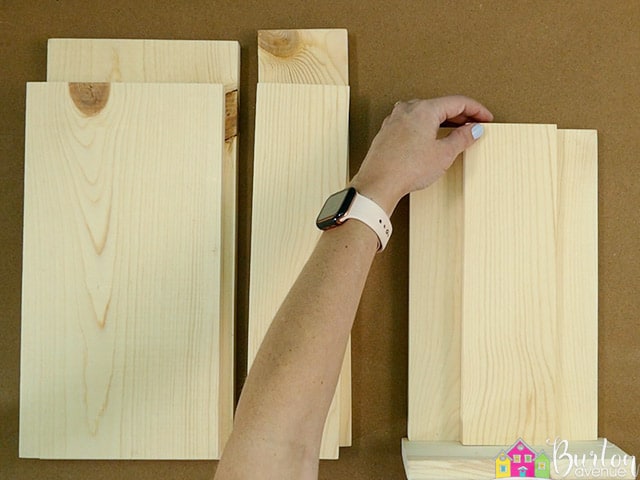
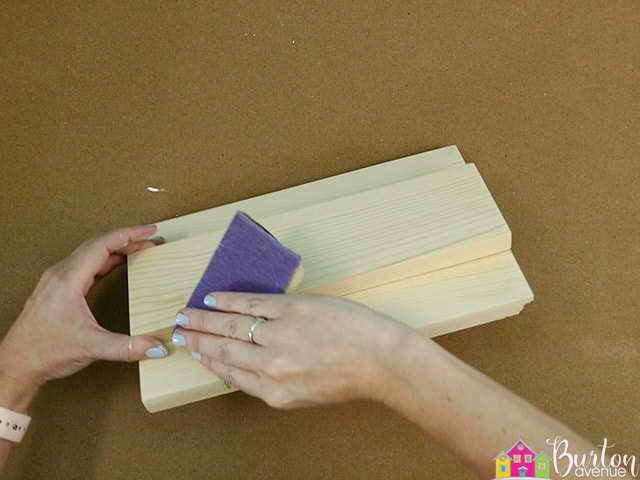
Start by adding some glue on the back of the 12″ piece that was cut from a 1″ x 4″. Place that over the center of the larger 12″ piece of wood.
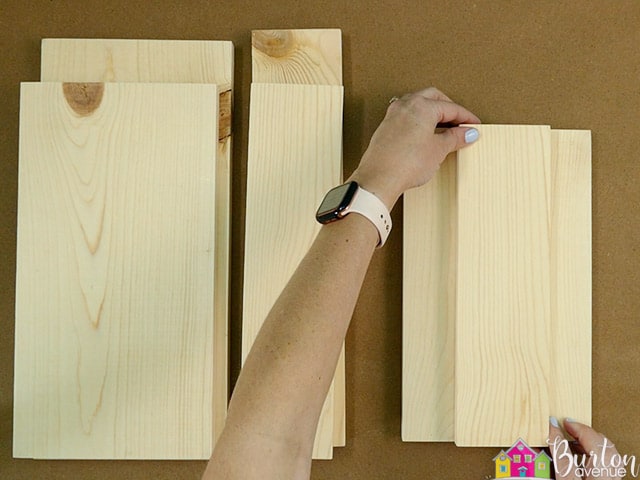
Make sure the bottom and top edges are lined up. Repeat these steps with the 14″ pieces and the 16″ pieces. Set those aside until the glue is dry.
Next, grab the 8″ piece of wood. Drill some small holes in the upper left-hand and right-hand corners, about 1/2″ from the edges.
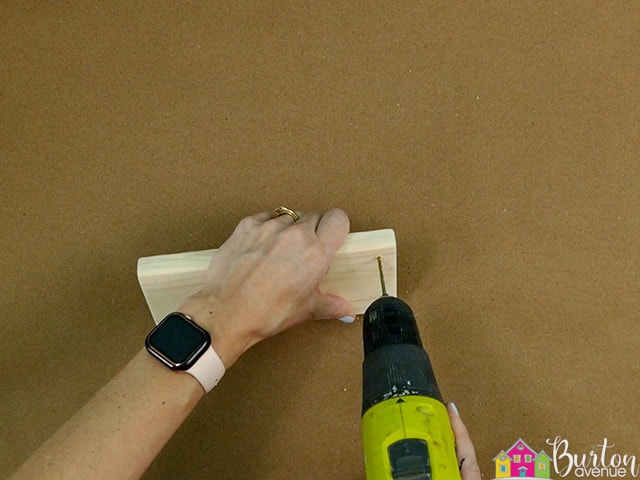
Then, sand the entire piece of wood so it’s nice and smooth. Now, you can paint it all white. You’ll probably need to do 2-3 coats and you’ll want to do the front, back, and all the sides. If you covered the holes with paint, use a nail or screwer to clean out the hole. Allow the white paint plenty of time to dry.
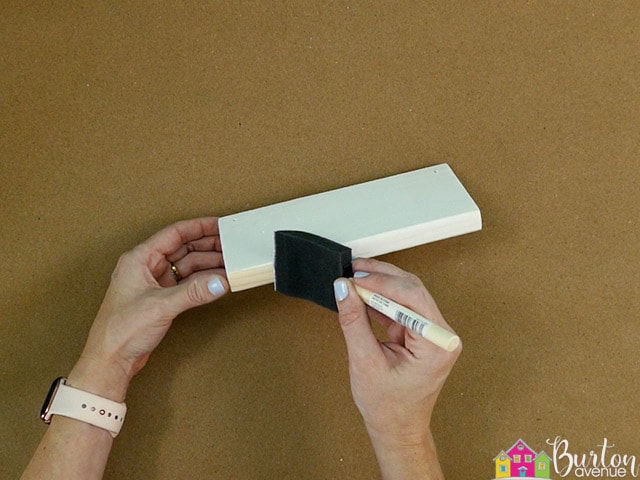
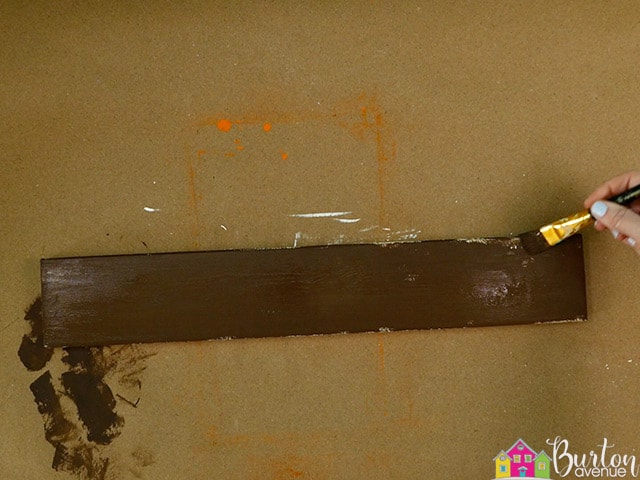
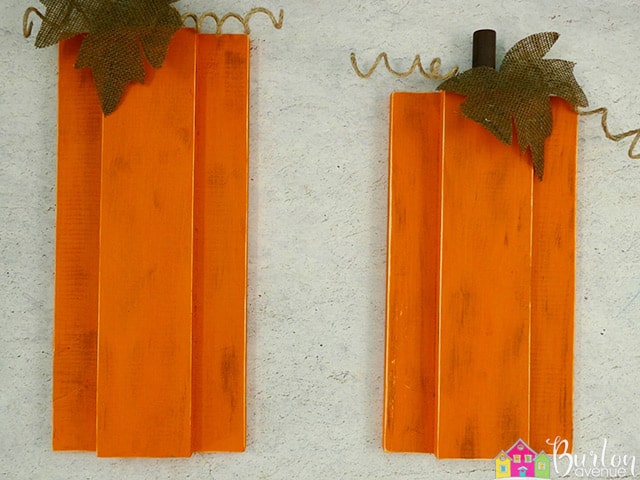
Grab one of the pumpkins and sand it down until it’s smooth.
Paint the pumpkin orange. Once again, you’ll probably need to do 2-3 coats on the front and sides. Painting the back is optional, but I like to do just one quick coat to make it look nice and finished.
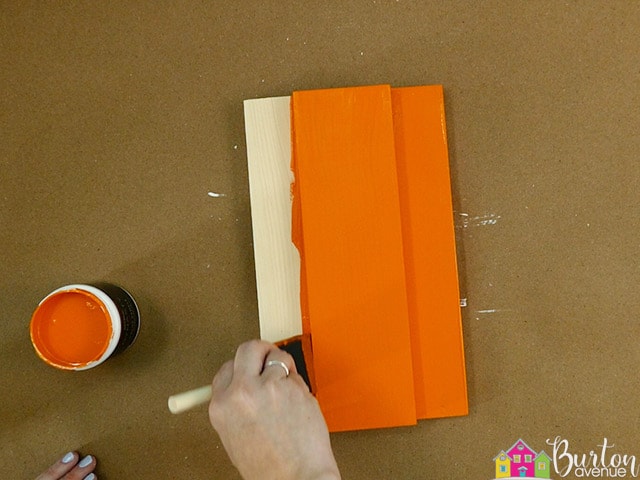
Once the orange paint is dry, we’re going to distress the pumpkin with some brown paint. To do this, you’ll want to put a little paint on your brush and then wipe most of it off.
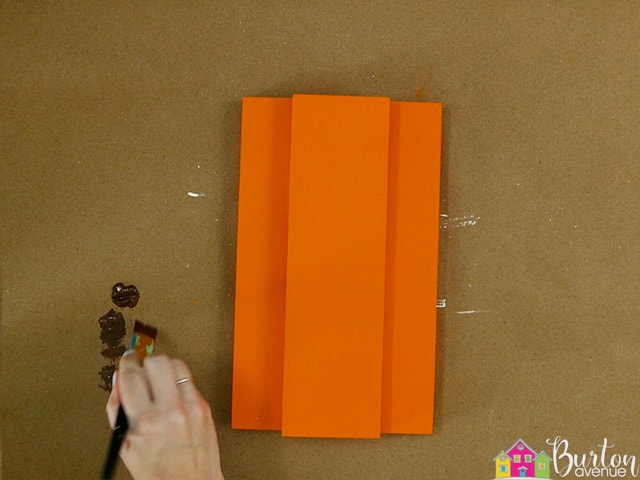
Now, do quick light up and down strokes all over the pumpkin. There shouldn’t be much paint left on your brush, just enough to make some light steaks with the paint.
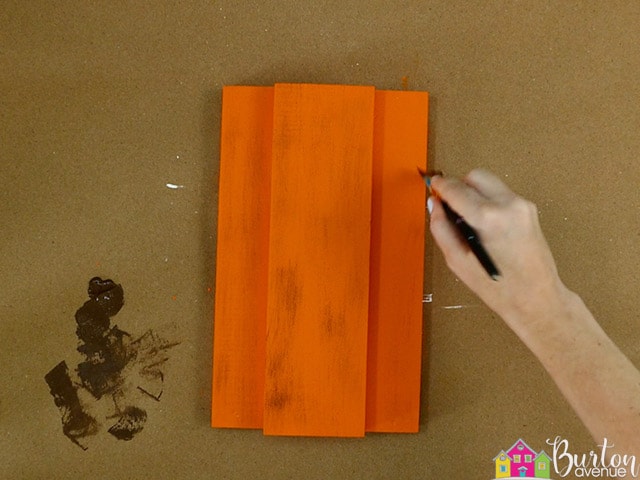
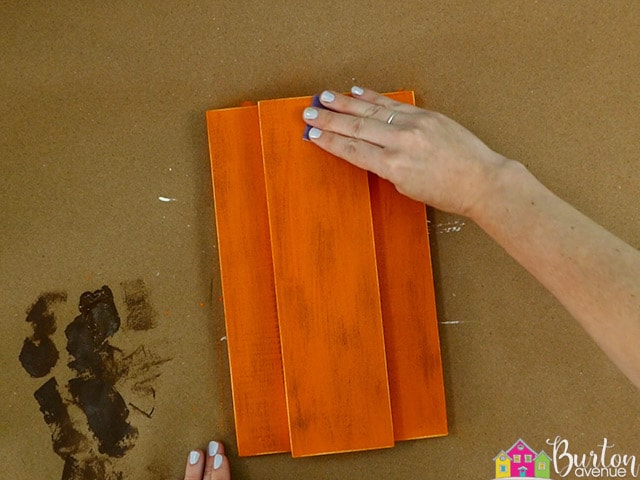
Once you’re happy with how that looks, you can grab some sandpaper and sand the paint off the edges of the pumpkin.
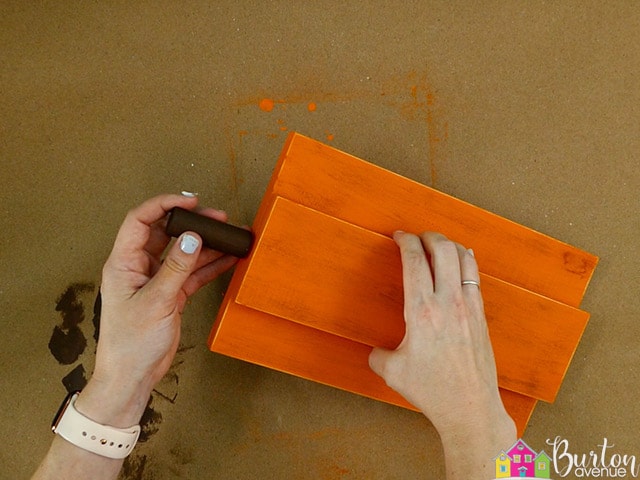
You can also use that same brown paint to paint the stem of the pumpkin. Once that’s dry, you can glue the stem into place.
Paint the other two pumpkins using this technique.
You can also paint the stand for the sign the same dark brown.
STEP 4: ADD EMBELLISHMENTS TO PUMPKINS
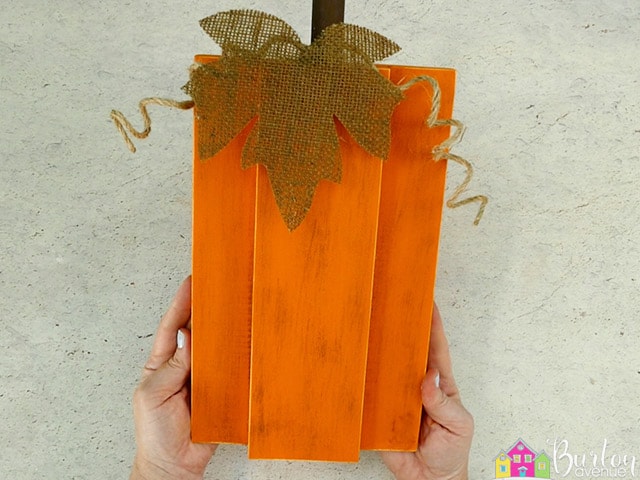
Next, we’re going to dress up the top of the pumpkins. I used some burlap leaves I found from Dollar tree.
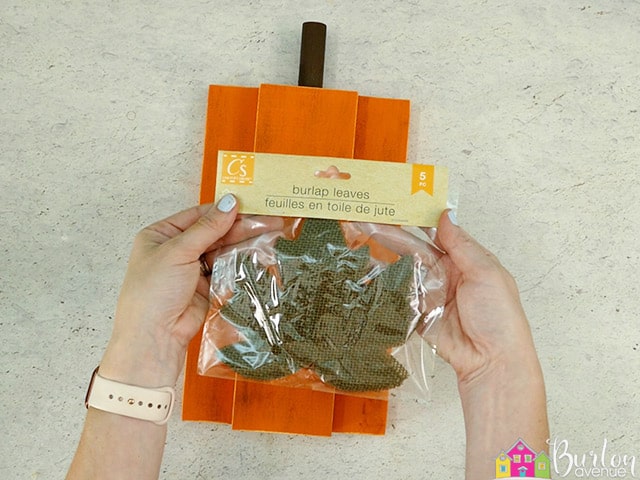
They have a wire stem that you can just twist around the stem of the pumpkin. Then, just add a dab of hot glue to keep it in place.
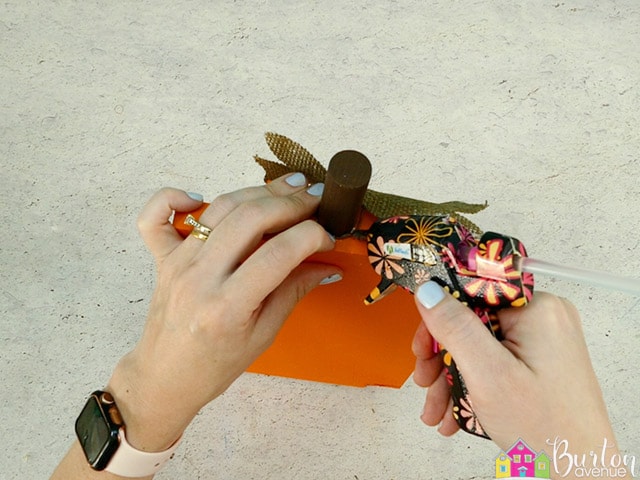 I also used the wired jute cord to make some vines.
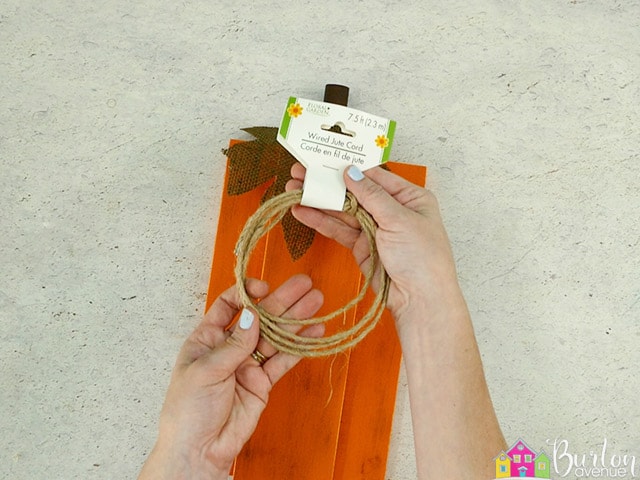
Cut about a 30″ piece and then use hot glue to secure the ends from unraveling.
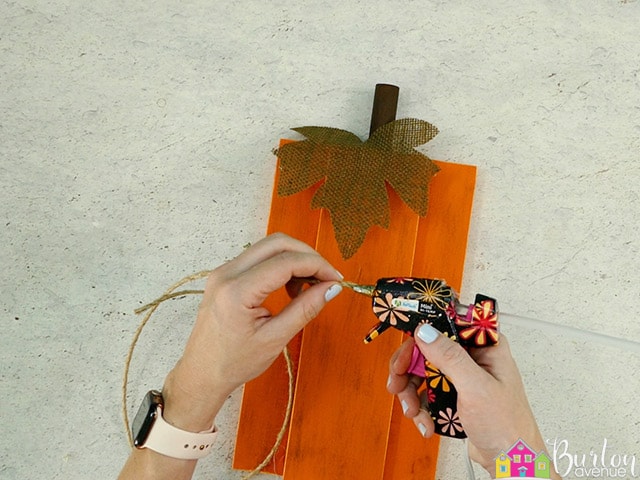
Find the center and wrap it around the pumpkin. Use a little hot glue to hold it in place

Twist it a couple of times to keep it tight around the stem.
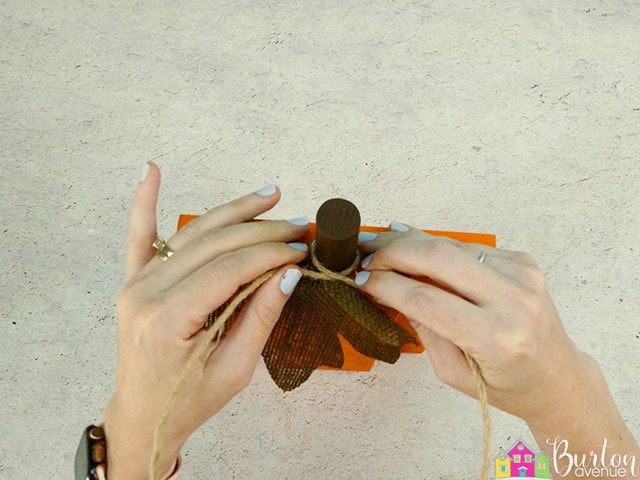
Wrap the cord around your finger to create a cute curly q.
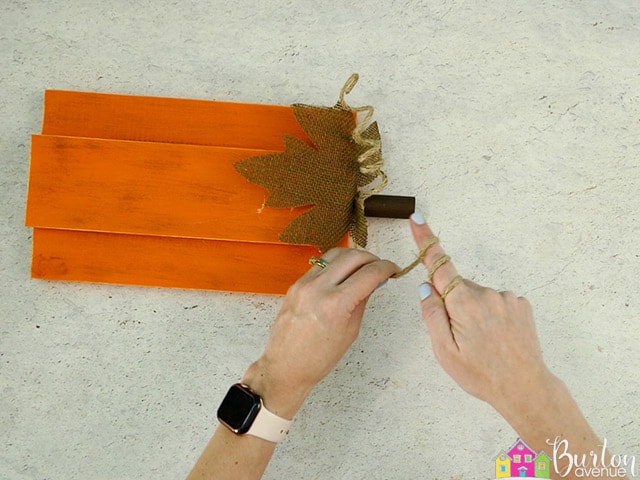
Then, adjust everything so it looks good, and then repeat with the other pumpkins.
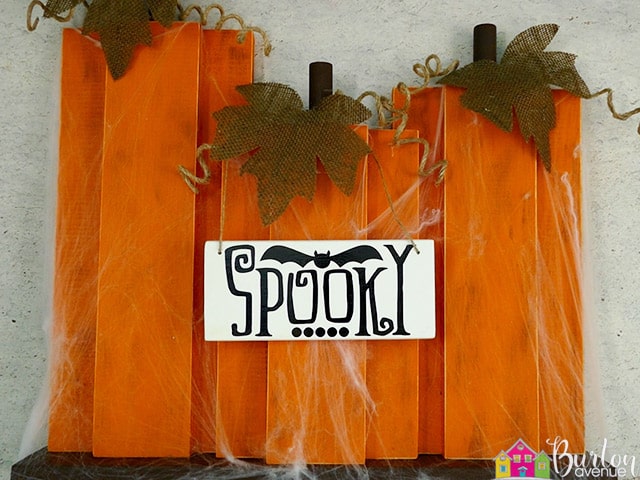
Place the large and medium-sized pumpkins on your work surface. Leave a gap of about 5″ between them.
Add some glue on the back, down the edges of the smallest pumpkin.
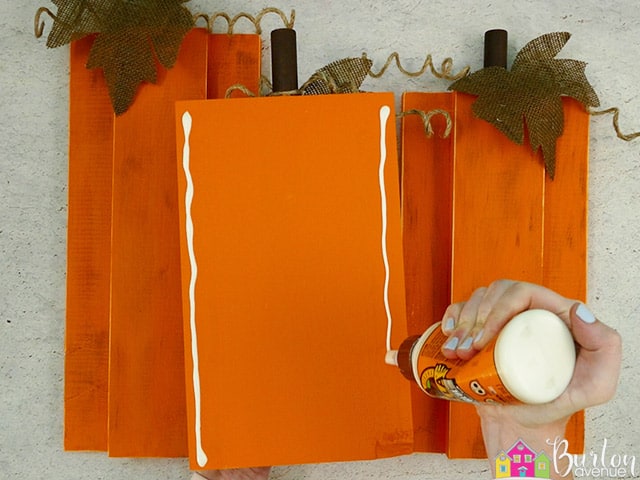
Flip it over and place it over the two larger pumpkins.
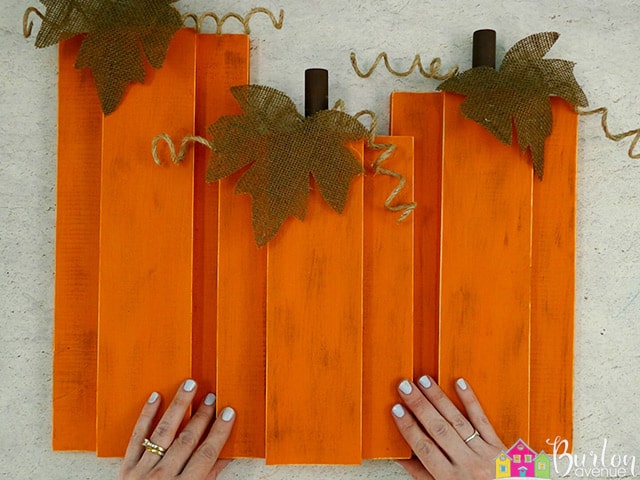
Make sure the bottoms of all three pieces of wood are lined up. Let that glue dry completely.
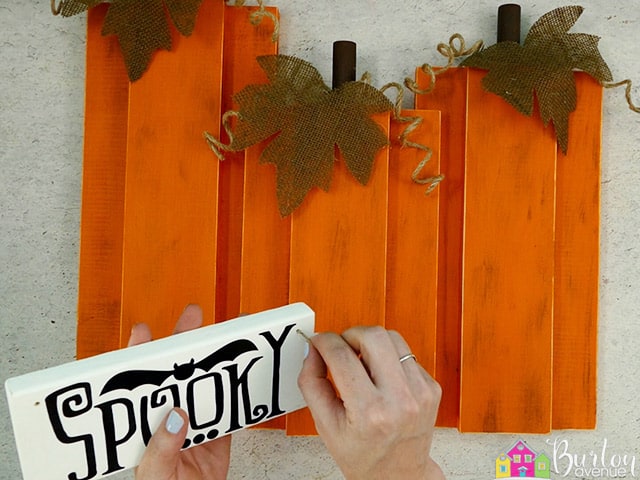
Next, we’re going to add the vinyl lettering to the sign. Grab the white piece of wood and one of the vinyl sayings. Remove the vinyl backing.
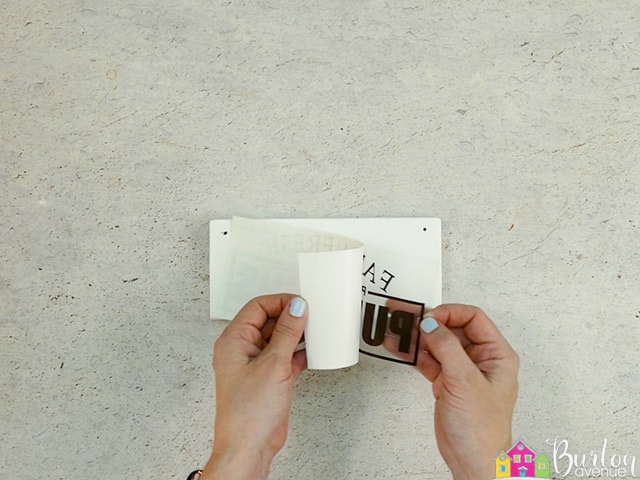
Position the design on the wood, be sure the two holes are at the top of the sign.
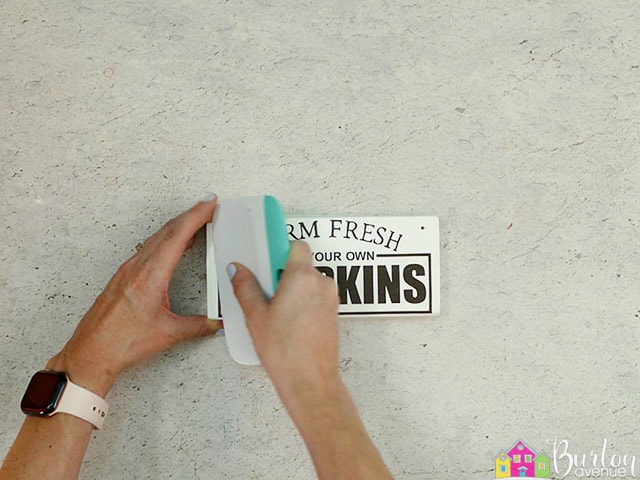
Center the design and then push down on the vinyl. Rub firmly over the top of the vinyl with your scraper,
Carefully pull off the transfer tape.
![]()
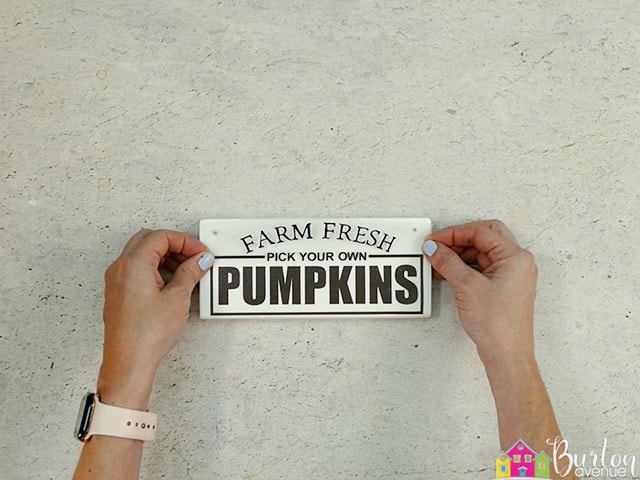
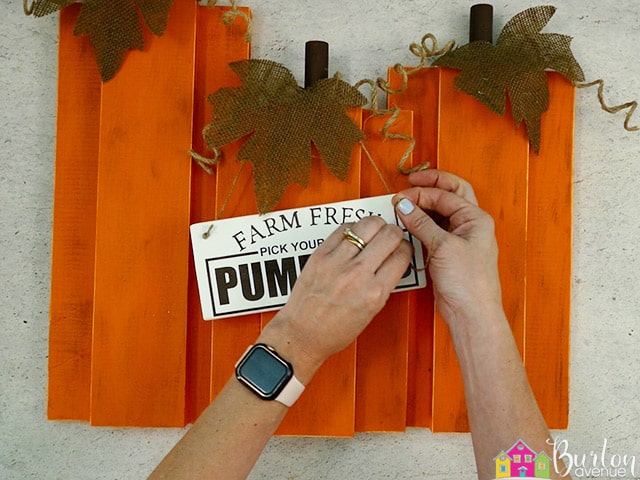
Flip the piece of wood over and apply the other design.
Cut a piece of twine about 20″ long. Thread one end through the white sign and tie a double know so it can’t slip back through the hole.
Thread the other end of the twine through the other hole. Hang the sign over the stem of the middle pumpkin. Adjust the twine until you’re happy with the height of the sign and then tie another double knot. Trim off any excess twine.
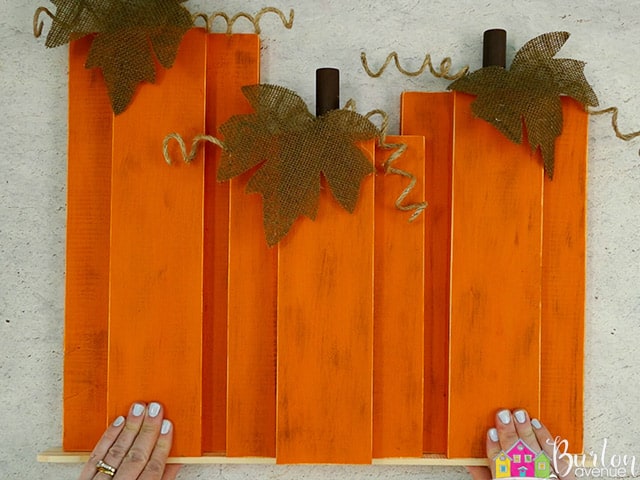
The last thing we need to do is attach the pumpkins to the stand. Add some glue along the bottoms of all the pumpkins.
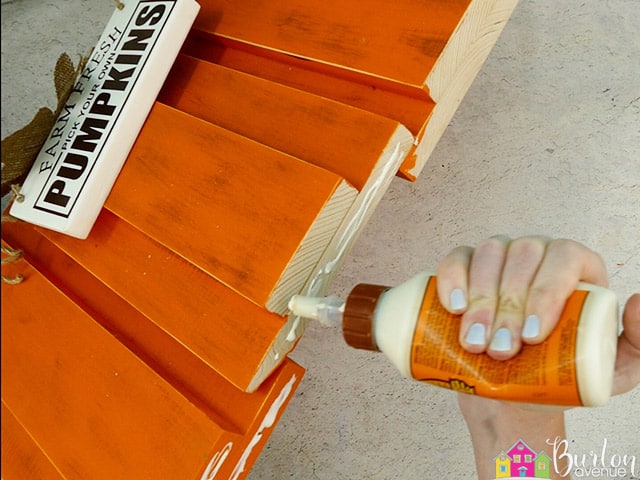
Place them on the stand. Make sure they are centered from right to left and from front to back. Wipe away any excess glue.

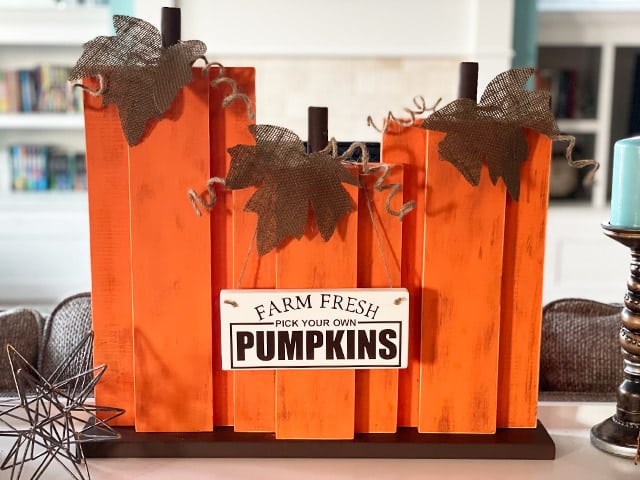
And that’s it, this sign is finished.
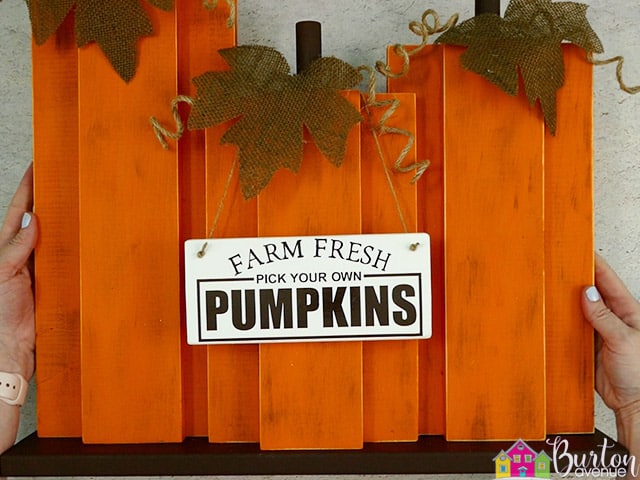
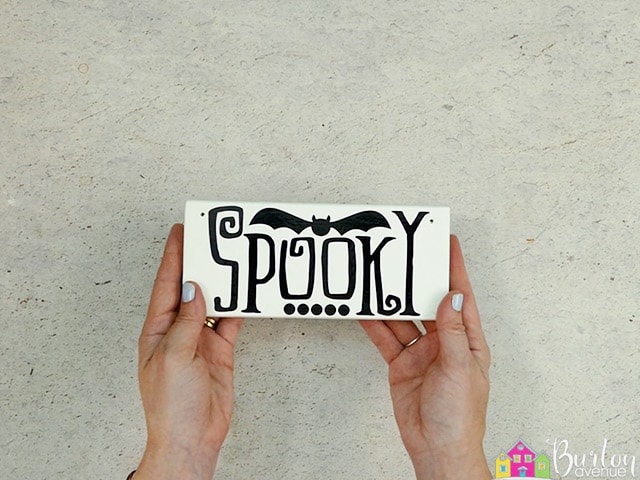
You can flip the sign over when it’s Halloween time. I thought it looked super cute to add some spider webbing for Halloween.
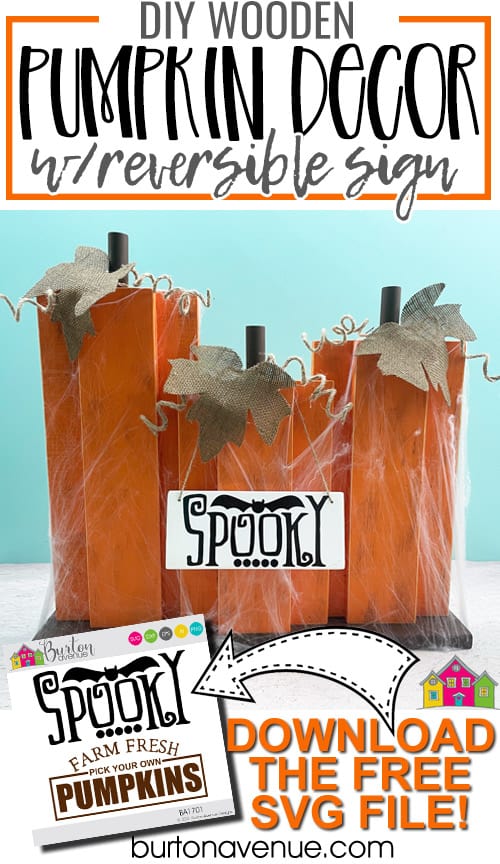
Want to make your own? Get the free cut file for this project in the resource library
I like this a lot. Perfect for the front porch. Thank you for sharing! Can you do something similar with Christmas trees??