
Burton Avenue
SVG files, tutorials and more for your electronic cutter.
 This post contains affiliate links for your convenience (which means if you make a purchase after clicking a link I will earn a small commission but it won’t cost you a penny more)! Read my full disclosure policy.
HERE’S WHAT YOU NEED
-
- Sublimation Pillow Cover
- Pillow Form
- Buffalo Check Infusible Ink
- Easy Press or Heat Press
- Electronic cutter (cricut explore, silhouette or other cutter)
- Cut File (available for free in my resource library)
HERE’S WHAT YOU DO
STEP 1: DOWNLOAD THE FREE SVG FILE
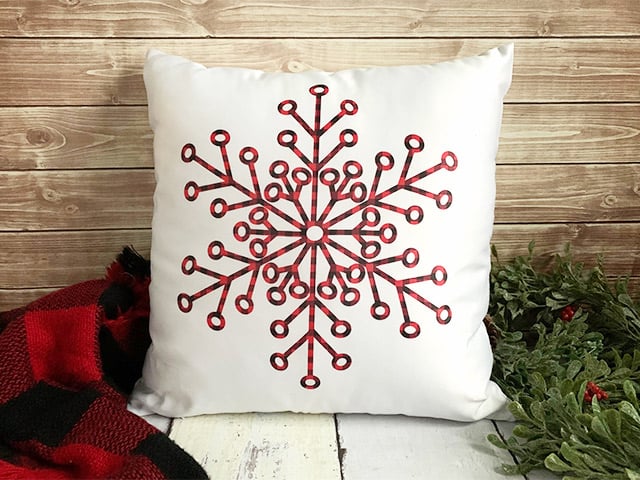
The first thing you’ll need to do is get the free SVG file you’ll use for this project. I keep all the SVG files I use for the projects I make in my SVG Library. These SVG files work with Cricut and Silhouette machines, as well as many others. This library is open to everyone and is free! You can access the library here. Look for the file called Snowflake. It will be listed under the category-Craftmas 2020 – Day 9.
STEP 2: PREPARE THE INFUSIBLE INK
Open the design in your software program. Size the design to 11.5″ tall and leave the width proportional.
When everything is sized correctly, you can cut the design.
Gently roll cut design so cut lines separate and are more visible. This is called “cracking” and it makes it easier to remove the excess paper from around your design.

Now use your fingers to carefully remove the excess pieces from around your design.


STEP 3: PREPARE THE PILLOW COVER
Use a lint roller or a rolled up piece of tape to remove any lint from the pillow cover.

Cover the pillow cover with the butcher paper that came with the infusible ink and then preheat the pillow cover.

Remove the butcher paper and carefully place the infusible ink sheet printed side down on the pillow. Make sure it is straight and centered.

STEP 4: PRESS DESIGN ONTO THE PILLOW COVER
Cover the design with the butcher paper, again. Use light pressure and follow this heat guide. I have the original easy press, so I had to press the design in 4 sections and each section had to be pressed for 120 seconds. If you have the Easy press 2, you might only need to do one or two sections. When moving from one section to another, slowly lift the press and try not to move anything but the easy press.
Once the entire design has been pressed, let design cool. Then, pull off the butcher paper and slowly remove the liner with the design.

Add a pillow form and this project is done!

Did you enjoy this post? Help spread the word! Share this post on your favorite Pinterest board. Thanks!

Want to make your own? Get the free cut file for this project in the resource library