
HERE’S WHAT YOU NEED
- White Cardstock
- Red Glitter Cardstock
- Green Glitter Cardstock
- Cricut Pens (Optional)
- Bakers Twine
- Electronic cutter (cricut explore, silhouette or other cutter)
- Cut File (available for free in my resource library)
HERE’S WHAT YOU DO
STEP 1: DOWNLOAD THE FREE FILES
The first thing you’ll need to do is get the free SVG file you’ll use for this project. I keep all the SVG files I use for the projects I make in my SVG Library. These SVG files work with Cricut and Silhouette machines, as well as many others. This library is open to everyone and is free! You can access the library here. Look for the file called Christmas Gift Tags BA1414. It will either be listed under the most recent projects/cut files or under the Christmas category.
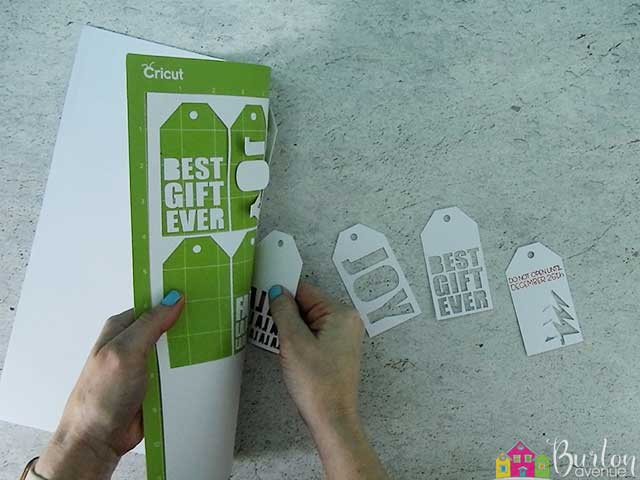
STEP 2: CUT THE CARDSTOCK TAGS
Open the design in your cutting software. You can resize the design to 9.5″ wide and that will make the tags about 4″ tall. Of course, you can also make them larger or smaller.
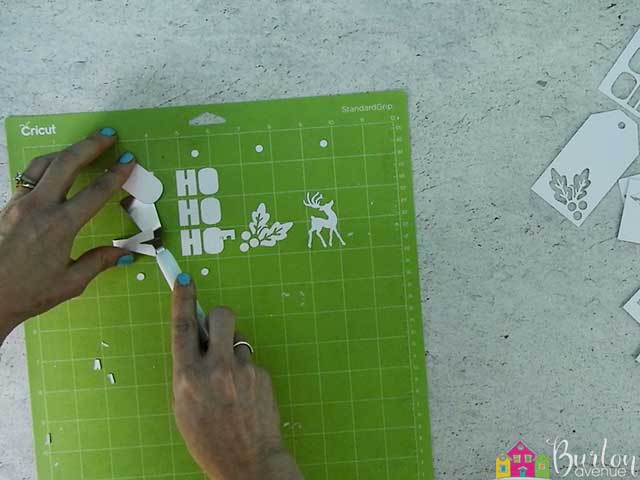
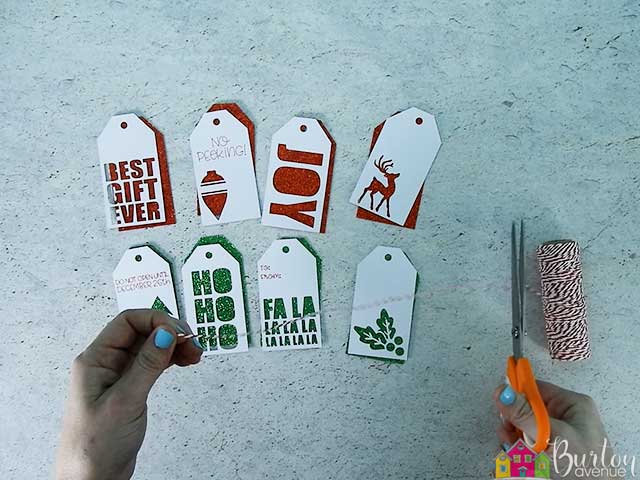
There are few Christmas phrases included with the file. If your machine can draw with a marker or pen, you can add these to the tags. These phrases are done in a hairline font, so the pen only makes one stroke for the letter instead of an outline around the letter. It seems like every software program displays them differently. In Design Space, they sometimes show up normal and you’ll just need to attach the phrases to the tag before you cut. In Silhouette Studio, you have to click on send tab to be able to see them. Then, you can select the phrases and move them onto the tags. Hopefully, you can figure out how to use them in your software program. If you don’t need these phrases, just select everything below the last row of tags and delete.
The fonts I used were Dear Agatha and Pinsetter Line
Once everything is sized correctly, cut the tags your Cricut or Silhouette. I used 100 lbs white cardstock for the front of the tags and glitter cardstock for the back. You could also just cut the front layer in glittered or colored cardstock and skip the back layer.
Once the cardstock is finished cutting, remove it from the cutting mat. You’ll want to slightly bend the cutting mat and carefully pull off the cardstock.
Remove any inside pieces that didn’t come off the mat with a spatula tool and cut the remaining colors.
STEP 3: ASSEMBLE TAGS
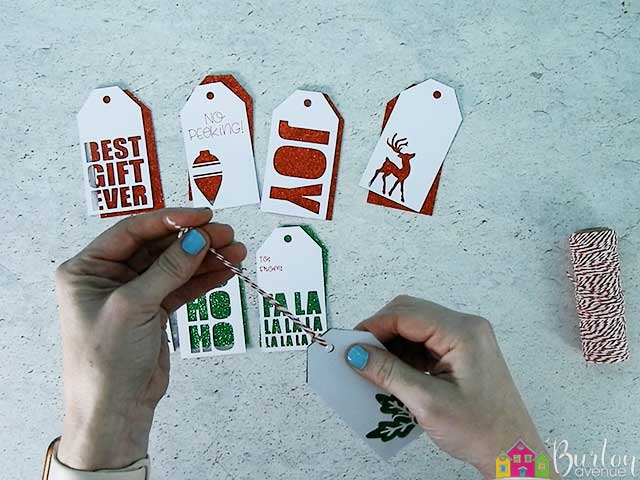
Stack together one glitter tag with one white tag. Then, cut your twine into 9″ pieces.
Fold the twine in half and thread it through both holes of the tags.
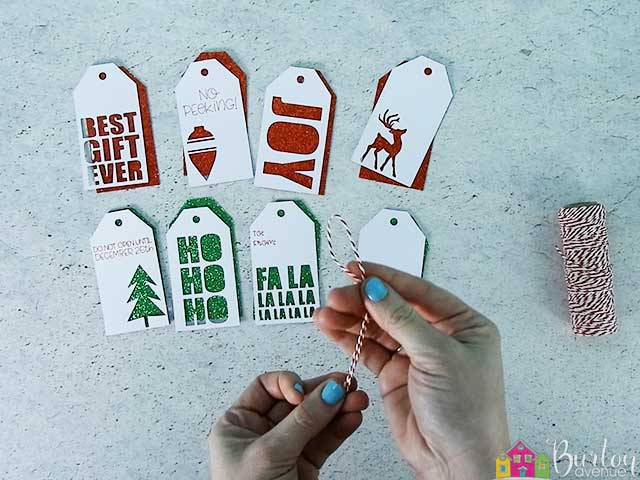

Separate the twine to form a loop.

Put the ends of the twine through the loop and pull tight.

That’s it. I told you this was an easy project! But, I just love how they turned out!

Did you enjoy this post? Help spread the word! Share this post on your favorite Pinterest board. Thanks!
