
HERE’S WHAT YOU NEED
-
- Cutting Board (I used this one)
- Torch Paste
- Squeegee
- Adhesive Vinyl – Color doesn’t matter (I got mine here)
- Transfer Tape
- Weeding Tool
- Scraper
- High Heat Gun (I used one similar to this)
- Christmas Pick
- Christmas Cookie Cutter
- Glue Gun & Glue
- Electronic cutter (cricut explore, silhouette or other cutter)
- Cut File – Old Fashioned Gingerbread Bakery BA2119 (click here to get the SVG file for free from my free SVG Library)
HERE’S WHAT YOU DO
STEP 1: DOWNLOAD THE FREE SVG FILE
The first thing you’ll need to do is get the free SVG file you’ll use for this project. I keep all the SVG files I use for the projects I make in my SVG Library. These SVG files work with Cricut and Silhouette machines, as well as many others. This library is open to everyone and is free! You can access the library here. Look for the file called Old Fashioned Gingerbread Bakery BA2119. It will be listed under the Craftmas 2022 Category-Day 19.
STEP 2: CUT AND WEED VINYL DESIGN
Open the design in your software program and size it to fit on your cutting board. Then, add a rectangle around your design to make it a stencil.
My cutting board measured about 6.75″ across and I made my design 6″ wide and left the height proportional.
When everything is sized correctly, you can cut the vinyl with your Cricut or Silhouette.
Once it has finished cutting, weed away the excess vinyl.

Since this is a stencil, we’ll be pulling out the letters and shapes from inside the rectangle.

Cut a piece of transfer tape and place it sticky side up on your surface. Then place the vinyl on top of the transfer tape and smooth it down.
![]()
Rub over the design firmly with your scraper tool.

Then, trim off the excess transfer tape and vinyl backing.
![]()
STEP 3: APPLY THE STENCIL TO THE CUTTING BOARD
Flip the design over and remove the vinyl backing.

Center the design from left to right on the cutting board. Use the straight edge of the stencil and line it up with the straight edge of the cutting board.
 Rub over the design to help it stick to the board.
![]()
Then, carefully pull off the transfer tape.

STEP 4: BURN THE DESIGN ONTO THE CUTTING BOARD
Apply a thin layer of Torch Paste over the stencil.

To do this, I cut off the edge of an old gift card, scooped up some of the paste, 
and pushed it onto the cutting board.

After the entire stencil was covered, I used the long edge of the gift card to scrape off the excess torch paste and even it out over the design.


Let the Torch Paste dry for several minutes, then carefully pull off the vinyl stencil.

Use your weeding tool to pull off any vinyl pieces that were left behind.

You should still be able to see the design when the Torch Paste has dried.

Next, use a high-heat gun to burn the design into the cutting board.

This process took quite a while, but it is so fun to watch the design appear.

The cutting board I used is made of several pieces of wood that are glued together. The heat of the gun did cause two of the strips to separate a bit, but I think it adds to the rustic look of the design. I also heated above the design on one of the strips to even out the change in color from the heat.
When you’re happy with the look, you can use a paper towel to wipe off any residue.

This cutting board is for decorative use only. But, if you want to make one to actually use, the Torch Paste website says this:
When Torch Paste is used on a surface that will be in contact with food items, it is recommended that that surface be sealed with a food-grade sealer after applying/burning Torch Paste. Some sealers may require periodic re-application, use and reapply as directed.
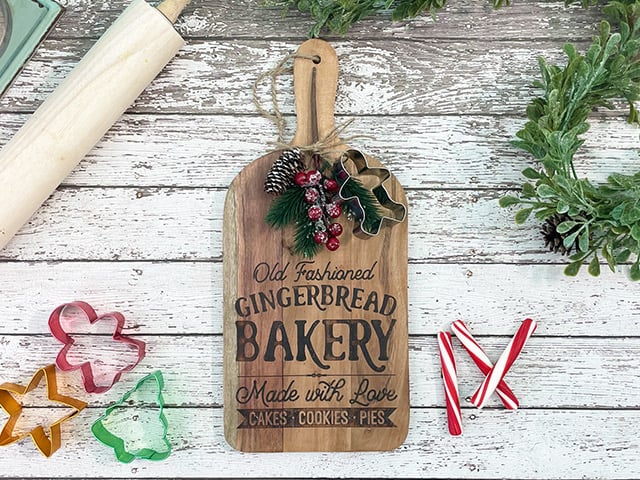
STEP 5: ADD CHRISTMAS EMBELLISHMENTS
To finish off the cutting board, tie a Christmas cookie cutter to a Christmas pick and glue it to the top of the cutting board.

And that’s all there is to it. Your wood-burned cutting board is finished!

Did you enjoy this post? Help spread the word! Share this post on your favorite Pinterest board. Thanks!

Want to make your own? Get the free cut file for this project in the resource library