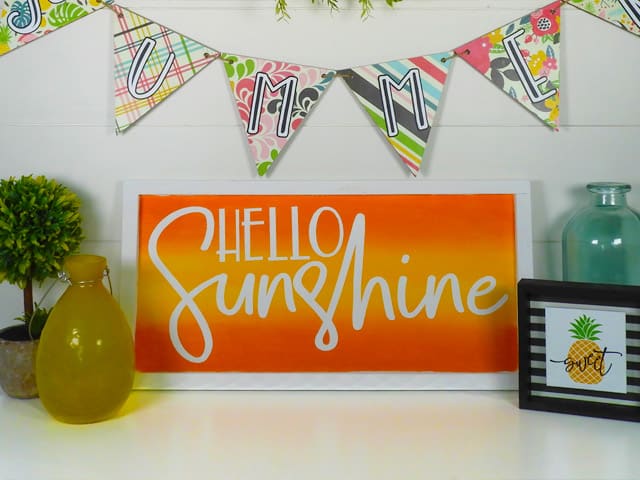
I just finished up the decor for my summer shelf and I’m loving how everything turned out. Today, I’m going to show you how to to make this cute summer wood sign. The yellow and orange background fits so perfectly with the saying. It totally reminds me of the sun!
HERE’S WHAT YOU NEED
- Wood Sign Blank (I found mine Michaels)
- Vinyl (Color doesn’t matter)
- Transfer Tape
- Orange and Yellow Paint & Brush
- Painters Tape
- Application Tool
- Electronic cutter (cricut explore, silhouette or other cutter)
- Cut File (available for free in my resource library)
HERE’S WHAT YOU DO
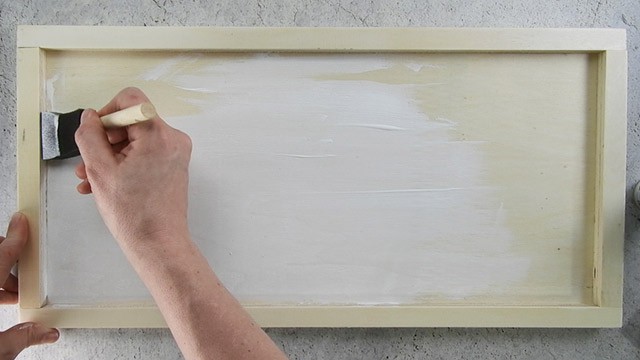
Start by painting the sign blank white. You’ll probably need to do at least two coats to get good coverage.
While the sign is drying, you can start working on the vinyl decal.
Open the design in your software program. Size it to fit on the sign blank. I did mine about 1″ smaller than the blank space. The inside of my sign measured 18″ x 8.5″, so I sized my design to be 17″ x 7.5″. Once it’s sized and ready to go, send the design to your Silhouette or Cricut to cut. When it’s finished cutting, you can weed away to excess vinyl.
Cut out a large piece of transfer tape and apply it over the vinyl design. Use an application tool or scraper and rub over the transfer tape.
![]()
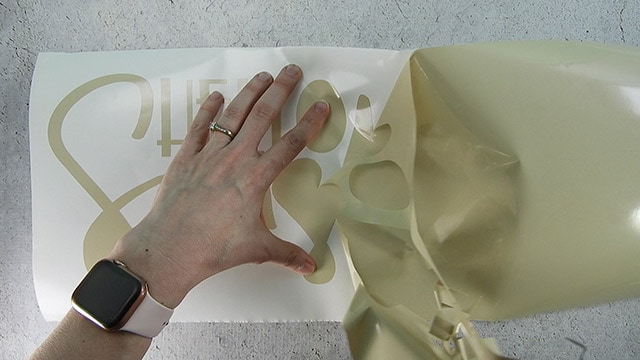
Flip over the design and carefully pull off the vinyl backing.
![]()
With the vinyl backing off, you can now apply the design to the sign blank. Just make sure the paint is completely dry before you put the vinyl on. Rub over the design again with an application tool to help the vinyl stick to the wood.
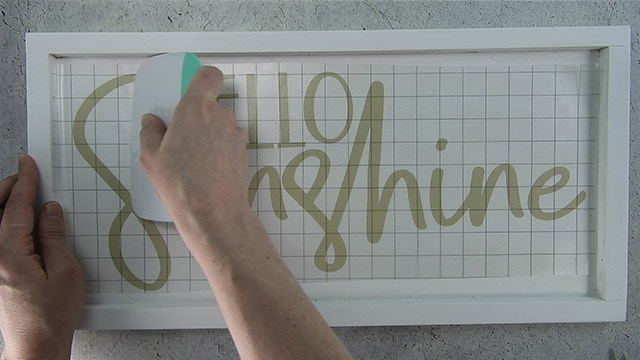
Now, you can pull off the transfer tape. Go slow and be sure the vinyl is sticking to the wood and doesn’t come up with the transfer tape. If it’s not sticking, rub over the transfer tape again until the vinyl sticks to the wood.
![]()
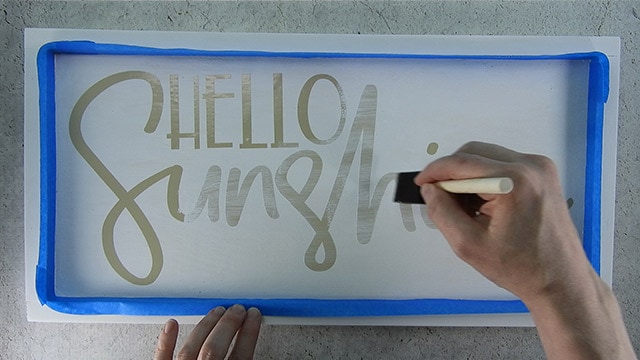
Use some painters tape and tape off the edges of the sign. Then, paint a light coat of white over the letters. This helps to stop bleeding.
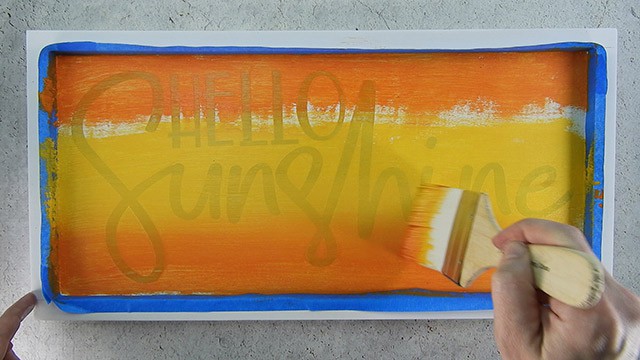
Now, it’s time to paint! This part is fun but it might take a bit of trial and error. Start by painting a strip of orange along the top and bottom of the sign.
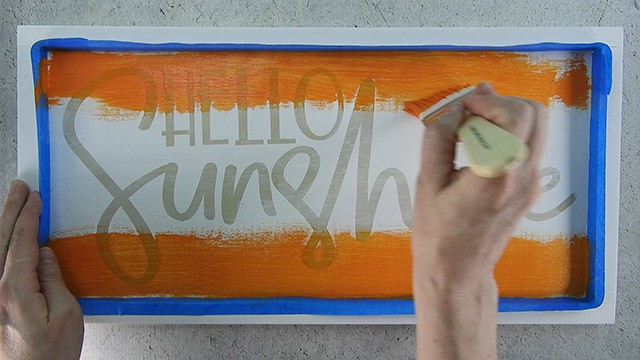
With a different paintbrush, fill in the middle of the sign with yellow.
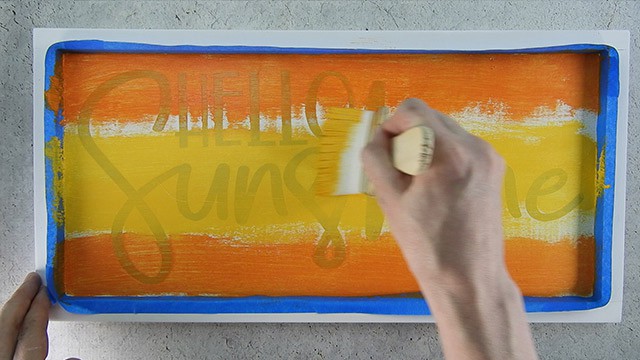
Now, with your orange paintbrush, paint orange all the way up to the yellow. You’ll want to do this part quick so both the yellow and orange paint stay wet.
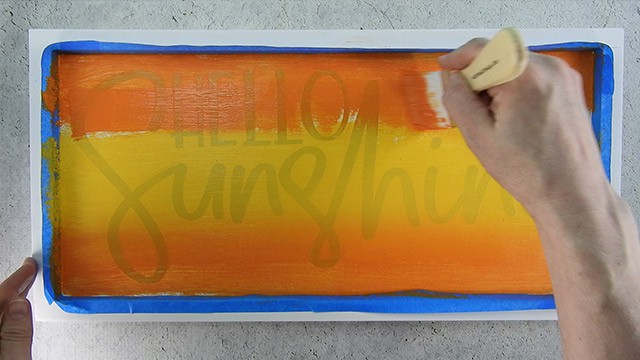
Take the yellow paintbrush and start blending where the orange and yellow meet. Keep going over that part of the sign until you’ve achieved the look you want.
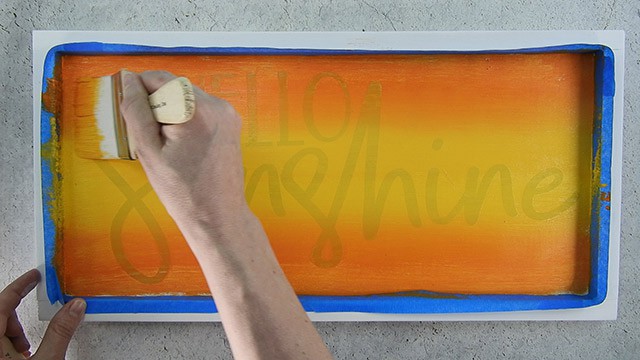
Now, repeat with the upper section of the sign.
When you start blending the upper section, make sure you flip your paintbrush so the orange is on top and the yellow is on bottom.
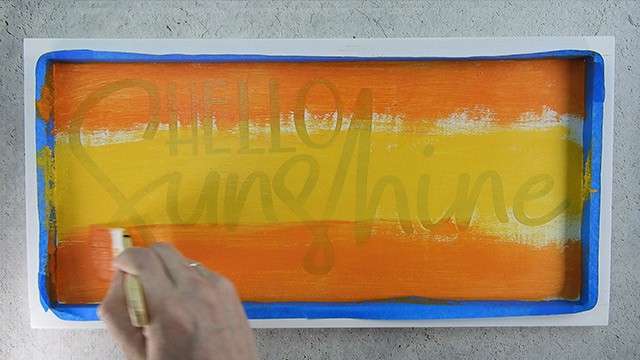
Once the paint is dry to the touch, you can start to pull off the vinyl letters.
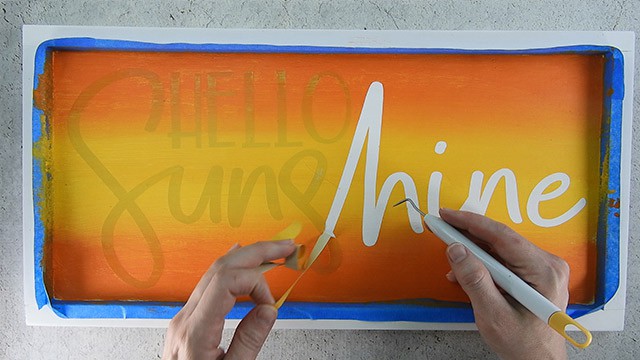
You can also remove the painters tape. If you have any bleeds, touch them up with some white paint.
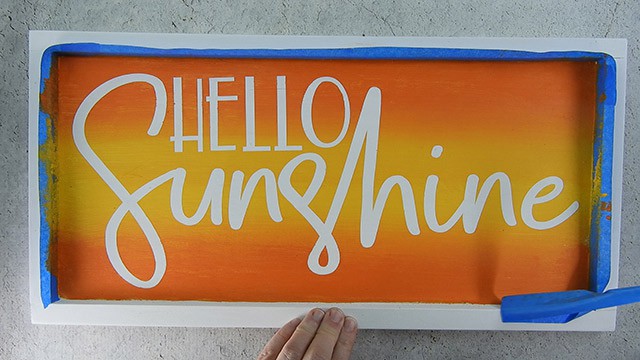
I think it turned out pretty cool! What do you think? Would you ever give this technique a try?
Did you enjoy this post? Help spread the word! Share this post on your favorite Pinterest board. Thanks!
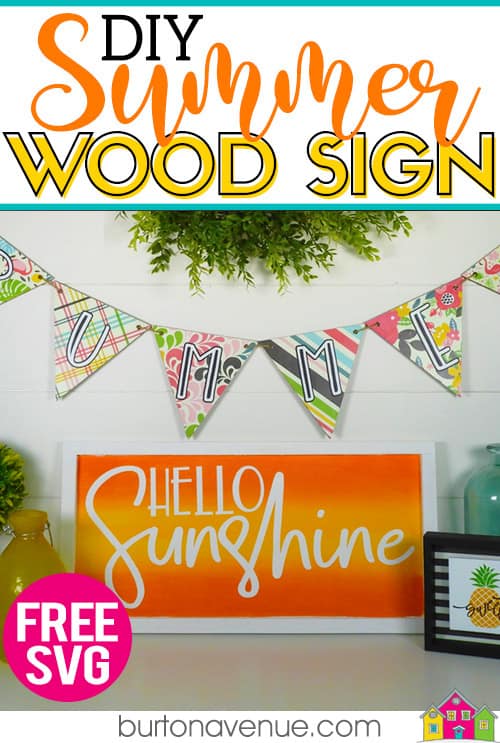
Want to make your own? Get the free cut file for this project in the resource library
Love this technique, and I will definitely try this. Thanks for sharing!
I love this design, I will definitely give it a go, Thank you!!