 This post contains affiliate links for your convenience (which means if you make a purchase after clicking a link I will earn a small commission but it won’t cost you a penny more)! Read my full disclosure policy.
HERE’S WHAT YOU NEED
- Wood for Sign (Mine measured approx. 16.5 x 9.5″)
- Vinyl (For painted signs, I like to use Oracal 631 or Stencil Vinyl)
- Application Tool
- Transfer Tape
- Acrylic Paint & Brushes (White, Cadmium Yellow, & Black)
- Masking Tape
- Hot Glue Gun
- Yellow Hot Glue Sticks (2-3 Long sticks)
- Wood Honey Dipper Sticks
- Weeding Tool
- Scrapper Tool
- Electronic cutter (cricut explore, silhouette or other cutter)
- Cut File (available for free in my resource library)
HERE’S WHAT YOU DO
STEP 1: DOWNLOAD THE FREE SVG FILE
The first thing you’ll need to do is get the free SVG file you’ll use for this project. I keep all the SVG files I use for the projects I make in my SVG Library. These SVG files work with Cricut and Silhouette machines, as well as many others. This library is open to everyone and is free! You can access the library here. Look for the file called Sweet Honey. It will either be listed under the most recent projects/cut files or under the Everyday category.
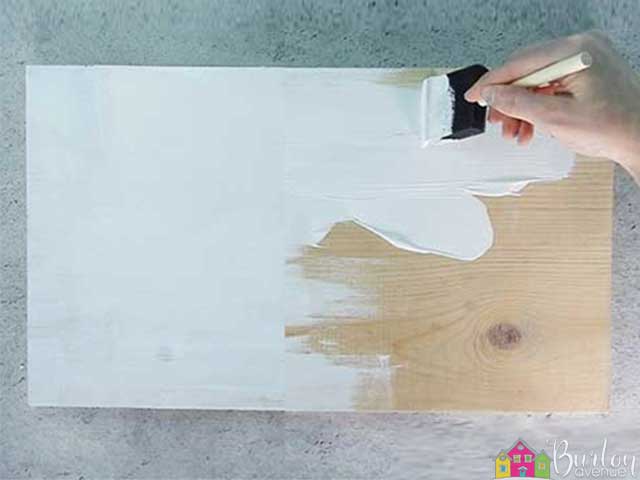
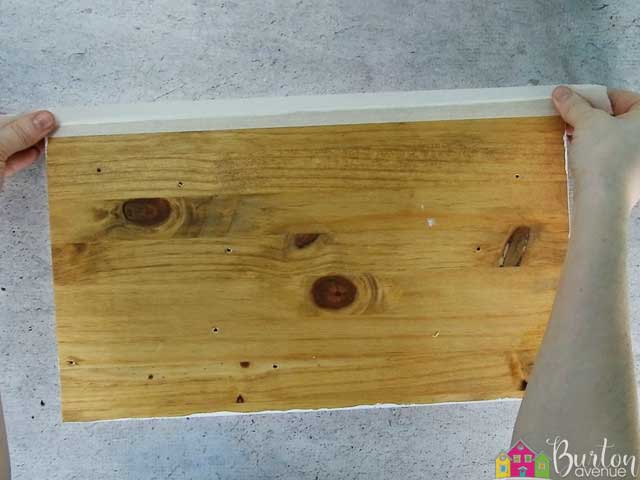
STEP 2: PREPARE WOOD SIGN
Cut your wood to size and lightly sand it. Brush off any sawdust and then paint the sign white. You’ll probably need a couple of coats.
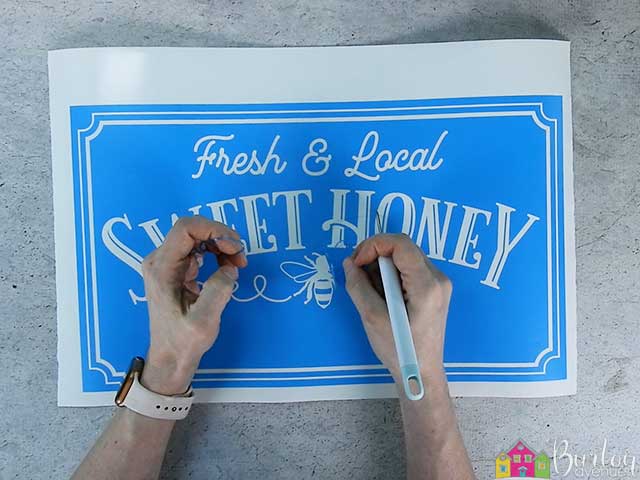
STEP 3: PREPARE THE VINYL DESIGN
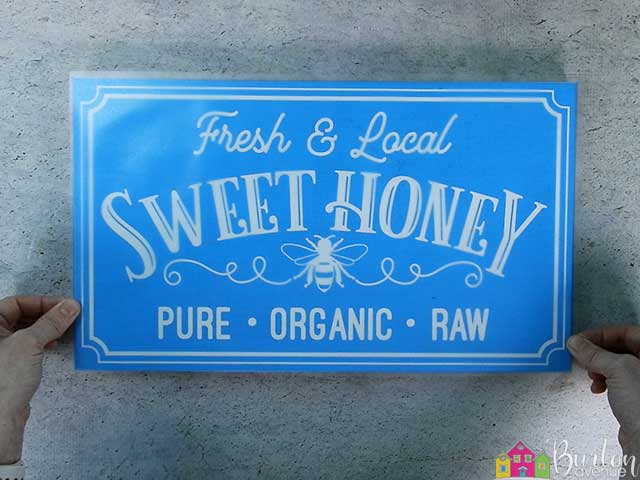
While the paint is drying, open the design in your software program. Resize the design to fit on your sign. My wood is about 16.5″ x 9.5″, so I sized my design to about 16″ wide. Then, I added a rectangle (the size of my wood) around the design to create a stencil.
Do you need more help with creating a vinyl stencil? Check out these posts.
How to Make a Vinyl in Cricut Design Space.
How to Make a Vinyl Stencil in Silhouette Studio
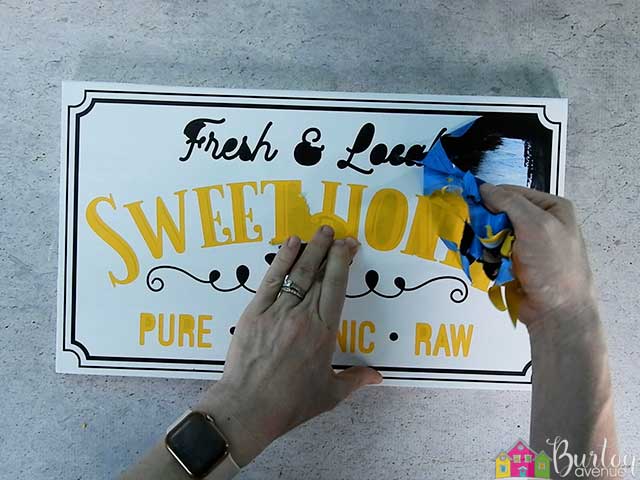
When everything is sized correctly, you can cut the stencil with your Cricut or Silhouette. Once it has finished cutting, weed away the excess vinyl.
Cut a piece of transfer tape a little larger than the design. Place the vinyl on the transfer tape.![]()
Use an application tool to rub over the design. Then, trim off the excess transfer tape.

Flip the design over and then pull off the vinyl backing. I like to do it this way so the vinyl doesn’t curl.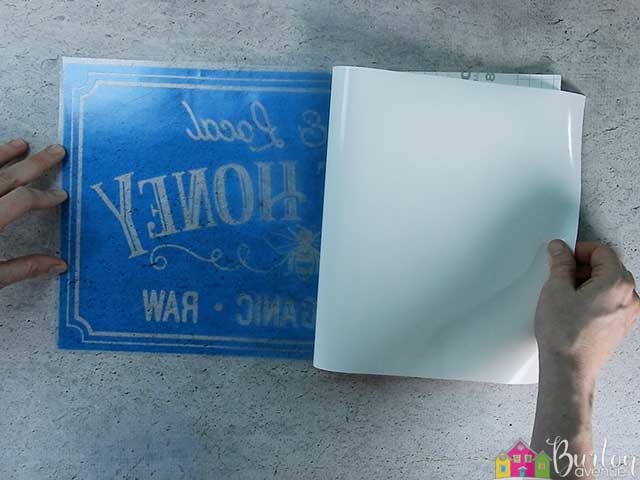
STEP 3: APPLY VINYL TO THE WOOD SIGN
Once the sign is completely dry, place the vinyl on it. Match up the straight edges of the stencil with the straight edge of the wood.
Once it’s in place, use a scraper and rub over the entire design.
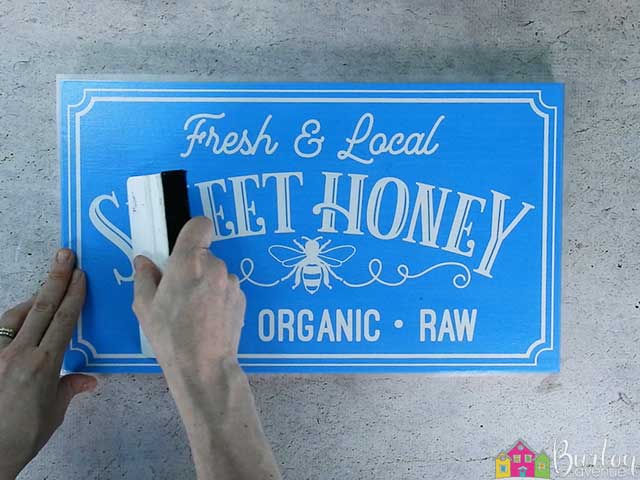
Carefully pull off the transfer tape and rub over the design a few more times with a scraper.
![]()
STEP 4: FILL IN THE STENCIL
Paint a light coat of white paint over the stencil.
Why do we do this? To help prevent bleeds.
Sometimes there are small gaps between the stencil and the wood. Our hope is that the white will fill in these gaps, instead of the colored paint.
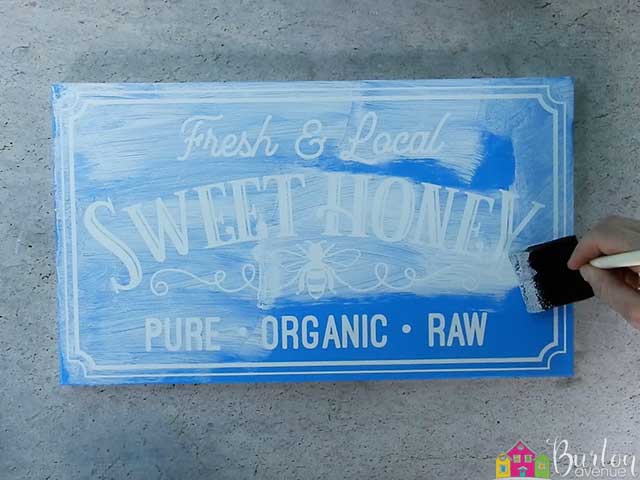
Once the white paint is dry to the touch, fill in the stencil with the colored paints.
It’s best to do several lights coats, rather than one thick heavy coat. This will also help to stop bleeding.
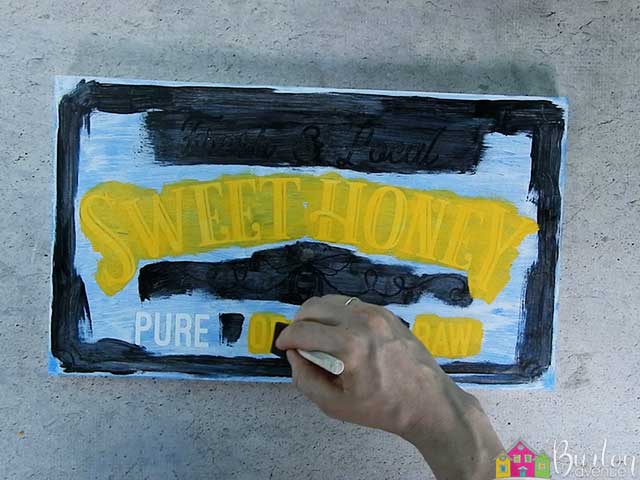
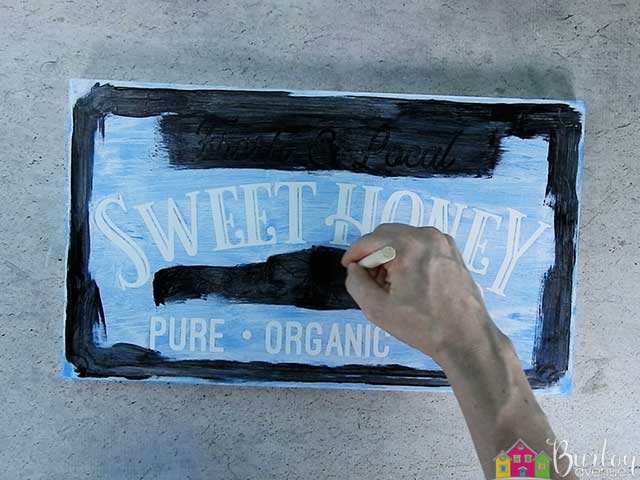
STEP 5: REMOVE THE VINYL STENCIL
Once the paint is dry to the touch, carefully pull off the stencil.
You can use a weeding tool or craft knife to pull out the centers of the letters. If there’s any bleeding, you can touch it up with a small paint brush.
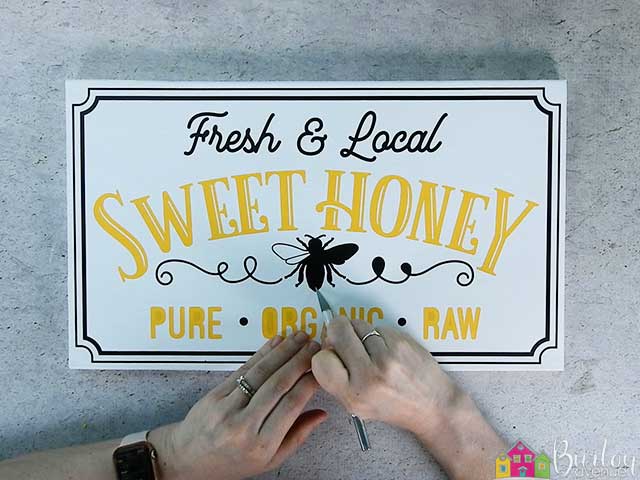
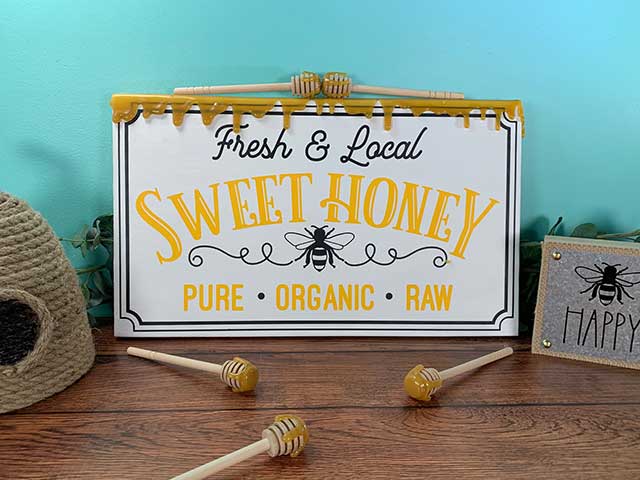
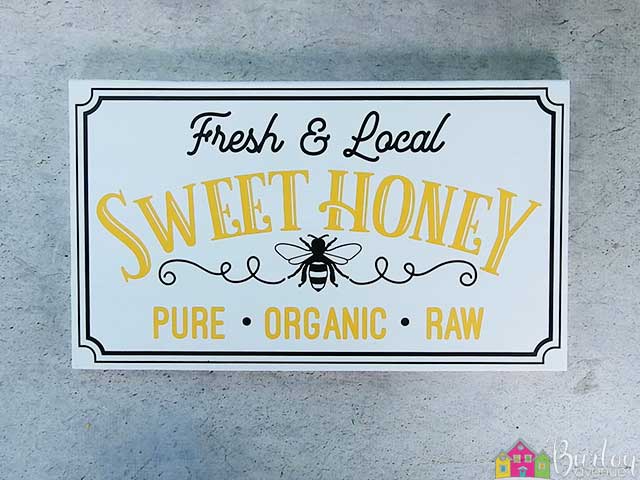
STEP 6: ADD THE FINISHING TOUCHES
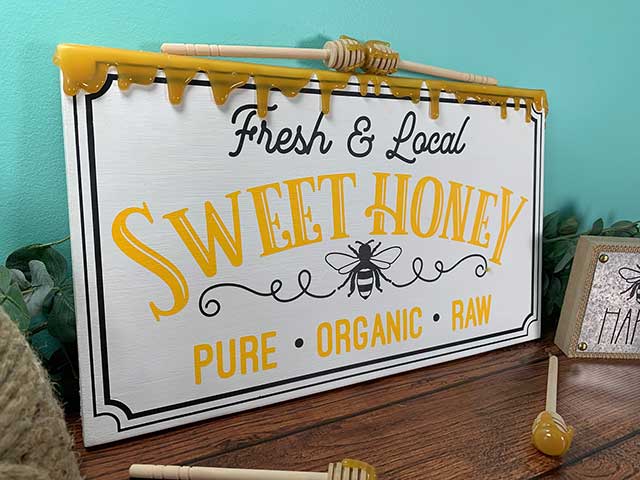
The sign looks great at this point. You can leave it as is or you can add some honey drips. The faux honey is done with a glue gun and tinted glue sticks. Isn’t that fun?
Read through all the steps and then practice on a piece of scrap wood until you are happy with your technique.
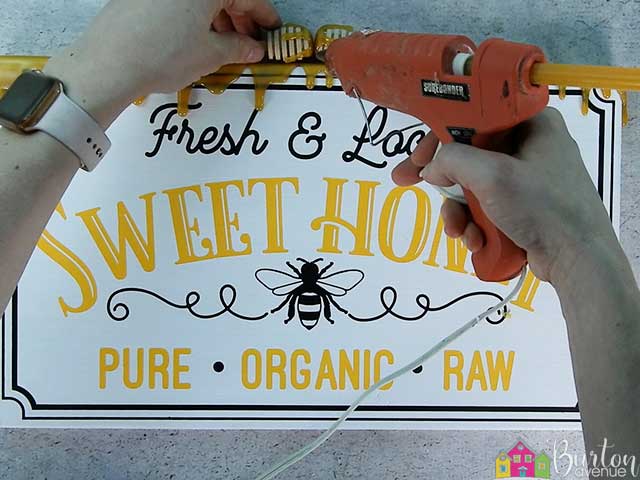
Start by adding a piece of masking tape to the back of the sign. This is to stop to “honey” from dripping on the back.
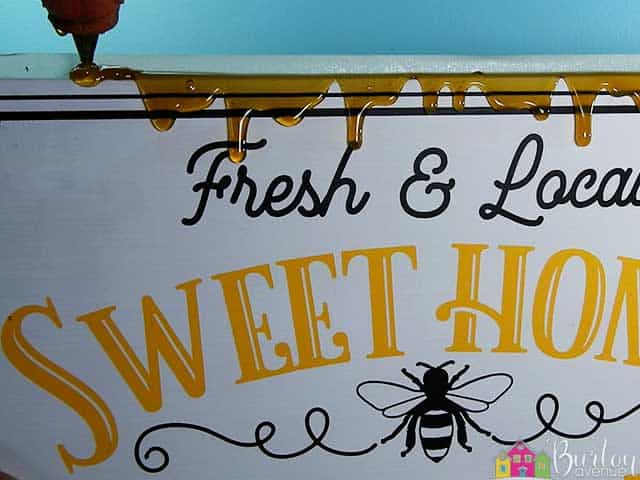
Use one hand to hold the sign upright and tip it forward just a little bit. Then, start adding the yellow hot glue (I got it here) to the top of the sign. Since you’re tipping the sign forward, the glue should run off the top edge just a bit.
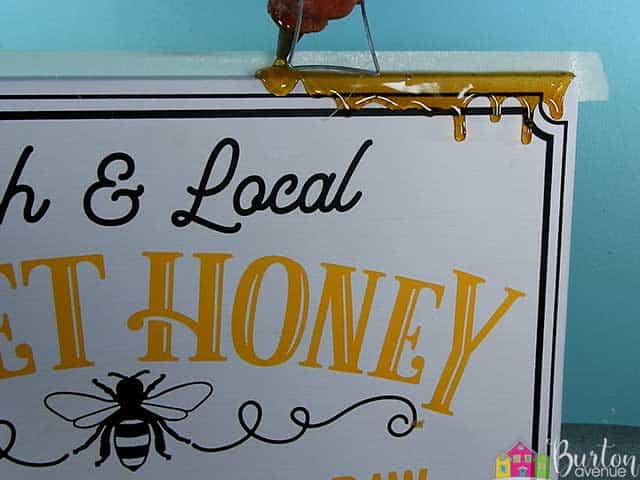
If you want longer drips, tip the board forward a little more. If your drips are getting too big, straighten the board out. If you want thicker drips, add more glue.

Repeat this process along the entire length of the board. Let the glue dry at least 5 minutes before you touch the glue or remove any of the hot glue strings.
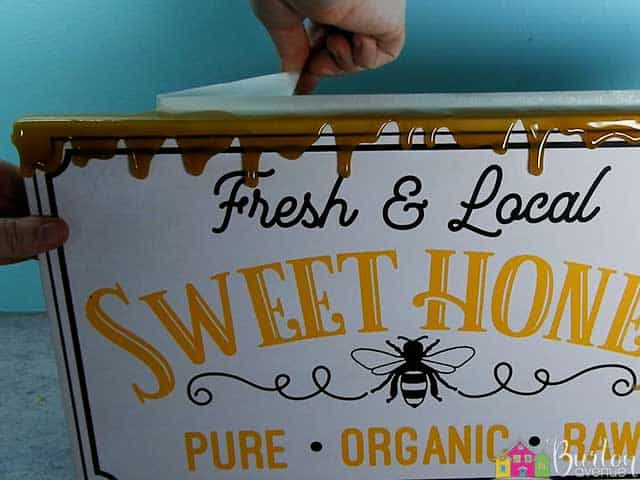
Once the glue is dry, you can pull off the masking tape.
Add glue to the honey dippers to create the same effect.
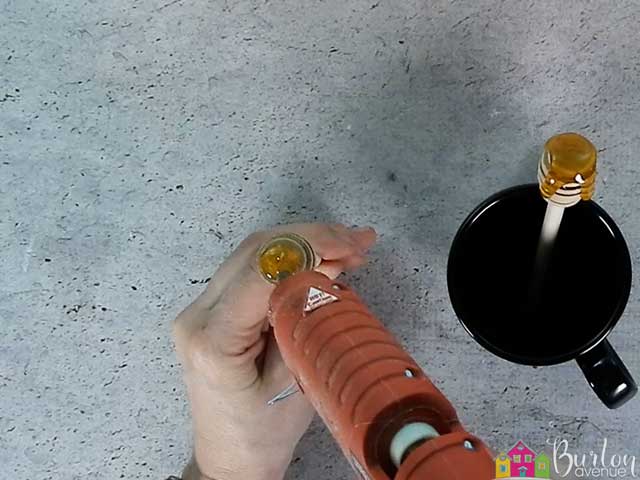
You can use the tip of the glue gun to guide the glue down the side of the dipper.
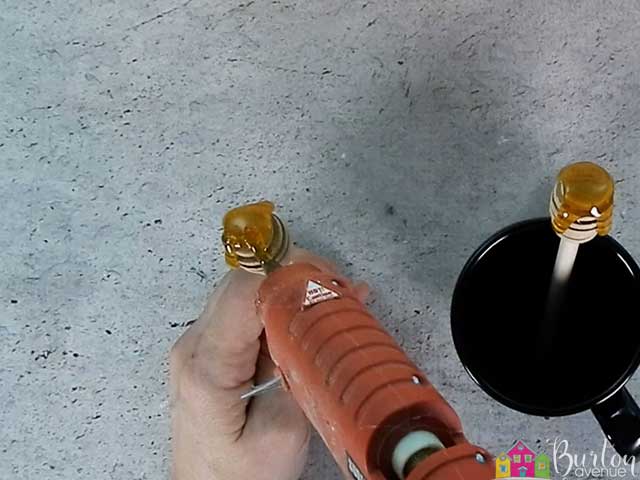
Once the dippers are dry, center them on the top of the sign.
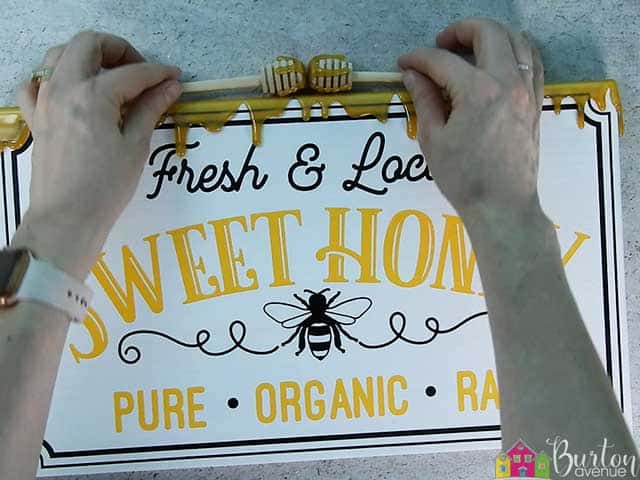
Glue them into place.
Isn’t it fun? I love how it looks just like honey dripping from the top of the sign!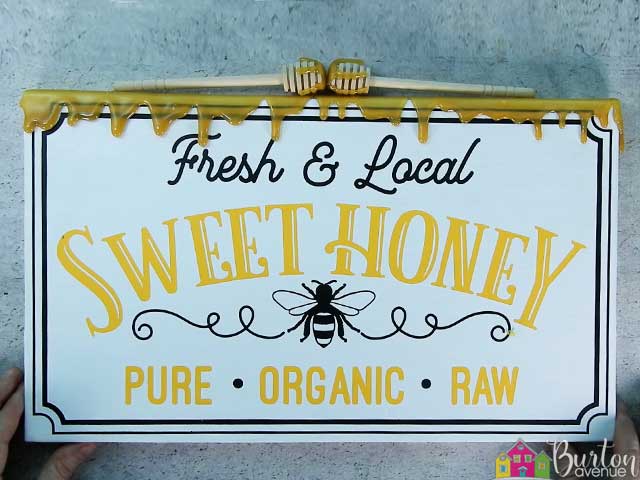
Did you enjoy this post? Help spread the word! Share this post on your favorite Pinterest board. Thanks!

Want to make your own? Get the free cut file for this project in the resource library
Thank you!