HERE’S WHAT YOU NEED
-
- 3- 5.5″ x 8″ Wood Blocks (I used 2×6’s)
- Adhesive Vinyl
- Transfer Tape
- Weeding Tool
- Scraper
- Paint and Brushes
- Sand Paper
- Ribbon, Twine & Christmas Embellishments
- Hot Glue gun & glue
- Electronic cutter (cricut explore, silhouette or other cutter)
- Cut File – Merry Joyful Blessed BA1814 (click here to get the SVG file for free from my free SVG Library)
HERE’S WHAT YOU DO
STEP 1: DOWNLOAD THE FREE SVG FILE
The first thing you’ll need to do is get the free SVG file you’ll use for this project. I keep all the SVG files I use for the projects I make in my SVG Library. These SVG files work with Cricut and Silhouette machines, as well as many others. This library is open to everyone and is free! You can access the library here. Look for the file called Merry Joyful Blessed BA1814. It will be listed under the Craftmas 2021 Category-Day 20.
STEP 2: CUT AND WEED VINYL DESIGN
Open the design in your software program and resize it to fit on your pieces of wood. The wood I used is about 1.5″ tall, so I resized each phrase to just over an inch in height. I used black and white adhesive vinyl.
When everything is finished cutting, remove the vinyl from your cutting mat and trim off any unused vinyl.
Weed away the excess vinyl from around the design.
Use the weeding tool to help remove the excess vinyl from inside the letters.
Cut a piece of transfer tape and place it sticky side up on your surface. Then place the vinyl on top of the transfer tape and smooth it down.
Rub over the designs firmly with your scraper tool.
Then, trim off the excess transfer tape and vinyl backing and cut the phrases apart.
STEP 3: MAKE THE BOOK STACK
For the books, I used a 2″ x 6″ and cut it into 3- 8″ pieces You’ll want to sand the blocks so they are nice and smooth. Then, paint one block red, one black, and one white. You’ll probably need to do 2-3 coats of each color to get complete coverage.
Now that the blocks are painted, it’s time to add the vinyl lettering. Grab one of the vinyl sayings and pull off the vinyl backing.
Position the word on the side of one of the blocks. Position the design about 1/4″ from the right edge of the block.
Press the design into place and then rub over it with your scraper.
Carefully pull off the transfer tape.
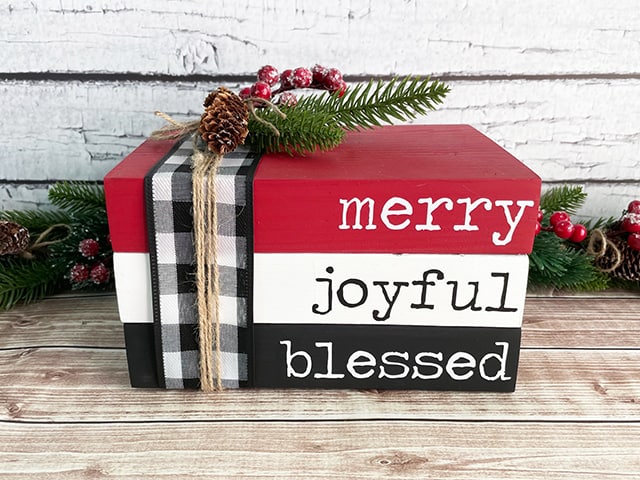
Repeat with the other two blocks. I put the word joyful on the white block and merry on the red one.
Stacks your books with merry on top, followed by joyful, and blessed on the bottom.
Use some hot glue and glue them together.
STEP 4: ADD EMBELLISHMENT TO THE BOOK STACK
Wrap a piece of ribbon around the books and glue it in place.
Then, wrap some twine around the stack 4 or 5 times. Tie it in a double knot and trim off the ends.
Glue on some pretty Christmas embellishments.
Finally, tie a bow with the twine and glue it over the embellishments.
And that’s it, you’re faux book stack is complete.
Did you enjoy this post? Help spread the word! Share this post on your favorite Pinterest board. Thanks!
Want to make your own? Get the free cut file for this project in the resource library


