HERE’S WHAT YOU NEED
-
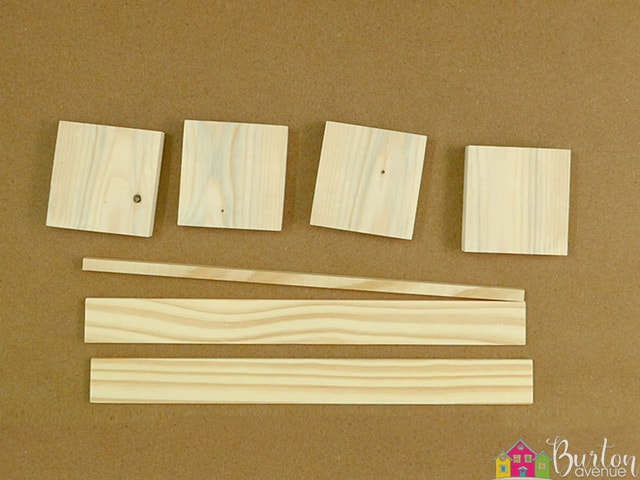
- Wood for tiles – 4-3.5″ squares (I cut mine from 4″ pine which measures closer to 3.5″)
- Wood for tray – 1-14″ piece cut from 3/8″ square wood dowel 2- 14″ pieces cut from 1.5″ wood (I used a large paint stir stick)
- Acrylic Paint in Fall Colors
- Stain & staining supplies
- Paint Brushes
- Adhesive Vinyl (White)
- Transfer Tape
- Weeding Tool
- Scraper
- Glue & Sandpaper
- Electronic cutter (cricut explore, silhouette or other cutter)
- Cut File – Fall Scrabble Letters BA1666 (available for free in my resource library)
HERE’S WHAT YOU DO
STEP 1: DOWNLOAD THE FREE SVG FILE
The first thing you’ll need to do is get the free SVG file you’ll use for this project. I keep all the SVG files I use for the projects I make in my SVG Library. These SVG files work with Cricut and Silhouette machines, as well as many others. This library is open to everyone and is free! You can access the library here. Look for the file called Fall Scrabble Letters BA1666. It will be listed under the Fall category.
STEP 2: CUT AND WEED VINYL DESIGN
Open the design in your software program and the letters so they fit on your blocks. My blocks were about 3.25″ square and so I made the height of all the letters about 2.3″. Once you’ve resized the design, you can cut it with your machine. I used Oracal 651 in white for this project
When everything is finished cutting, remove the vinyl from your cutting mat and trim off any unused vinyl.
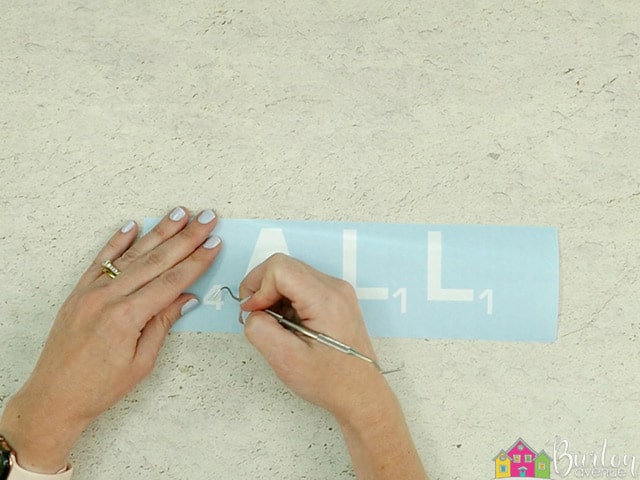
Weed away the excess vinyl from around the design.
Use the weeding tool to help remove the excess vinyl from inside the letters and numbers.
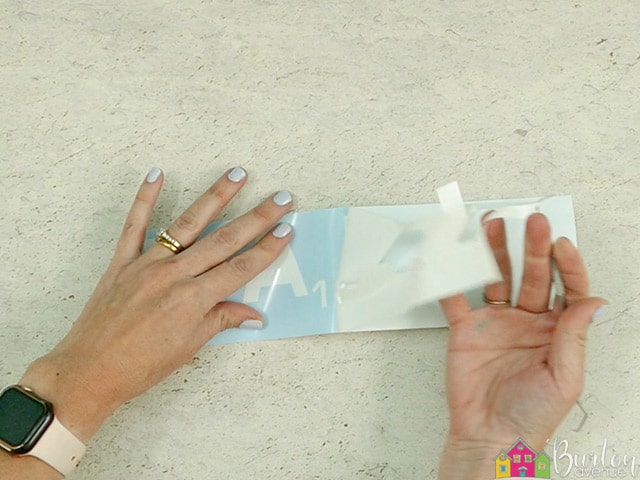
Cut a piece of transfer tape and place it sticky side up on your surface. Then place the vinyl on top of the transfer tape and smooth it down.
![]()
Rub over the designs firmly with your scraper tool.
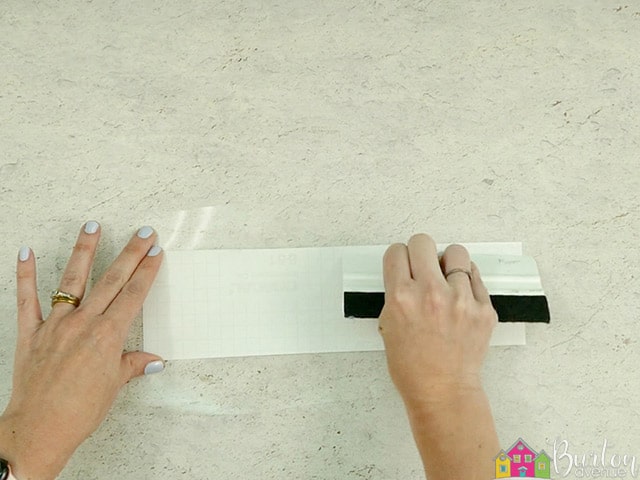
Then, trim off the excess transfer tape and vinyl backing and cut apart the letters.
![]()
Now that the vinyl is ready to go, let’s work on the wood pieces.
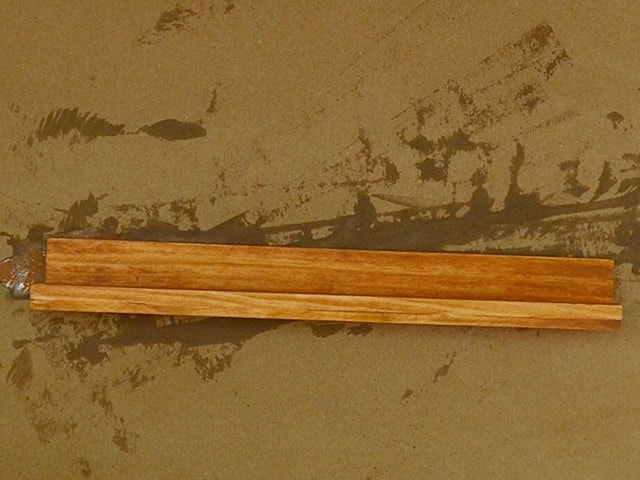
STEP 3: MAKE THE TRAY FOR THE TILES
For this project you’ll need 4 pieces of wood that measure around 3.5″ square. I used a 4″ piece of pine which measures closer to 3.5″ and then I cut off a little on each edge so all the edges were nice and straight.
You’ll also need a 14″ piece cut from a 3/8″ square wood dowel and 2 -14″ pieces cut from a thin 1.5″ piece of wood. I found some large paint sticks that worked perfectly for this.
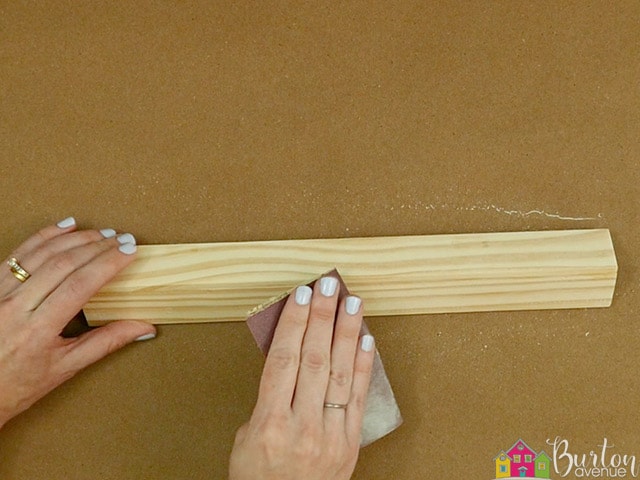
Use some sandpaper and sand over all the pieces of wood.
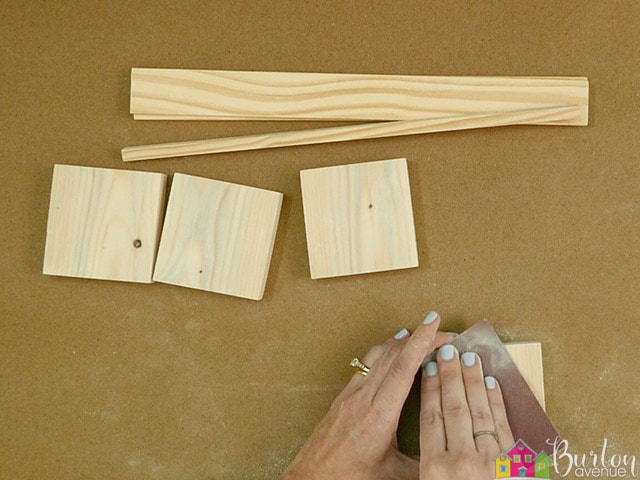
Now that everything is sanded, we’re going to work on the tray for the letters. Grab the two thin pieces of wood. Add some good glue on the bottom of one of the strips.
Place that strip on top of the other so the edges match up. Wipe away any excess glue with a wet paper towel. Let those pieces dry for about 10 minutes.

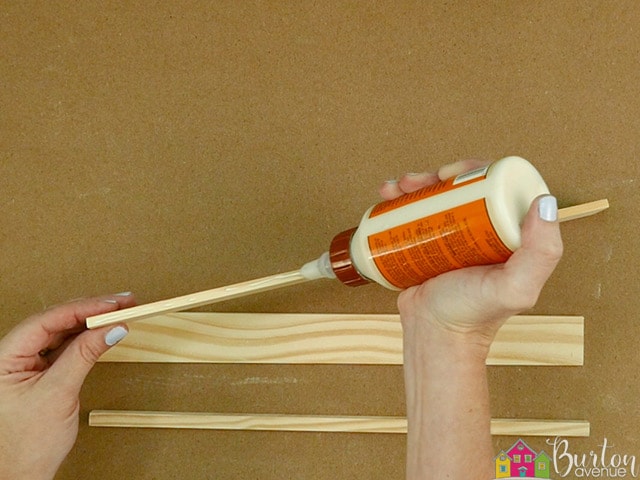
Next, grab the square dowel and add some glue onto one of the edges.
Then, place that on the thin piece of wood to form the lip of the tray. Match up the edges and press the pieces together. Wipe off the excess glue.

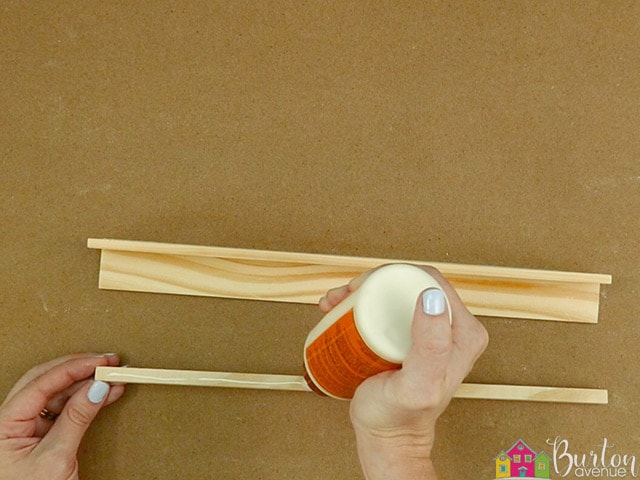
If you have clamps you can use them here. The clamps will probably push out more glue, so be sure to wipe that off, too.
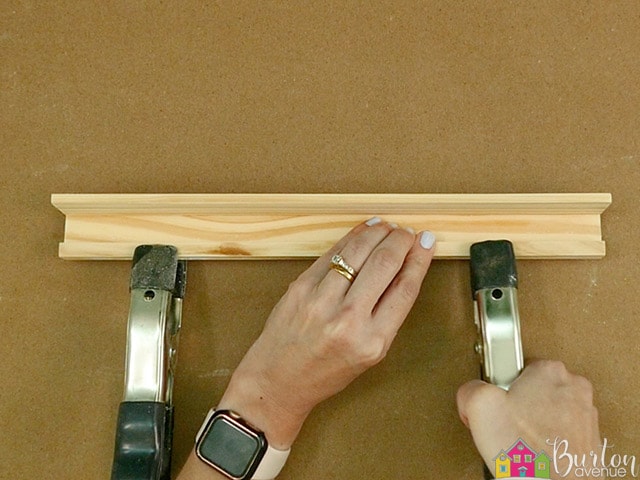
Once the glue has had time to dry, remove the clamps if you used them, and then sand down the front of the tray and back of the tray, where the two pieces meet.
Now you can stain the tray. Remove any sanding dust and then stain with the color of your choice. I like to use a foam brush to apply the stain.
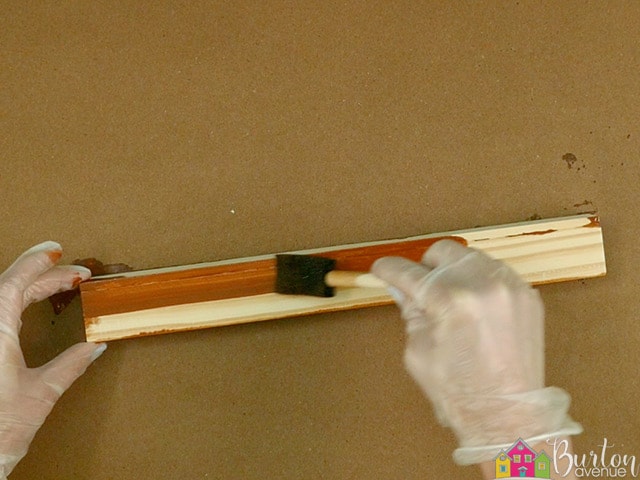
I usually apply the stain and wipe it right off with an old towel or blue shop paper towel. But if you’d like a darker color, you can let it sit for about 10 minutes before wiping.
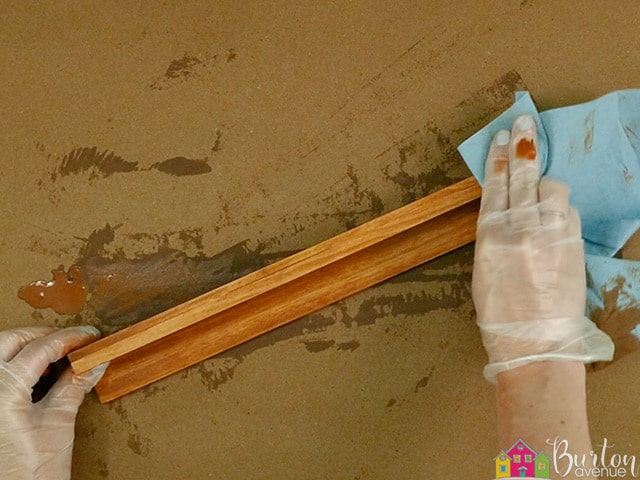
Let the tray dry for a couple of hours.
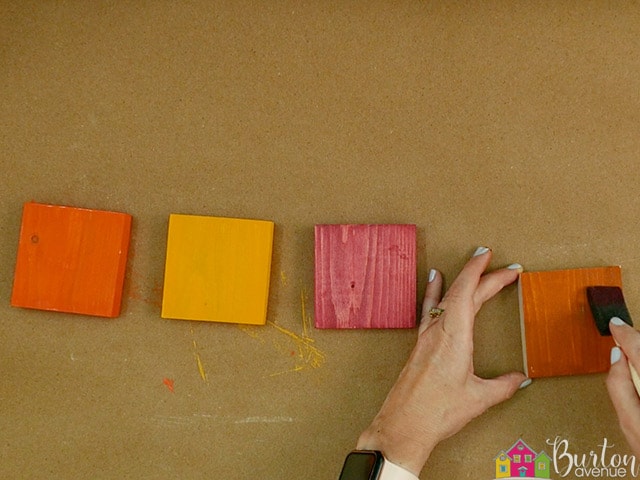
STEP 4: MAKE THE SCRABBLE TILES
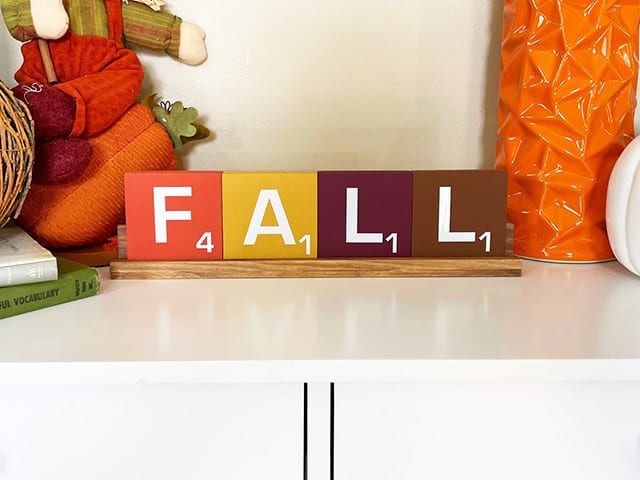
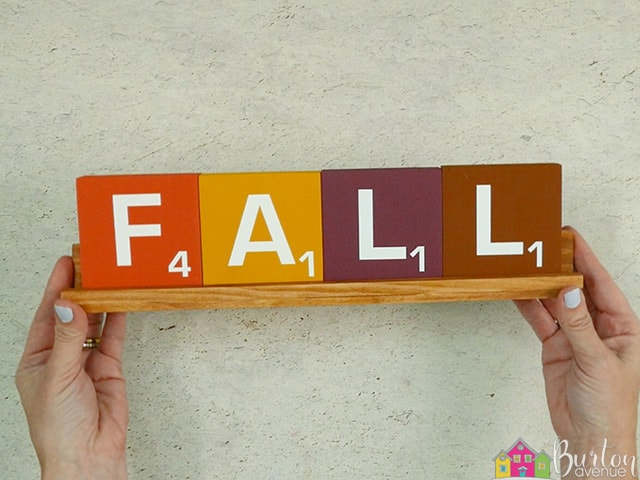
I chose 4 fall colors to paint the blocks, orange, yellow, burgundy, and brown. I painted the fronts and sides with 2-3 coats and then did just one coat on the back.
Decide what order you want the blocks to go in. Then, grab your vinyl letters and put a letter on each block.
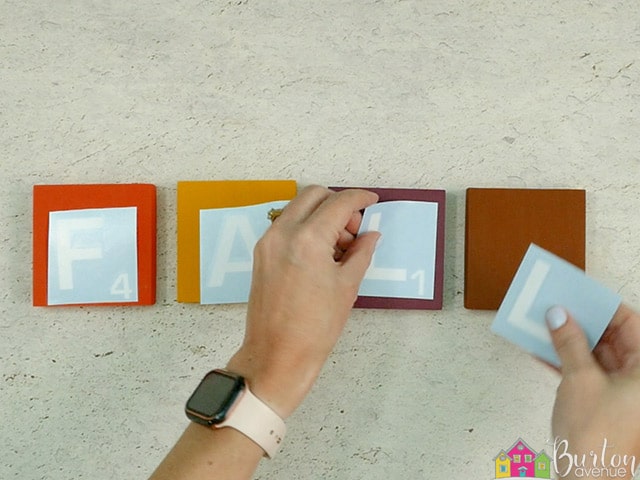
Take the letter F and pull off the vinyl backing.
Position the vinyl on the block so the bottom number is about 1/2″ from the bottom edge.
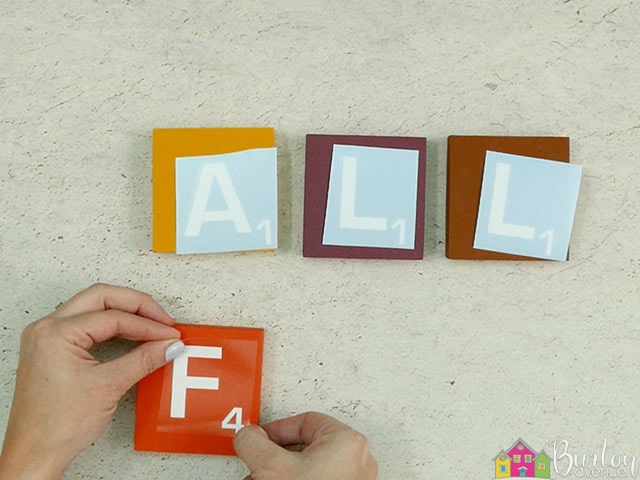
This is so the lip of the tray doesn’t cover the number.
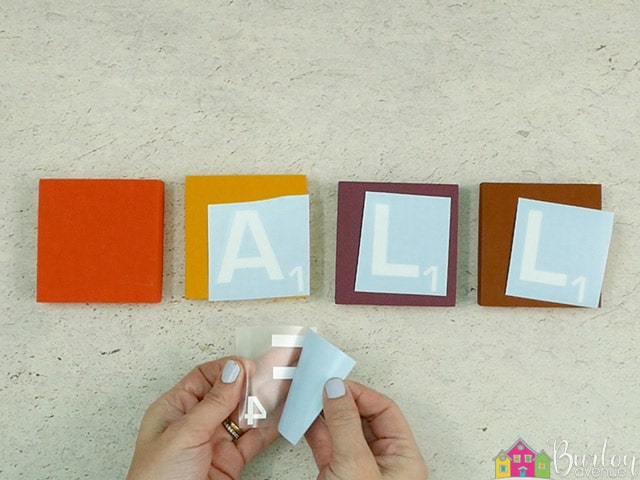
When you’re happy with the placement, press down on the vinyl. Rub over the letter with your scraper.
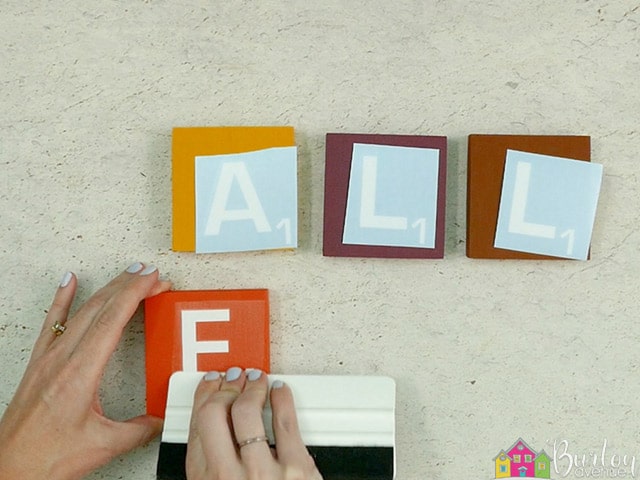
Then, pull off the transfer tape.
![]()
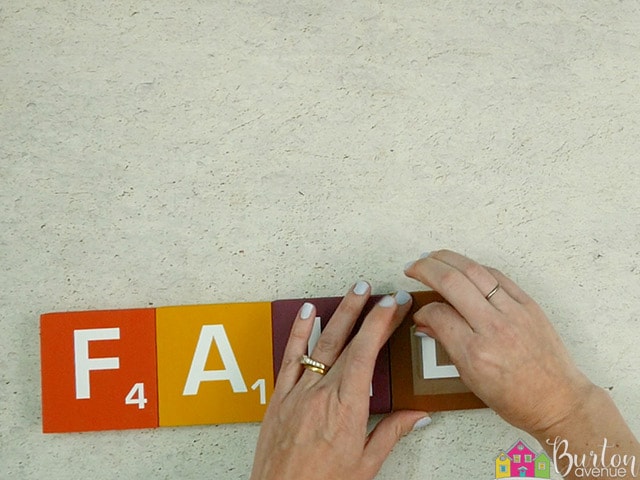
Repeat those steps with the other 3 letters.
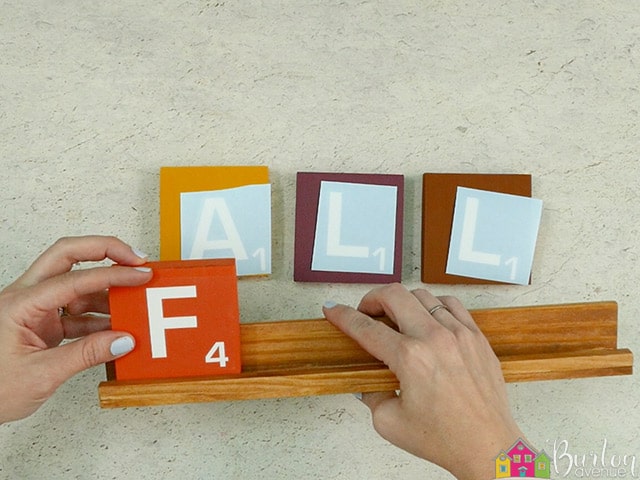
Once all the letters have been applied, you can place them in the tray.

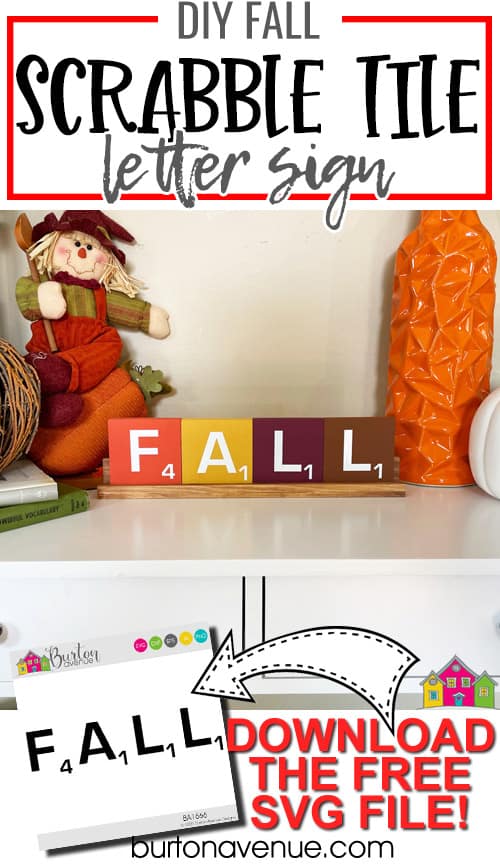
And that’s it, this project is finished. I just love how this DIY Fall Scrabble Letter Sign turned out.
Didn’t it turn out cute?

Want to make your own? Get the free cut file for this project in the resource library
This is such a cute and fun project. Your instructions and pictures are so detailed and clear, I think even I can make this!