
 This post contains affiliate links for your convenience (which means if you make a purchase after clicking a link I will earn a small commission but it won’t cost you a penny more)! Read my full disclosure policy.
HERE’S WHAT YOU NEED
- Clear Glass Plate (I found mine at Dollar Tree)
- Vinyl (I used stencil vinyl, but you can use any type of adhesive vinyl)
- Etching Cream
- Brush
- Gloves
- Application Tool
- Transfer Tape
- Weeding Tool
- Electronic cutter (cricut explore, silhouette or other cutter)
- Cut File (available for free in my resource library)
HERE’S WHAT YOU DO
STEP 1: DOWNLOAD THE FREE SVG FILE
The first thing you’ll need to do is get the free SVG file you’ll use for this project. I keep all the SVG files I use for the projects I make in my SVG Library. These SVG files work with Cricut and Silhouette machines, as well as many others. This library is open to everyone and is free! You can access the library here. Look for the file called Cookies for Santa. It will be listed under the Christmas category-25 Days of Craftmas 2019 – Day 9.
STEP 2: PREPARE VINYL DESIGN
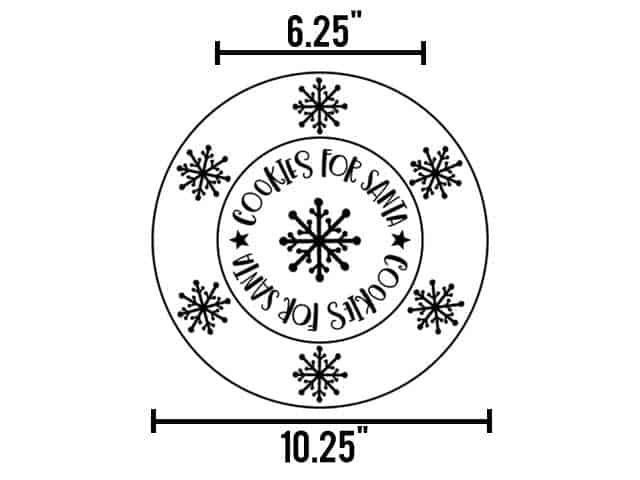
Open the design in your software program. Measure the diameter of your plate and draw a circle that size. My plate is 10.25″, so I sized my circle to be 10.25″ Now, if your plate has a brim, draw another circle (if your plate is flat, you can skip this step). To get the size of the second circle, measure the size of the brim and multiply by 2. Then you’ll subtract that number from the diameter of your plate. So, my brim measured 2″. Mulitply that by 2 (which is 4) and subtract from 10.25″ gave me 6.25″. So, 6.25″ is the size of my inner circle. Now, resize the design to fit inside the circles. You’ll want to leave the circles and cut them with your design to create a stencil.
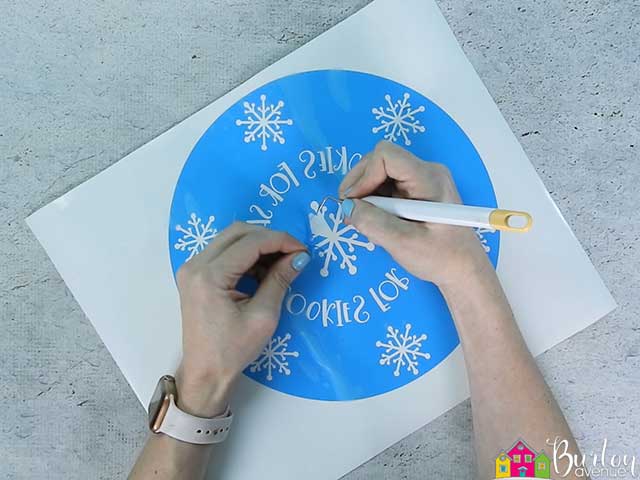
Since this will be etched on the bottom of the plate, the design needs to be mirrored. So, be sure to do that before cutting the stencil with your Cricut or Silhouette.
I used stencil vinyl for this project because it’s a little transparent, but it’s also a little hard to cut and weed. You can also use I have lots of it to use up, but you can also use any type of adhesive vinyl.
Once everything is cut, weed away the excess vinyl.
Cut a piece of transfer tape a little bigger than the design. Place the vinyl on the transfer tape and smooth it down with an application tool.![]()
Then, trim off the excess transfer tape.
![]()
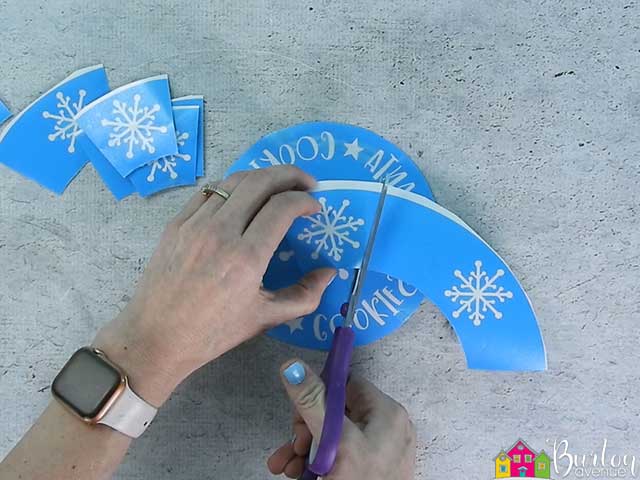
If you added a second circle for the brim, cut along that line to separate the snowflakes from the rest of the design.
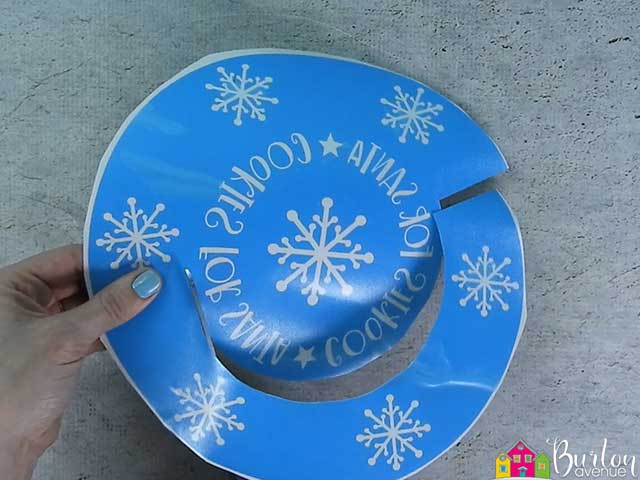
Then, cut apart the snowflakes.
STEP 3: APPLY VINYL TO THE PLATE
Start with the middle section. Firmly rub over the design to help it stick to the transfer tape. Then, flip the design over and slowly pull off the vinyl backing.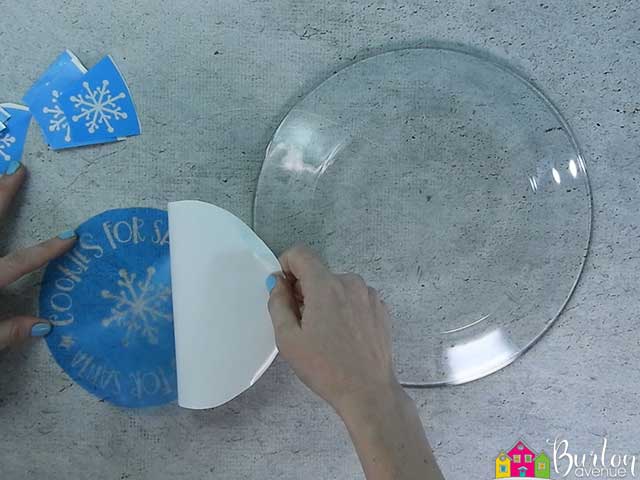
Center the design on the bottom of the plate. Rub over the vinyl with your scraper.

Slowly pull off the transfer tape.
![]()
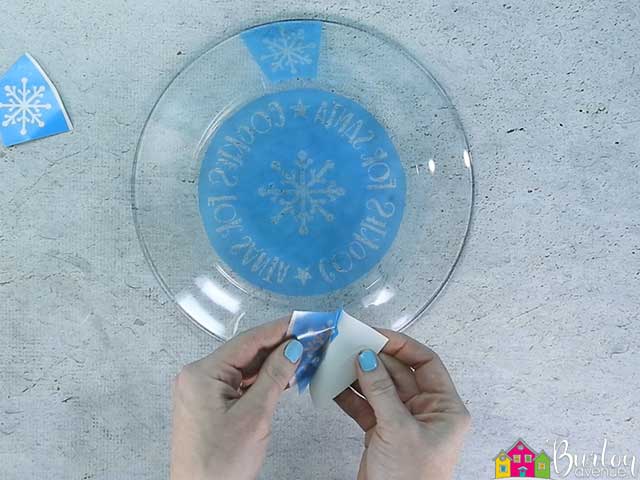
Now, do the same thing with the snowflakes. Try to space them evenly around the plate.
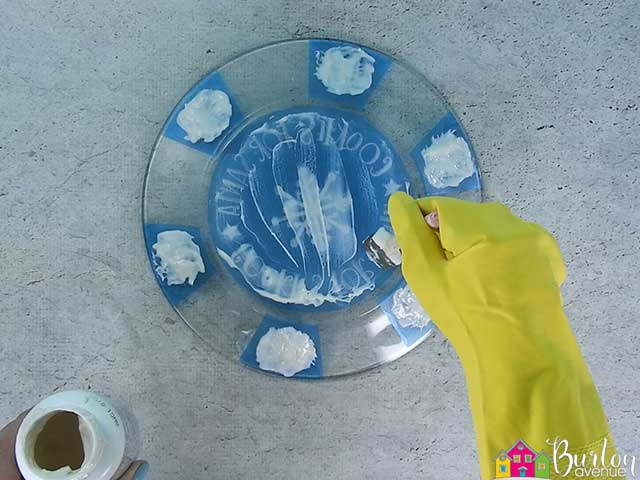
STEP 3: APPLY ETCHING CREAM
Apply a thick layer of etching cream over the design. Just kind of dab it on. Don’t brush back and forth. It should be thick enough that you can’t really see the stencil through the cream. If you have gloves, you should wear them. If you don’t, make sure you don’t touch the cream at all.
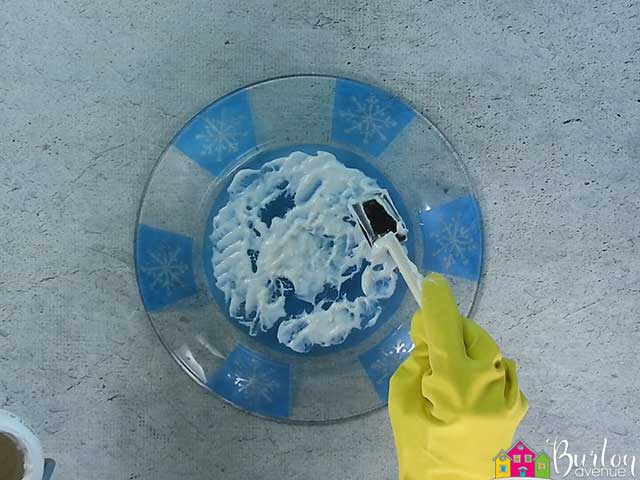
Keep the etching cream inside of the stencil. If it happens to go outside of the stencil, wipe it off as quick as possible.
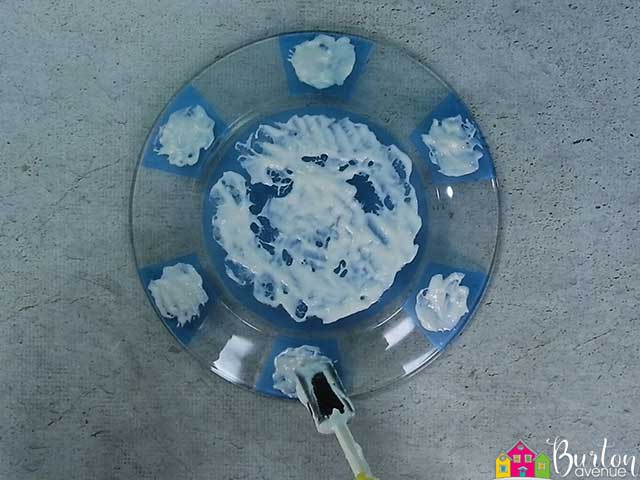
When I use etching cream, I put it on and let it sit for about 2 1/2 minutes. Then, I go back over the design and move the etching cream around a bit, just to make sure the cream has gotten everywhere. Then, I let it side for another 2 1/2. minutes. When the time is up, I like to scrape as much etching cream off as possible and put it back in the bottle.
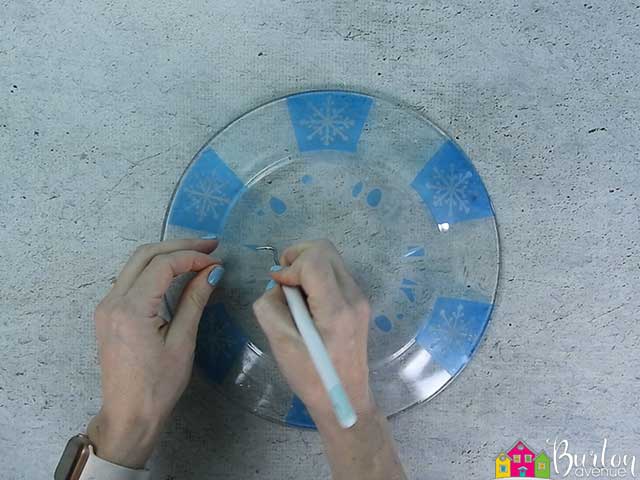
Now, rinse off the etching cream. Use plenty of water and wash thoroughly.
Once you’ve washed off the etching cream, you can pull off the stencil. At first, the design will be a little hard to see. But, once the plate dries, the design will show up better.
And that’s it. Now you’ve got a cute plate for Santa’s cookies. Hopefully, he’ll love it so much, he’ll bring you lots of presents 😉

Did you enjoy this post? Help spread the word! Share this post on your favorite Pinterest board. Thanks!
Want to make your own? Get the free cut file for this project in the resource library