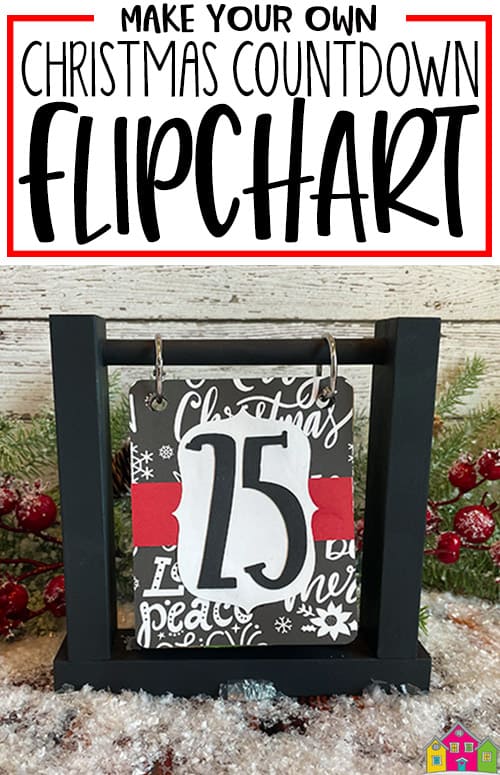
This flipchart Christmas countdown sign is such a fun and creative way to count down the days until Christmas! Each numbered card flips over to reveal the next, making it an interactive and eye-catching decoration. You can customize each card with different papers and colors for a unique, handmade touch. Read on for the full tutorial.
 This post contains affiliate links for your convenience (which means if you make a purchase after clicking a link I will earn a small commission but it won’t cost you a penny more)! Read my full disclosure policy.
HERE’S WHAT YOU NEED
-
- 12 Sheets of Cardstock (I used this printed pack)
- Glue
- Small Book Rings (1″ size)
- 1/2″ Wood Dowel
- 1″x2″ for the Stand
- Acrylic Paint & Brush
- Drill & 1/2″ Drill Bit
- Wood Glue
- Electronic cutter (cricut explore, silhouette or other cutter)
- Cut File – Christmas Countdown Flipchart BA1819 (available for free in my resource library)
HERE’S WHAT YOU DO
STEP 1: DOWNLOAD THE FREE SVG FILE
The first thing you’ll need to do is get the free SVG file you’ll use for this project. I keep all the SVG files I use for the projects I make in my SVG Library. These SVG files work with Cricut and Silhouette machines, as well as many others. This library is open to everyone and is free! You can access the library here. Look for the file called Christmas Countdown Flipchart BA1819. It will be listed under the Craftmas 2021 Category-Day 4.
STEP 2: CUT OUT AND ASSEMBLE THE CARDSTOCK PIECES
Open the design in your software program. Resize the width of the design to 11.5″ wide and leave the height proportional.
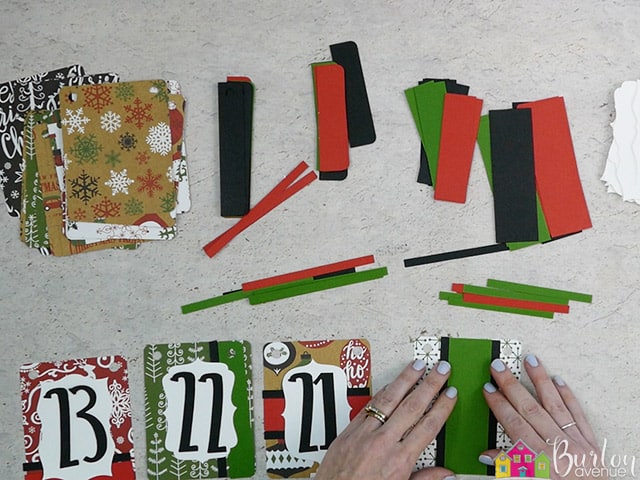
In the file, you’ll see there are several different colors in the design. Each color represents a sheet of cardstock you’ll be cutting. There are large rectangles that are different shades of green. I cut those out of printed Christmas cardstock.
Next are three sections in shades of reds and pinks. I cut those out of solid red, green, and black, which coordinated with my printed cardstock.
Then, there are three sections of gray shapes. I cut those out of white cardstock.
Finally, there are black numbers that I cut out of black cardstock.
I walk you through all the details of the file in the video above. So, if you’re unsure of what anything is, be sure to check it out.
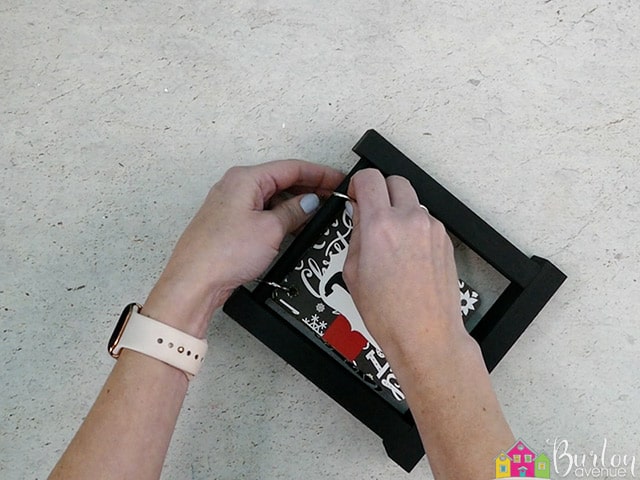
Once everything has been cut, separate all the different pieces into piles.
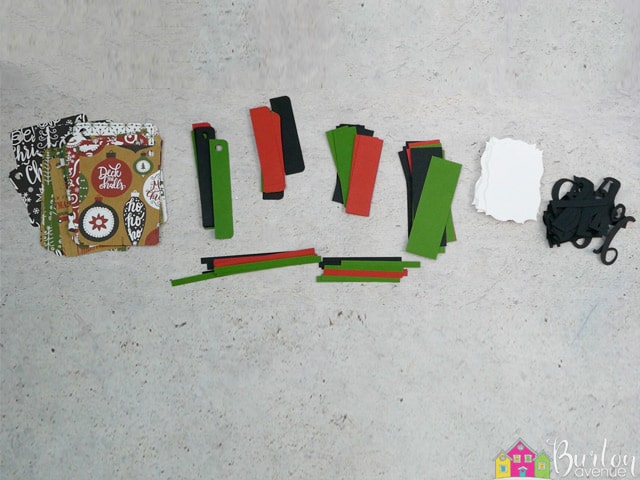
For each number, you’ll want to use a background rectangle, 1-3 rectangle pieces, 1 decorative frame, and the number.
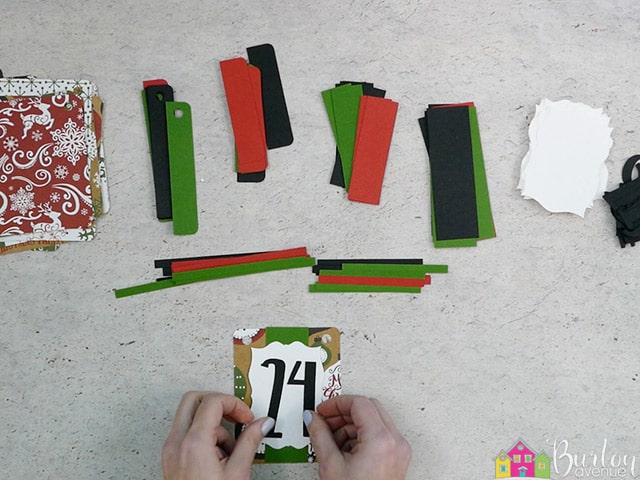
You can be creative with how you arrange and add the rectangles pieces. I grabbed all the pieces and arranged them on the background just to make sure I liked the look, then I glued everything into place.
You should be able to make numbers 1 – 25 and there will probably be leftovers of most of the pieces.
Now that the numbers are done, let’s work on the stand.
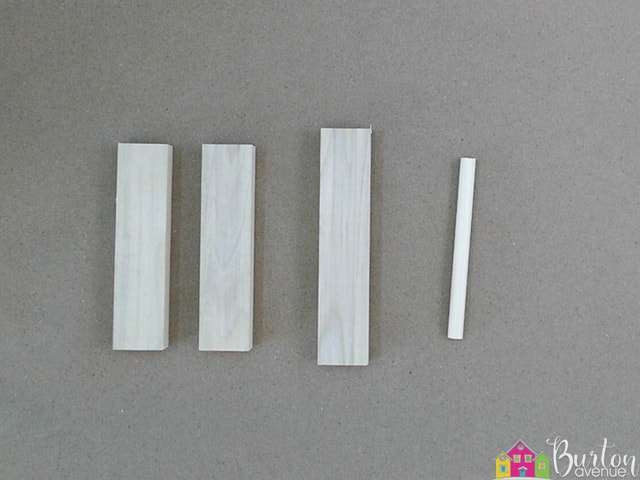
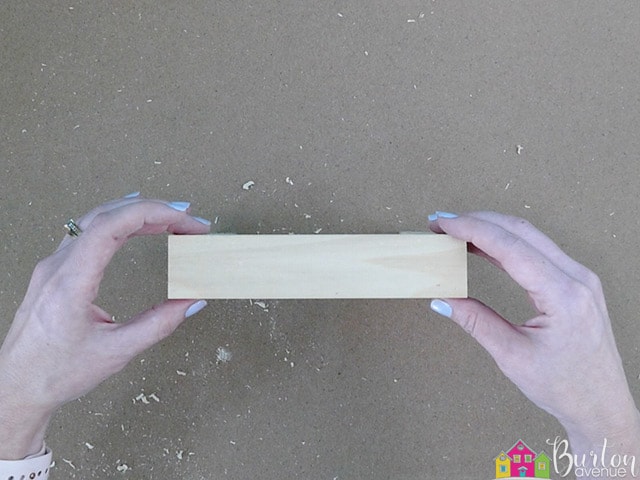
STEP 3: MAKE THE STAND
The stand is actually pretty easy to make.
You’ll need 2-6″ pieces and 1-7″ piece cut from a 1″ x 2″. You’ll also need 1-5.5″ piece cut from a 1/2″ wooden dowel.
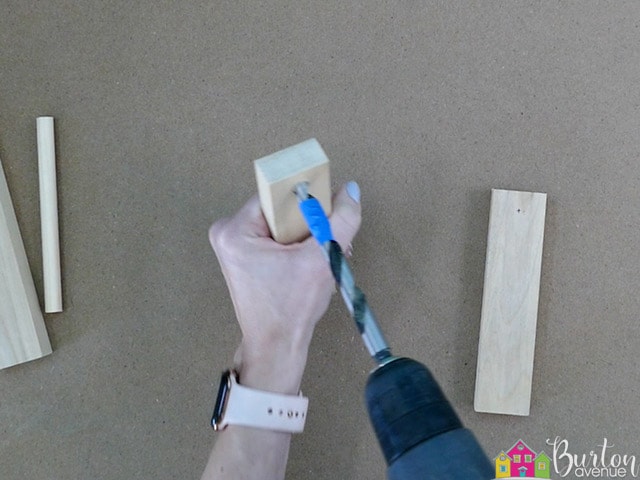
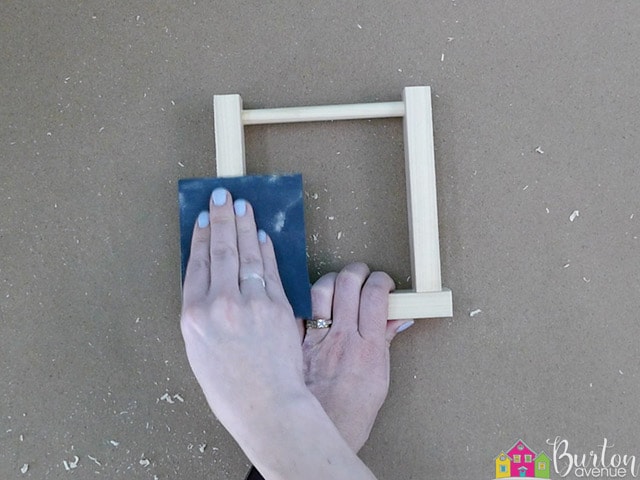
Make a mark on both of the 6″ pieces 1/2″ down from the top and 3/4″ over from the edge.
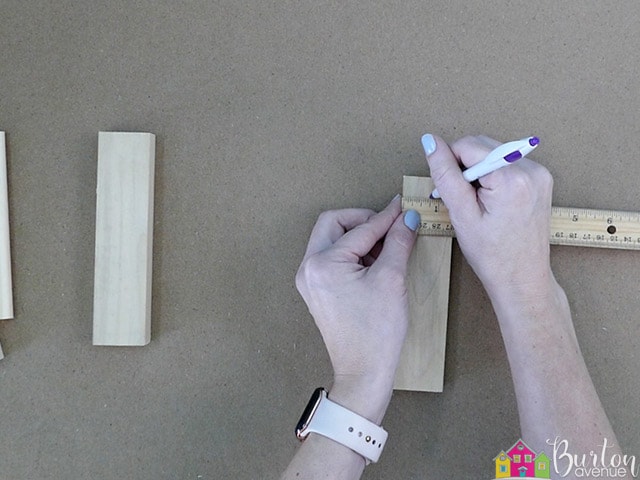
Grab your drill bit and place it over the top of the 6″ piece to figure how far you can drill into the wood.
Wrap a piece of masking tape around the drill bit to set the depth. You’ll know to stop drilling when the tape hits the wood.
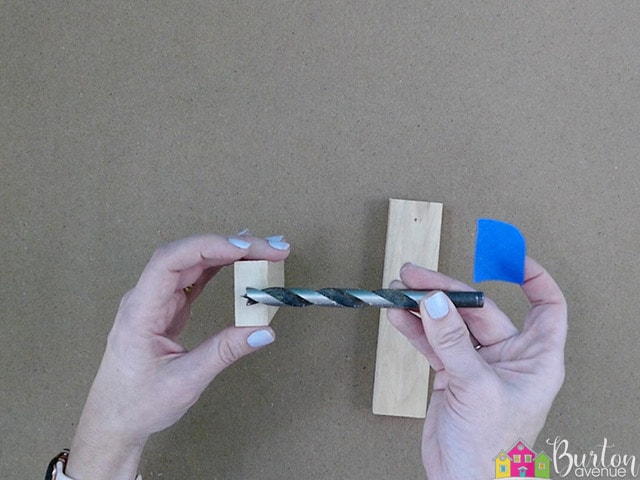
Now, drill a hole into each of the pieces of wood right on the marks you made. Your hole should be at least 1/4″ deep.
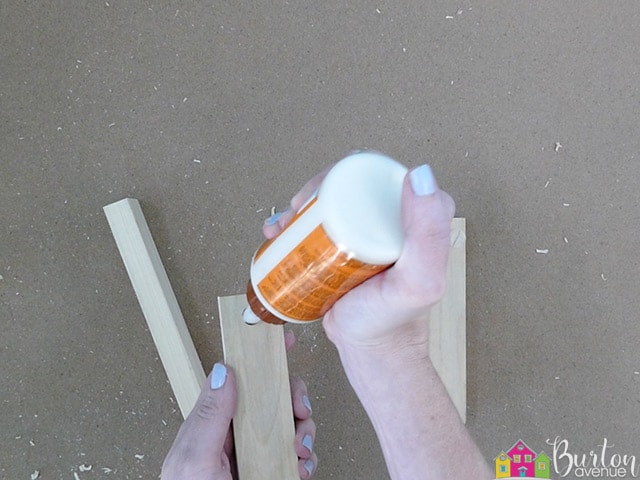
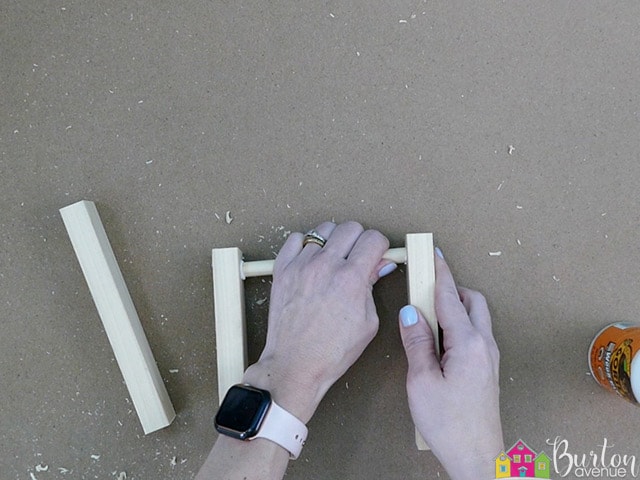
Put the dowel in the holes and make sure everything fits.

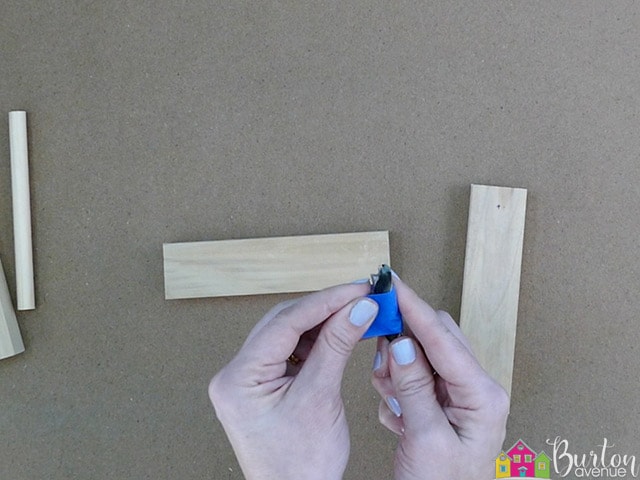
Then, use some wood glue to the dowel in place. After a few minutes, you can wipe off any excess glue.
Next, add some glue onto the bottoms of the sides and then attach the bottom piece.
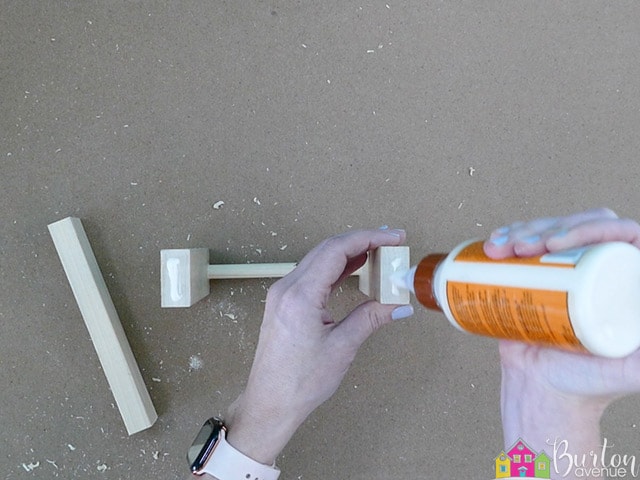
Let the glue dry for a bit, and then wipe off any excess glue and then give the entire stand a light sanding.
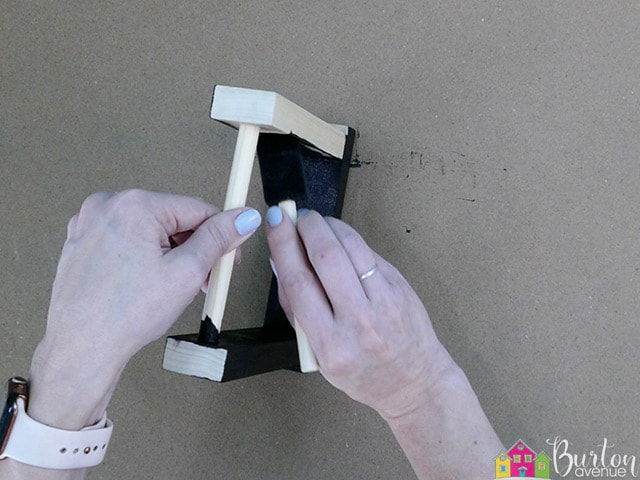
Now you can paint the sign black. You’ll probably need to do a couple of coats.
STEP 4: ASSEMBLE THE FLIPCHART
Once the black paint is completely dry, you can assemble the countdown sign.
I put the number 25 on top and then put the rest of the numbers behind that.
Thread some book rings through the holes of the numbers.
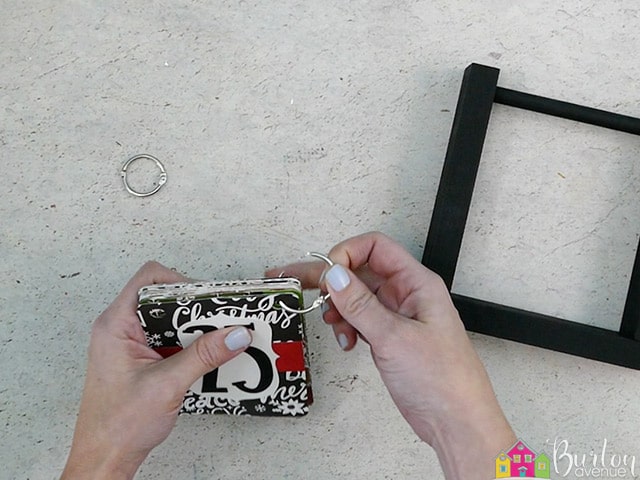
Then, clamp them around the wooden dowel.
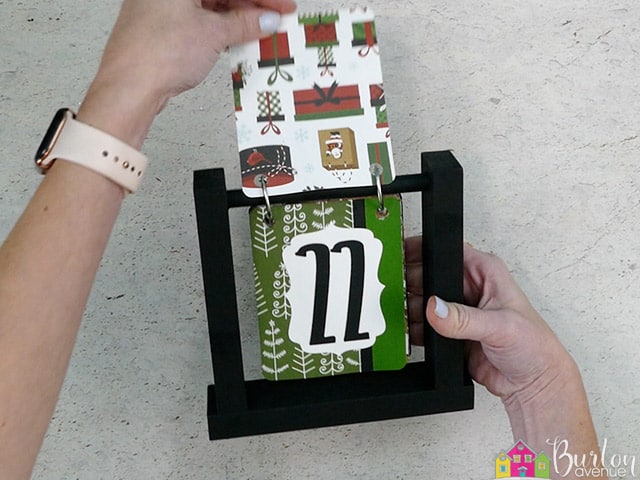
When each day is over, you can flip the number to the back until you get to day 1.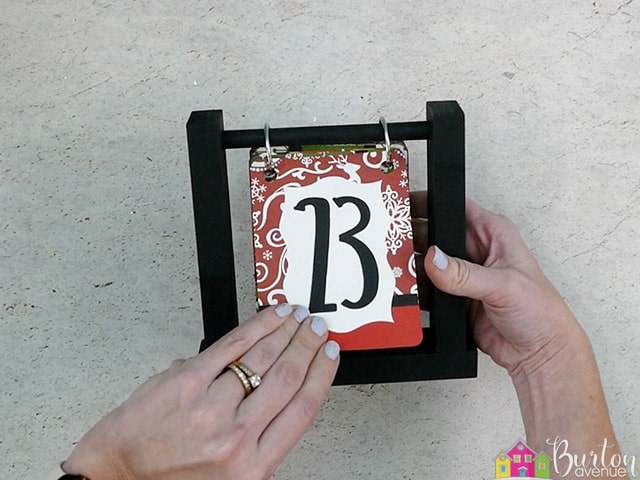
Did you enjoy this post? Help spread the word! Share this post on your favorite Pinterest board. Thanks!