Here’s what you need:
– Wood (I used pine)
– Vinyl for stencil
– Transfer Tape
– Paint and brushes
– Sandpaper
– Staining Medium (Optional)
– Bracket for Hanging
– Router (Optional)
– Electronic cutter (cricut explore, silhouette or other cutter)
– Cut File (see link below)
Disclosure: I was not compensated for this post, but will earn a small percentage for sales as an affiliate. As always, all opinions are 100% my own.
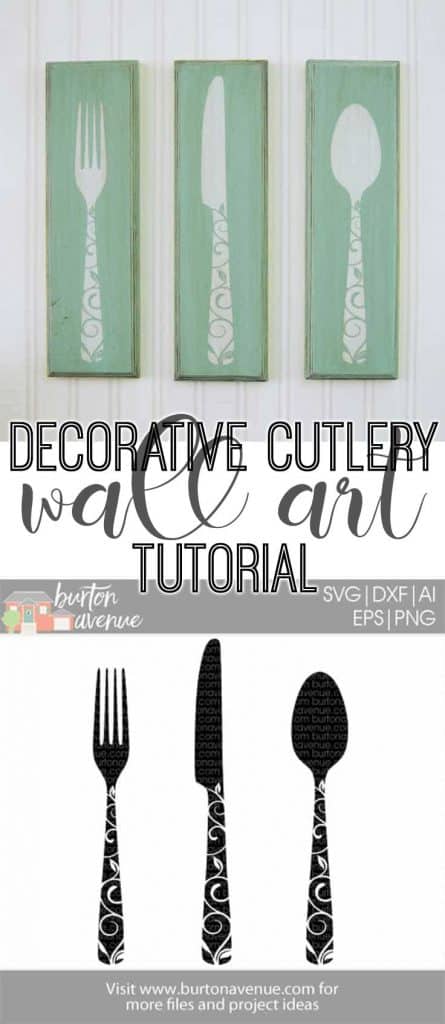
- Cut your wood down to size. My pieces of wood are about 12″ x 3.5″. I used a router to add a decorative edge. Paint the base coat white.

2. Cut and weed your vinyl. After the paint is dry, use transfer tape to apply the vinyl to the wood.

3. Paint the top coat over the vinyl decal.

4. After the paint dries, carefully pulled up the vinyl.

5. To distress, lightly sand the edges.

6. Mix some staining medium and brown paint and paint over the top. Wipe off the excess with a paper towel or rag.

7. Add a bracket for hanging and repeat with a knife and fork design.
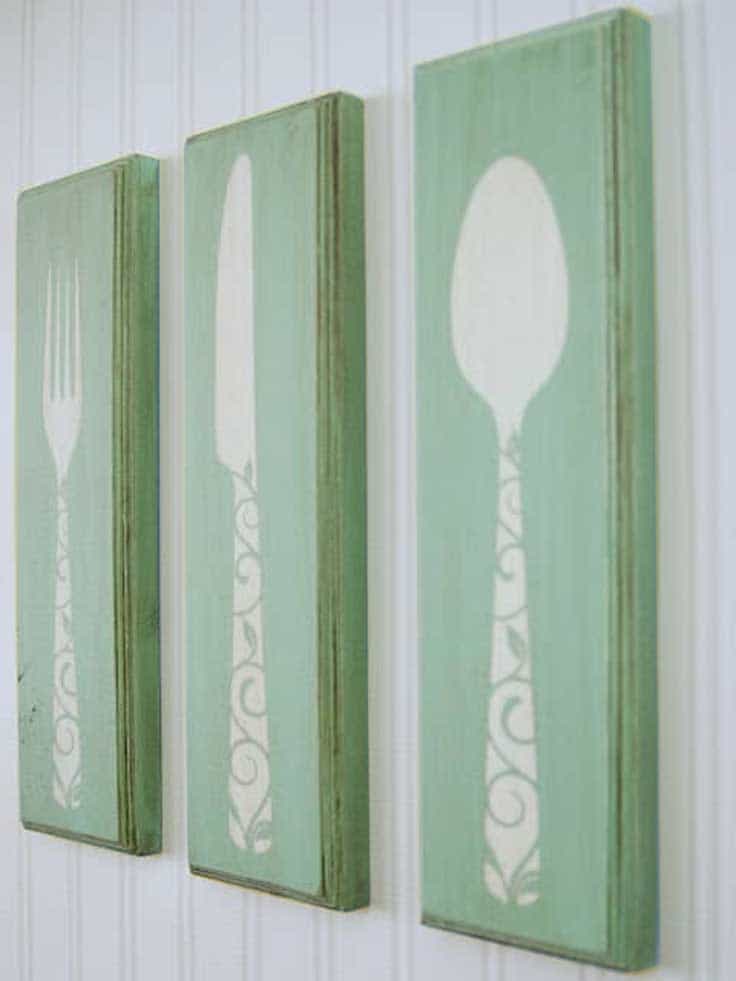
Now, I have some fun original artwork for my kitchen!

Want to make your own? You can purchase the cut file I used for this project below.

Thank you for being so generous, I love your designs.
I love this idea! Now It just gotta find somewhere in my kitchen to put it!
What a super project I love it…thank you for sharing it with us…!!
Those are adorable…I could totally see them in my kitchen. 🙂
These are so cute! I love the vintage look of them!
These are so cute! I love the vintage feel of them!
I have a lin party going on right now if you have a chance to stop by and share! : )
http://cherishedbliss.com/2013/09/moonlight-mason-jars-21.html
Super cute! I can’t wait to make them for our kitchen!! Thanks so much for the file, Angie!
love everything that comes from you! the tutorials are such a bonus–keep them coming. Thanks
I love this! Would love more information on how to use a router! The extra detail it adds is amazing!!!