This Dry-Erase Christmas Countdown Plate is one of the easiest holiday projects you can make! Since it’s dry-erase, you can write and update the countdown number every day—no messy paints or wood cutting required. All you need is a plate (or any smooth surface like a frame, mirror, or whiteboard) and some festive vinyl. It’s a quick, mess-free DIY Christmas advent craft that’s both functional and fun for the whole family. Read on for the full tutorial.

HERE’S WHAT YOU NEED
- Glass Plate (The one I used was a 10.5″ white plate)
- Vinyl (I used Real Red and Lime-Tree Green)
- Christmas Ribbon and Glue (Optional)
- Transfer Tape
- Painters Tape
- Electronic cutter (cricut explore, silhouette or other cutter)
- Cut File (available for free in my resource library)
HERE’S WHAT YOU DO
The first thing you’ll need to do is get the free SVG file you’ll use for this project. I keep all the SVG files I use for the projects I make in my SVG Library. These SVG files work with Cricut and Silhouette machines, as well as many others. This library is open to everyone and is free! You can access the library here. Look for the file called Days Until Christmas for Plate. It will either be listed under the Christmas category-25 Days of Craftmas 2018 – Day 2.
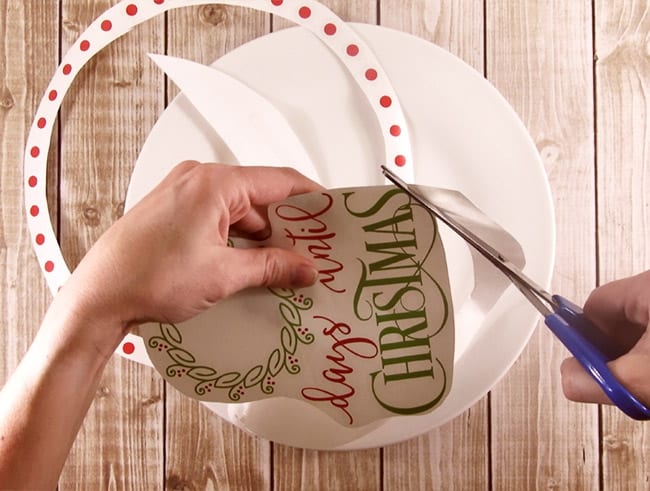
Clean the glass plate to remove any dirt or fingerprints. While the plate dries, layout the design in your software. I used a 10.5″ plate, so I sized the design to be 9.7″ round. Cut out the two colors of vinyl, weed away the excess vinyl and apply the transfer tape.
Do you need help cutting this multi-color design? Check out this step by step tutorial for Silhouette Users here and for Circut Users here.
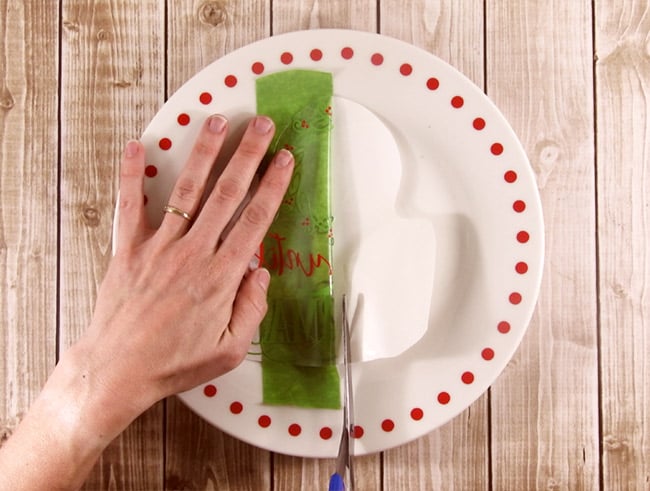
The curves of the plate can make applying vinyl a little bit tricky, especially if you’re adding a border around the brim. So, to make things a little easier, cut the border apart and the rest of the design. Then, trim off as much backing as you can.
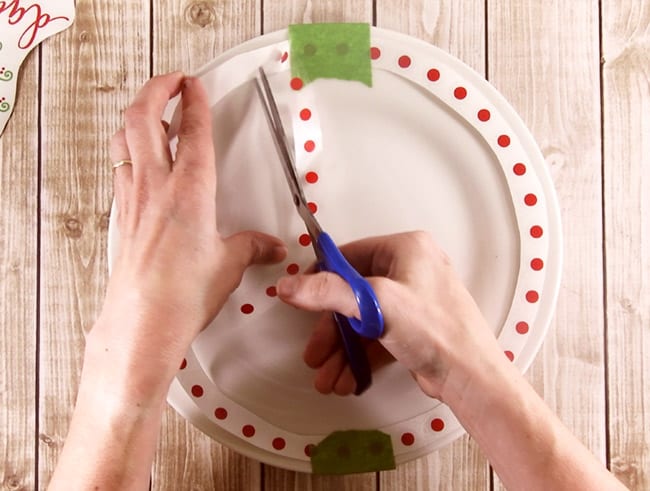
Have you ever heard of the hinge method? You use tape to act as a hinge when applying your vinyl. The tape keeps everything straight and centered while you’re applying the vinyl. We’ll be using this method to apply the vinyl to the plate.
Center the border onto the plate and then use painters tape to keep it in place.

Fold the vinyl over the tape and then cut off and remove the backing.
Then, press the vinyl into place, but don’t remove the transfer tape.
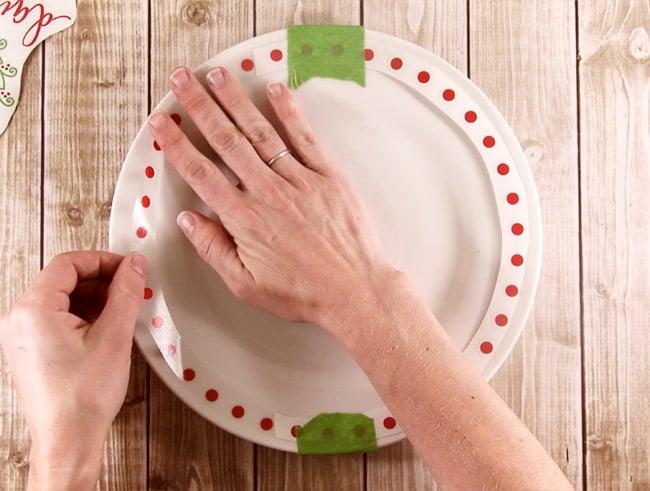
Remove the tape and repeat the process with the other side. Rub over the vinyl several times so it sticks to the plate and then remove the transfer tape.
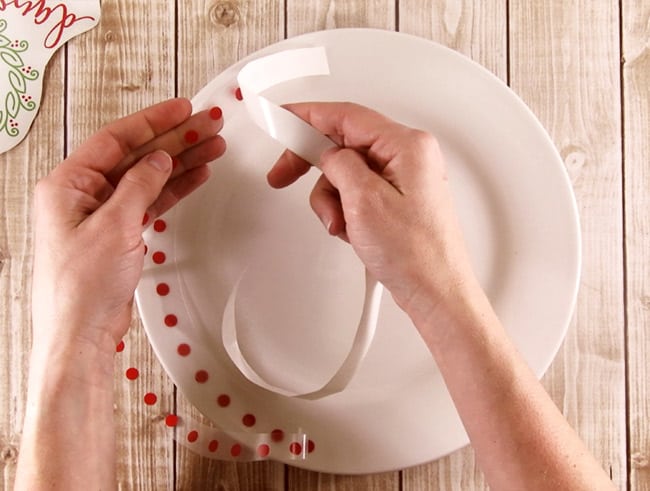
Use this method to apply the center design.
Once the vinyl is in place, you can add a decorative bow to the top. Now your plate is ready to start counting down the days until Christmas.
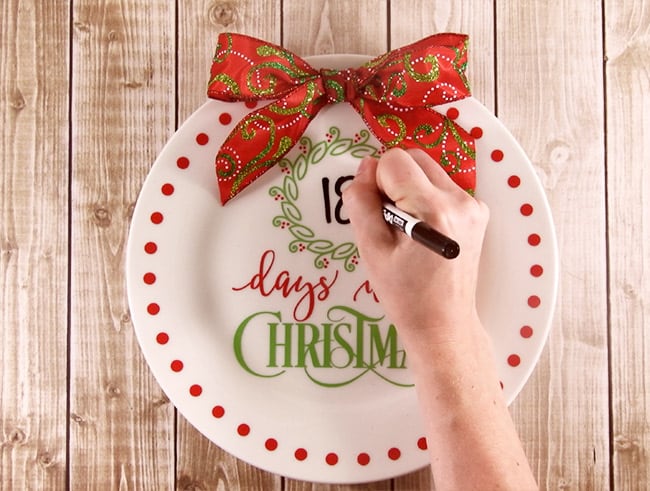
Use a plate holder to display your new countdown plate! Cute and easy, right!

Did you enjoy this post? I’d love for you to pin it to your favorite pinterest board.

This cute project makes me want to start working on Christmas DIY’s, but then I’d have to stop doing all the cute fall projects I’m in the middle of using your cut files)! Next year I need to start earlier! LOL! Thanks for all the wonderful inspiration!