
Burton Avenue
SVG files, tutorials and more for your electronic cutter.
 This post contains affiliate links for your convenience (which means if you make a purchase after clicking a link I will earn a small commission but it won’t cost you a penny more)! Read my full disclosure policy.
HERE’S WHAT YOU NEED
-
- Clear Ornament (Found at Dollar Tree)
- Transparency Sheet
- Gold Shreds
- Gold Ribbon
- Weeding Tool
- Printer
- Electronic cutter (cricut explore, silhouette or other cutter)
- Cut File (available for free in my resource library)
How to Make a DIY Nativity Floating Ornament with Cricut
STEP 1: DOWNLOAD THE FREE SVG NATIVITY FILE
The first thing you’ll need to do is get the free SVG file you’ll use for this project. I keep all the SVG files I use for the projects I make in my SVG Library. These SVG files work with Cricut and Silhouette machines, as well as many others. This library is open to everyone and is free! You can access the library here. For this project, you’ll want to download 2 files. Look for files called Floating Ornament and Unto us a Child is Born. They will be listed under the category-Craftmas 2020 – Day 9.
STEP 2: PREPARE THE CLEAR ORNAMENT INSERT
Open the design in your software program. Size the template to fit in your ornament. I’m using a 4″ ornament from Dollar Tree, so I sized the template to 3.7″. Then, add the design onto the template. Print the design on clear tranparency sheets and then use your machine to cut them out.
Remove the circles from the cutting mat.
![]()
Grab an ornament and remove the metal hanger. I put the ornament in a cup to keep it from rolling.
Then, take one of the transparency circles and roll it up.
![]()
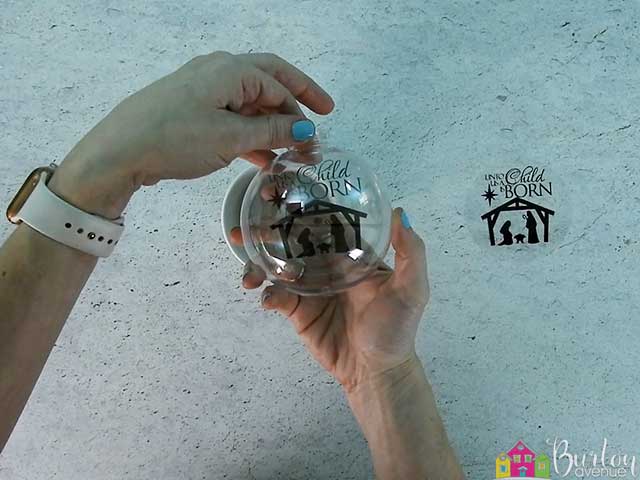
Make sure the tab on the transparency sheet is at the top and place the rolled up sheet inside the ornament.
![]()
Once it’s in the ornament, the transparency sheet should unroll and flatten out.
STEP 3: ADD GOLD SHREDS AND FINISHING TOUCHES
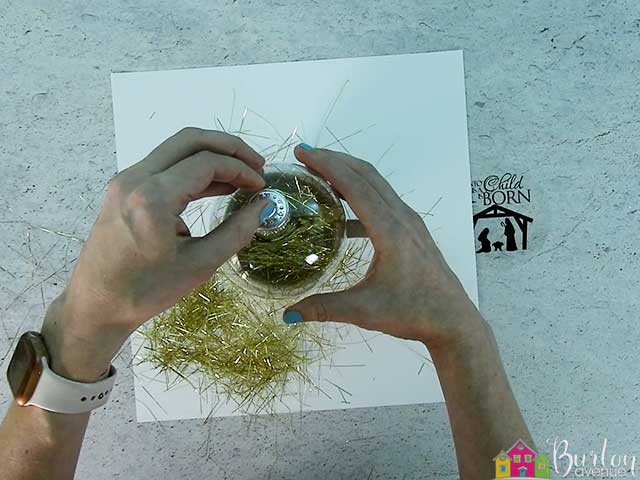
Now we’re going to fill the ornament with some gold shreds. I used these gold icicles and cut them into small pieces about 1″

Grab some of the metallic shreds and stuff them inside the ornament. You’ll want to put some in front of the transparency sheet and some behind it.

After you’ve added the shreds, tap the ornament to help the shreds fall to the bottom of the ornament. Then, replace the metal hanger.
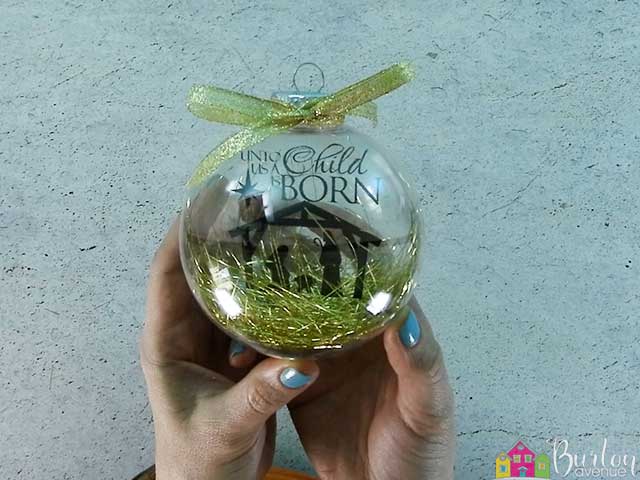
Finally, tie on a gold metallic bow.

These ornaments turned out so pretty! They would make a great gift for family and friends or would look great hanging on your tree. You can also use this technique to add a variety of different designs to your transparency sheet.
Did you enjoy this post? Help spread the word! Share this post on your favorite Pinterest board. Thanks!

Want to make your own? Get the free cut file for this project in the resource library
Thank you so much for this file and tutorial. I’m hoping I can get my printer to print on this material.