 This post contains affiliate links for your convenience (which means if you make a purchase after clicking a link I will earn a small commission but it won’t cost you a penny more)! Read my full disclosure policy.
HERE’S WHAT YOU NEED
-
- Valentine Colored Cardstock
- Socks
- Small Elastics
- Pom Pom Balls
- Straight Pins
- Cello Bag & Ribbon (Optional)
- Electronic cutter (cricut explore, silhouette or other cutter)
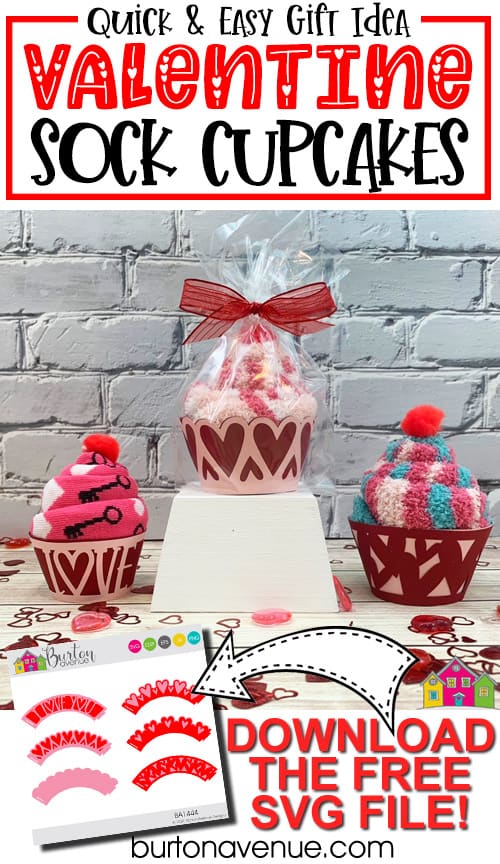
- Cut File – Valentine Cupcake Wrappers BA1444 (available for free in my resource library)
HERE’S WHAT YOU DO
STEP 1: DOWNLOAD THE FREE SVG FILE
The first thing you’ll need to do is get the free SVG file you’ll use for this project. I keep all the SVG files I use for the projects I make in my SVG Library. These SVG files work with Cricut and Silhouette machines, as well as many others. This library is open to everyone and is free! You can access the library here. Look for the file called Valentine Cupcake Wrappers BA1444. It will be listed under the Valentine’s Day category.
STEP 2: MAKE CUPCAKE WRAPPERS
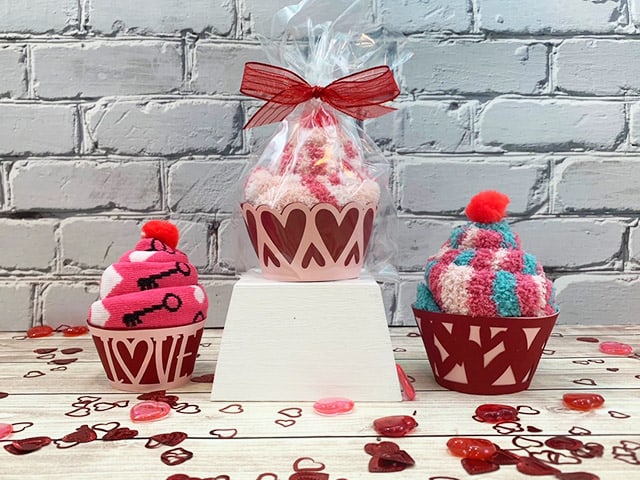
Open the design in your cutting software. Size the design to fit your sock cupcakes I resized the wrappers for my fluffy socks to 9.5″ and the wrappers for my regular socks to 8″. Once everything is sized correctly, cut out the pieces with your Cricut or Silhouette. I used red and pink cardstock.
Once the cardstock is finished cutting, remove it from the cutting mat. It’s best to flip over the mat and gently bend it over until the cardstock releases. This way, the cardstock shouldn’t get bent.

To make the wrapper, you’ll need to fold down the top portion of the tab.
Form a circle with the wrapper and place the bottom of the tab in the slit, followed by the top folded portion.

Once the tab is inside of the slit, you can unfold the top of it. Repeat with the other section of the wrapper.

Place the inside layer inside of the out layer and match up the seams. The layers should stay together, but if they don’t you can add a bit of glue to keep them in place.
STEP 3: LET”S MAKE CUPCAKES!
Grab a pair of socks and fold each sock in half lengthwise.

Place one sock over the other but separate the toes about 1/2″.

Begin rolling the socks from the toes to the ankle in a downward motion.

As you roll, each layer should be about a quarter of an inch lower than the previous layer. This will help create the look of frosting. Make sure the socks stay folded in half and roll until you have reached the other end of socks.

Take a rubber band and secure the socks at the bottom of your cupcake.

Place your socks in the wrapper and adjust the socks until they look good.

Add a fake cherry to the top by placing a straight pin through the center of a pompom ball. 
Then, just pin it to the top of the sock.

You can also wrap these in a cellophane bag to complete the gift!

And that’s it! Isn’t that a fun and quick gift you can make?

Did you enjoy this post? Help spread the word! Share this post on your favorite Pinterest board. Thanks!