
HERE’S WHAT YOU NEED
-
- 5 – 8″ pieces (cut from a 1″ x 2″ which actually measures .75″ x 1.5″)
- 1 – 7.5″ piece (cut from a 1″ x 2″ which actually measures .75″ x 3.5″)
- Acrylic Paint (Navy, Red, Creamy White, Brown)
- Paint Brushes
- Adhesive Vinyl (Color Doesn’t Matter)
- Transfer Tape
- Weeding Tool
- Scraper
- Burlap
- Glue & Sandpaper
- Drill and small drill bit
- 18 Guage Wire
- Sharpie Marker
- Electronic cutter (cricut explore, silhouette or other cutter)
- Cut File – America BA1559 (available for free in my resource library)
HERE’S WHAT YOU DO
STEP 1: DOWNLOAD THE FREE SVG FILE
The first thing you’ll need to do is get the free SVG file you’ll use for this project. I keep all the SVG files I use for the projects I make in my SVG Library. These SVG files work with Cricut and Silhouette machines, as well as many others. This library is open to everyone and is free! You can access the library here. Look for the file called America BA1559. It will be listed under the Patriotic category.
STEP 2: CUT AND WEED VINYL DESIGN
Open the design in your software program and resize it to 7.25″ wide and leave the height proportional. Once you’ve resized the design, you can cut it with your machine.
When everything is finished cutting, remove the vinyl from your cutting mat and trim off any unused vinyl.
Weed away the excess vinyl from around the design.

Use the weeding tool to help remove the excess vinyl from inside the letters.

Cut a piece of transfer tape and place it sticky side up on your surface. Then place the vinyl on top of the transfer tape and smooth it down.
![]()
Rub over the design firmly with your scraper tool.

Then, trim off the excess transfer tape and vinyl backing
![]()
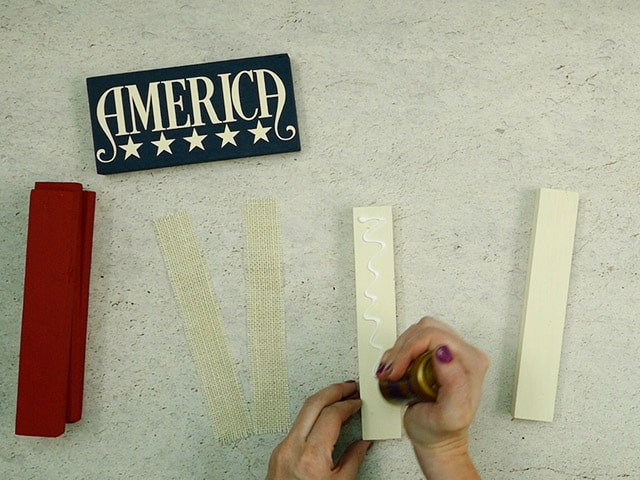
STEP 3: PAINT WOOD PIECES
This wood sign is really easy to make because it’s all straight cuts. You’ll need 5 – 8″ pieces cut from a 1″ x 2″ and 1 – 7.5″ piece cut from a 1″ x 4″. Just a note, the 1″ x 2″ wood actually measures .75″ x 1.5″ and the 1″ x 4″ actually measures .75″ x 3.5″, so if you’re cutting them from a larger piece of wood, make sure to adjust your measurements.

Use some sandpaper and sand over all the pieces of wood.

Paint the front of the big piece a creamy white.

Paint 3 of the skinny pieces red and two of them the creamy white.
I did 2 coats on the big piece of wood and on the red pieces. I just did one coat on the skinny white pieces since they’ll be mostly covered later on.
Painting the backs of the pieces is optional, but it does give the project a more finished look.
Allow the pieces plenty of time to dry.

Next, grab your vinyl lettering and pull off the vinyl backing.

Center the design on the larger piece of wood.

Rub over the vinyl with your scraper.

Then, pull off the transfer tape. I went over the vinyl one more time with my scraper just to be sure it was sticking to the wood.
![]()
Now, paint over the vinyl letters with a light coat of the creamy white paint. Doing this should help prevent the blue paint from bleeding.

Once that paint has dried, you can paint on several light coats of navy blue paint. I ended up doing 3 coats.

When the last coat is dry to the touch, carefully pull off the vinyl letters. You can use a craft knife or a weeding tool to help with this step.

Look at those nice clean lines.

STEP 4: ADD BURLAP TO WOOD
Next, cut two strips of burlap that are 1.5″ x 8″. If there are folds or wrinkles, you’ll want to iron them out. Pull some of the strands out along the edges to create a frayed look.

Add some glue onto the top of one of the creamy white strips of wood. Use a brush to smooth it out evenly over the wood.
Then, press the burlap onto the wood. Repeat this with the other piece of burlap.

If the burlap hangs over the wood too far, you can trim off the excess and pull out another strand or two from the edge.

Next, we’re going to add some faux stitch marks. Use a Sharpie and draw small lines down the edges of the wood. It’s a little tricky to draw the lines with those frayed edges, but if you use your finger to hold the edges down, it’s a little bit easier.

STEP 5: DISTRESS WOOD PIECES
Now, we are going to distress the wood pieces. This step is optional, if you don’t want to do it, you can skip it and just start assembling the flag.
Dip a stencil brush into some brown paint and then dab most of the paint off onto a piece of paper. Then, lightly dab the brush onto the edges of one of the pieces of wood.
 The more you dab, the darker the brown will be.

Once you’ve got a look you’re happy with, repeat on all the wood pieces.

You can also lightly dab the paint onto the letters.
STEP 6: ASSEMBLE THE PIECES
To assemble the flag, you’ll first glue the red and white stripes together. Just add some glue to the sides of the pieces and push them together.

If you have a clamp you can use it here. If not, just use some heavy objects to push the pieces of wood together while the glue dries.

Once the glue has dried, we need to drill some small holes to thread some wire through.
Layout the pieces and mark each drill spot. I am using three pieces of wire so I marked my holes on all the red pieces of wood and then made marks above on the blue piece.

Then, use a drill to add holes where you made your marks.

You’ll also want to drill holes at the top to attach a wire for hanging.

Cut three small pieces of wire. Thread one end through the back of the blue piece and the other end through the back of the red piece. Trim the wire so there’s just a 1/2″ or so sticking out of each hole.

Use needle-nose pliers to twist the ends to make a little spiral which will keep the wire from pulling back through the holes.

Repeat with the other two stripes.

Finally, add a hanging wire at the top using the same technique.

And that’s it, this project is finished! I just love the way it turned out!


Want to make your own? Get the free cut file for this project in the resource library