

HERE’S WHAT YOU NEED
- Cardstock (I used green, white, red, a Christmas print, and gray/silver)
- Glue
- Hershey’s Nuggets
- Electronic cutter (cricut explore or maker, silhouette or other cutter)
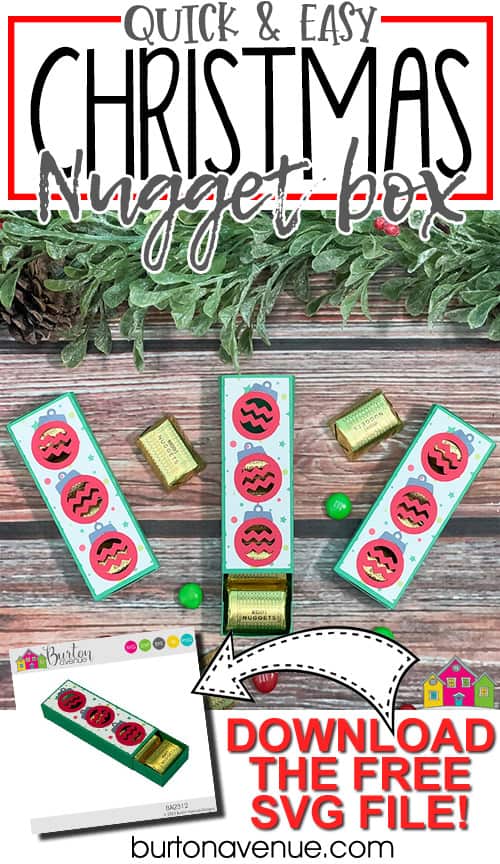
- Cut File – Christmas Nugget Box BA2312 (click here to get the SVG file for free from my free SVG Library)
HERE’S WHAT YOU DO
STEP 1: DOWNLOAD THE FREE SVG FILE
The first thing you’ll need to do is get the free SVG file you’ll use for this project. I keep all the SVG files I use for the projects I make in my SVG Library. These SVG files work with Cricut and Silhouette machines, as well as many others. This library is open to everyone and is free! You can access the library here. Look for the file called Christmas Nugget Box BA2312. It will be listed under the Craftmas 2023 Category-Day 12.
STEP 2: CUT THE CARDSTOCK PIECES
Open the design in your cutting software and resize it to 5.13″ tall. The tray and cover have perforation lines that will be cut with a regular blade. If you’re using Cricut Design Space, you’ll need to attach the perforation lines to the rectangles behind them. Once everything is sized correctly, cut out the pieces with your Cricut or Silhouette.
Once the cardstock is finished cutting, remove it from the cutting mat. It’s best to flip over the mat and gently bend it over until the cardstock releases. This way, the cardstock shouldn’t get bent.

STEP 3: ASSEMBLE THE BOX
Glue the small rectangle onto the cover piece. Match up all the circle cutouts. You’ll notice one of the circles is closer to the edge of the paper than the other; this will be the bottom of the cover.

Add some glue around the edge of one of the ornament pieces. You don’t need to put any glue on the wavy lines.

Glue the ornament over one of the circles on the cover. Repeat with the other two ornaments.

The bottom ornament should be straight, the middle should angle to the left, and the top ornament should angle to the right.

Glue on the tops of the ornaments.

Next, fold along all the perforation lines.

You’ll notice that one of the end tabs is smaller than the other. Fold that tab back and put some glue on it.

Then fold the cover section in half to glue the tab to the side piece.

Once it’s dry, you can open it up. Now the cover piece is done.

Next, let’s work on the tray. Fold along all perforation lines.

Add some glue to one of the tabs.

Bring the two ends of the tray together.

Glue the tab to the inside of the long side piece.

Repeat with the other 3 tabs until you’ve made the tray.

Add 4 Hershey’s Nuggets to the tray.

Slide the cover over the top of the tray.

And that’s it, this project is finished. It turned out so cute!

Did you enjoy this post? Help spread the word! Share this post on your favorite Pinterest board. Thanks!
Want to make your own? Get the free cut file for this project in the resource library