 This post contains affiliate links for your convenience (which means if you make a purchase after clicking a link I will earn a small commission but it won’t cost you a penny more)! Read my full disclosure policy.
HERE’S WHAT YOU NEED
- Clear Glass Plate (I found mine at Dollar Tree)
- Vinyl (I used red and green)
- Ruler
- Rubbing Alcohol
- Dry Erase Marker
- Scraper
- Transfer Tape
- Weeding Tool
- Electronic cutter (cricut explore, silhouette or other cutter)
- Cut File (available for free in my resource library)
HERE’S WHAT YOU DO
STEP 1: DOWNLOAD THE FREE SVG FILE
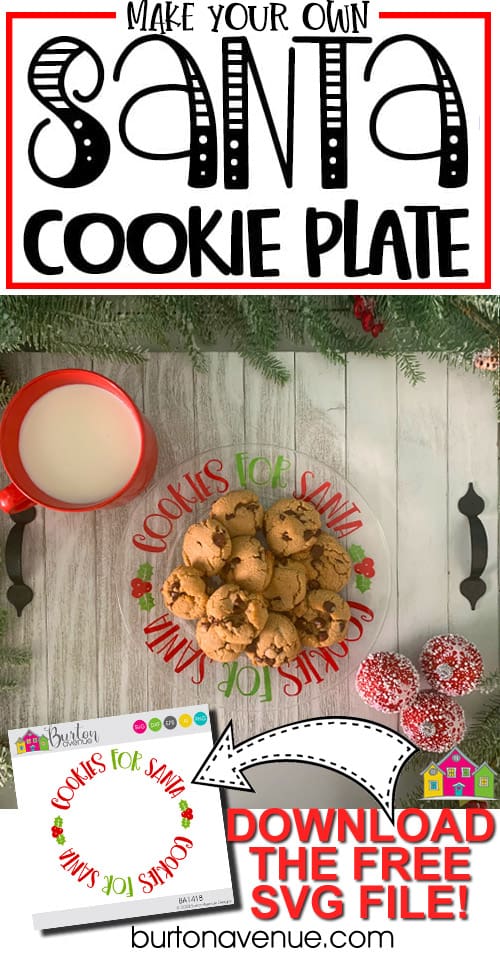
The first thing you’ll need to do is get the free SVG file you’ll use for this project. I keep all the SVG files I use for the projects I make in my SVG Library. These SVG files work with Cricut and Silhouette machines, as well as many others. This library is open to everyone and is free! You can access the library here. Look for the file called Cookies for Santa BA1418. It will be listed under the Christmas category.
STEP 2: PREPARE VINYL DESIGN
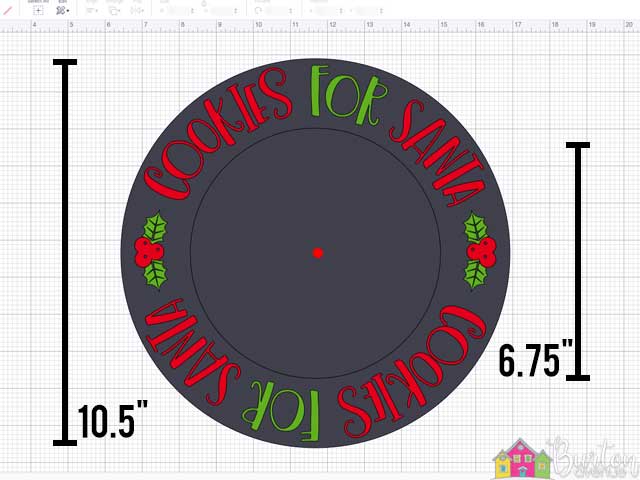
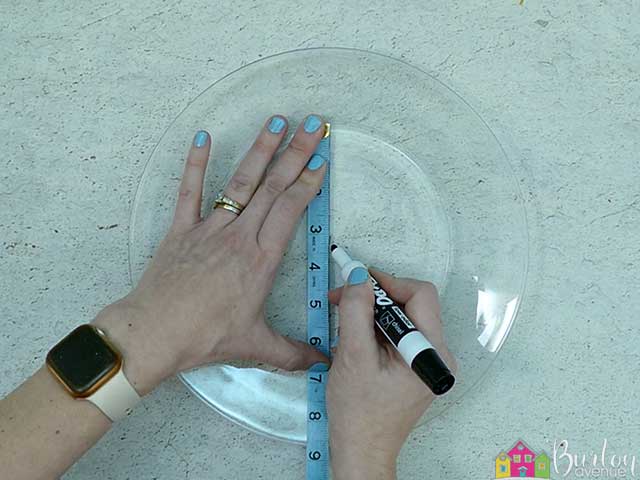
Open the design in your software program. Measure the diameter of your plate and draw a circle that size. My plate is 10.5″, so I sized my circle to be 10.5″ Then, measure the bottom of the plate and draw another circle that size. Mine was 6.75″, so that’s the size of my inner circle. You’ll want center the inside circle inside of the large circle. Now, resize the design to fit inside the circles. I ended up making this design about 9.75″ wide and I left the height proportional.
You can also place a small dot in the center of the design. This will help make centering the design on the plate a little easier.
Since this vinyl will be going on the bottom of the plate, the design needs to be mirrored. Don’t skip this step or this project won’t work.
I cut the red portion of the design the way it appeared on the screen. For the green portion, I moved everything close together to save vinyl. Once everything is cut, weed away the excess vinyl.
 Use a weeding tool to pull out the small pieces inside of the letters and inside of the berries.
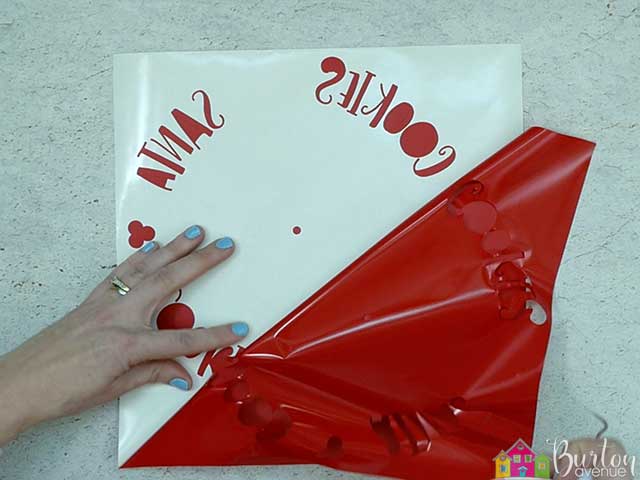
Cut a piece of transfer tape a little bigger than the design. Place the vinyl on the transfer tape and smooth it down with a scraper.![]()
Then, trim off the excess transfer tape.
![]()
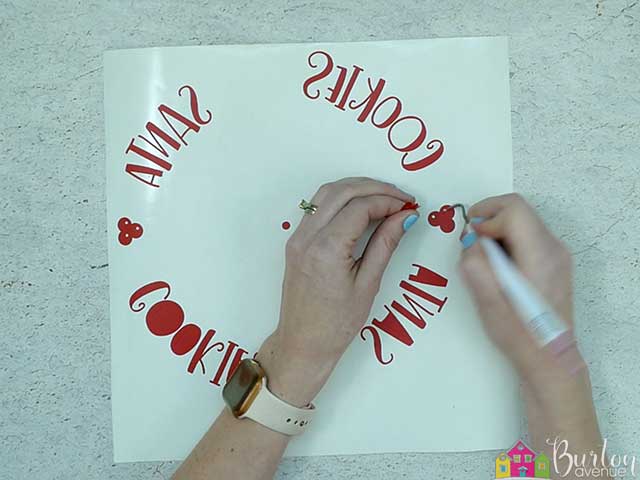
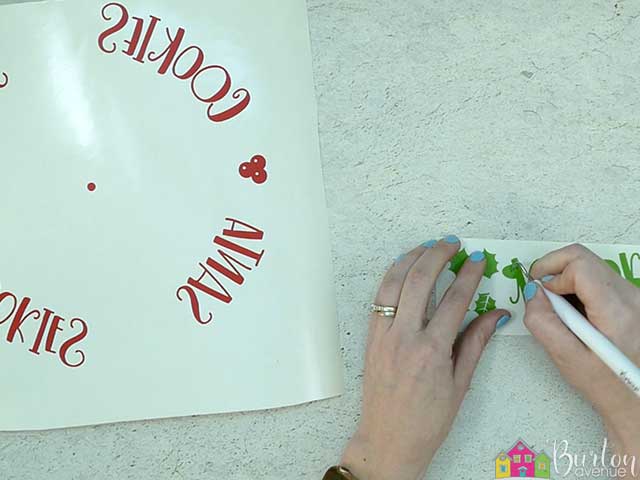
Cut apart the two green words and the two sections of leaves.
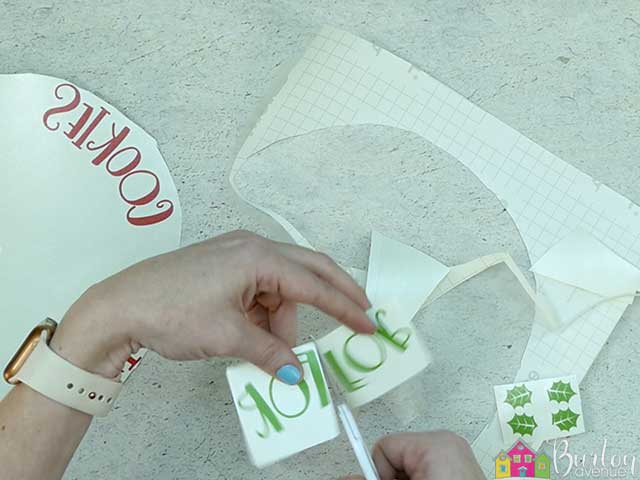
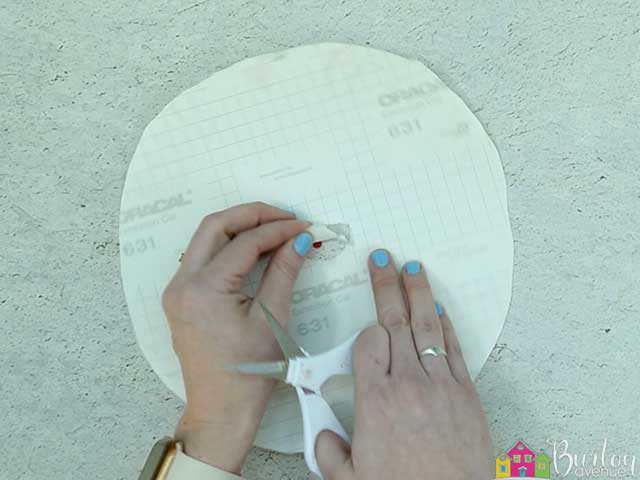
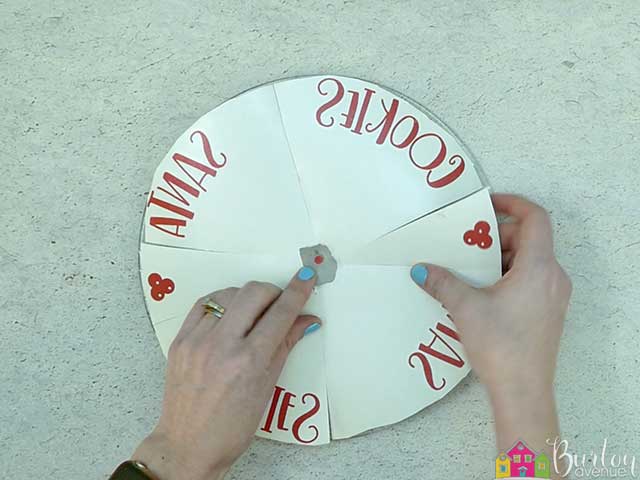
Use your scissors to poke a hole in the center of the vinyl backing. Then, remove a small section of the backing. You can either cut or tear it away. It doesn’t have to be perfect, you just need to expose the dot and some of the transfer tape.
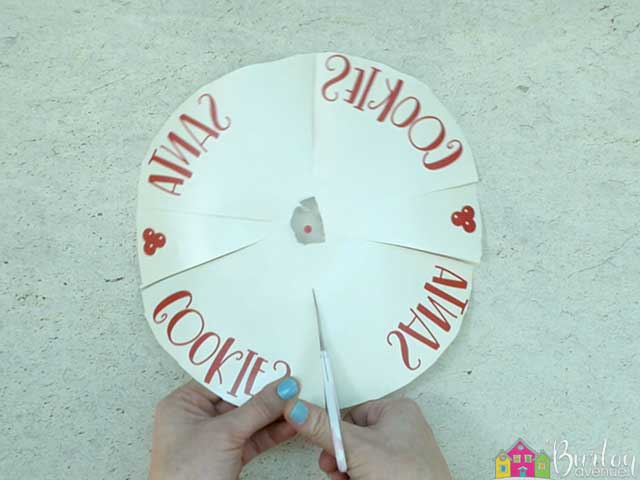
Then, cut large slits between each section of words and berries.
STEP 3: APPLY VINYL TO THE PLATE
With the plate right side up, use a dry erase marker and place a small circle in the center. Then, flip the plate over and wipe it down with rubbing alcohol.
Once the plate has dried, place the vinyl on the bottom of the plate. Match up the vinyl circle with the dot you made on the plate. Press down where the transfer tape is exposed so the design sticks to the plate.
Take one section of the design and pull off the vinyl backing.
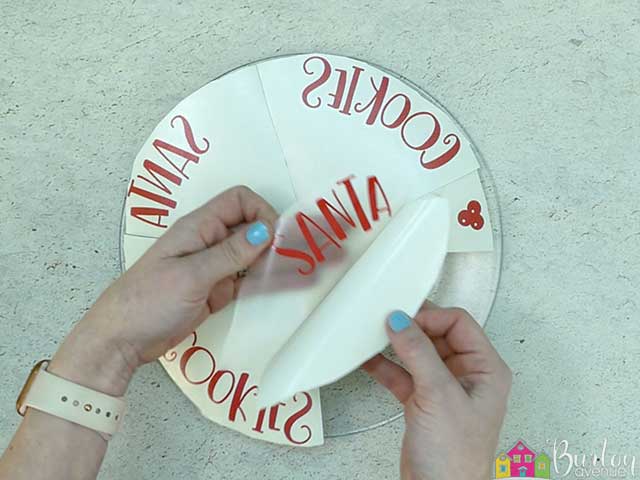
You should be able to rip off that section of backing and remove it from the plate.
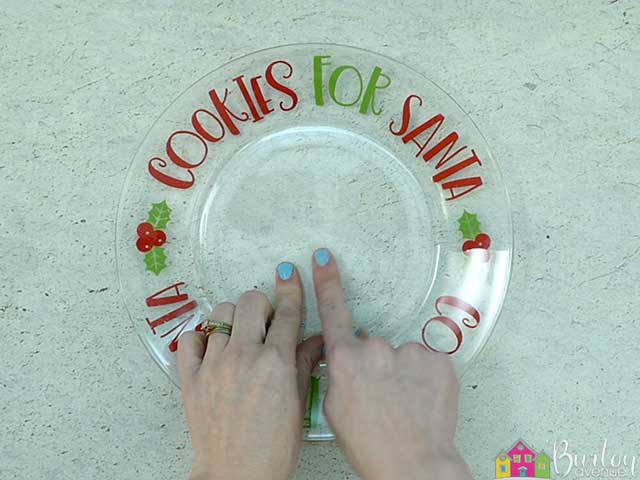
Now, push down the center of the word onto the plate.
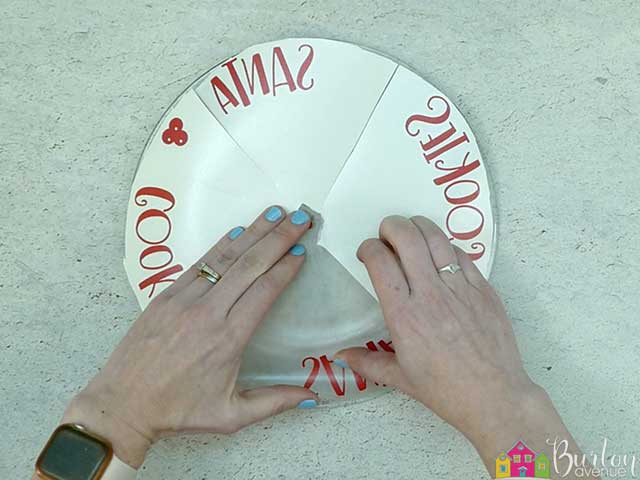
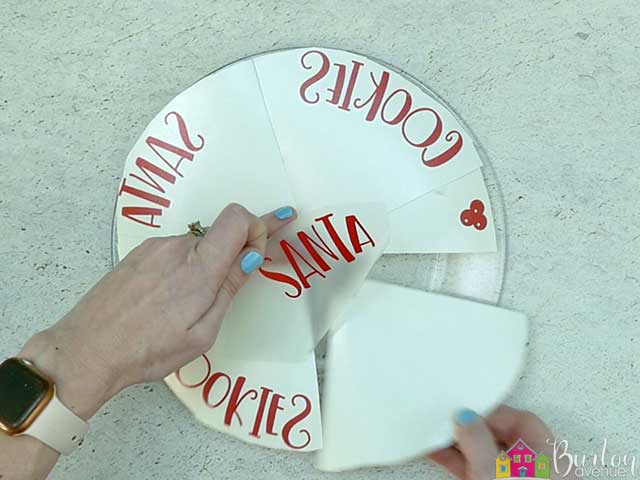
Move your thumbs outward to press down the rest of the letters. Repeat these steps with all the other sections of the design.
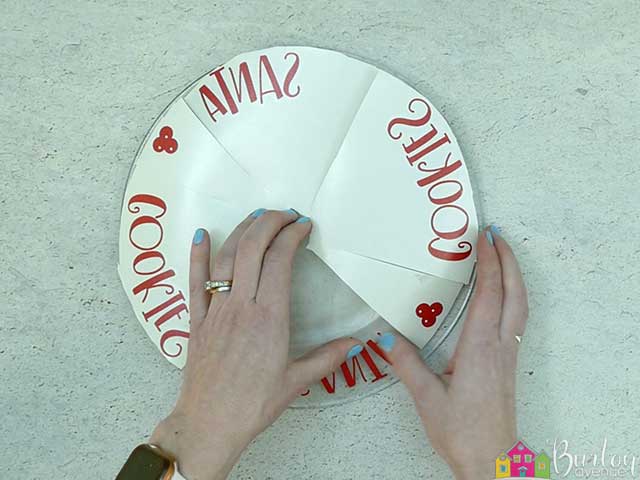
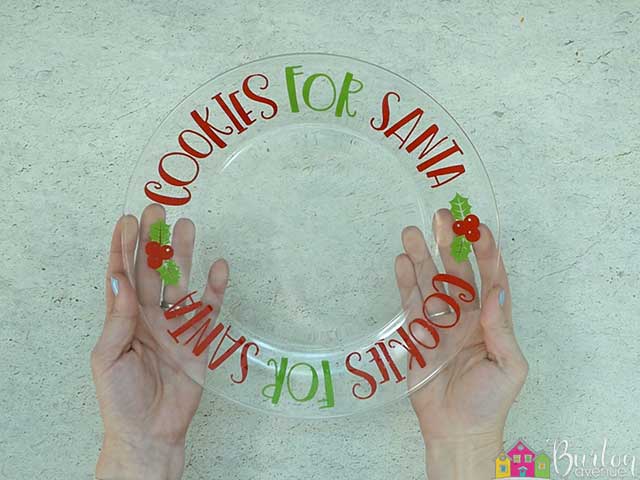
Once all the vinyl has been pressed down, you can carefully pull off the transfer tape.
![]()
Next, grab one of the green sections of vinyl and pull off the backing.
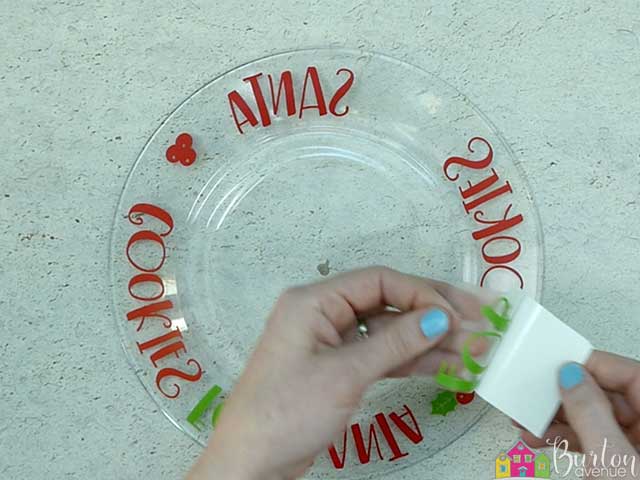
Position it on the plate and rub over the letters, Then, remove the transfer tape. Repeat these steps until all the vinyl has been applied.
Wipe off the dot in the center of the plate.
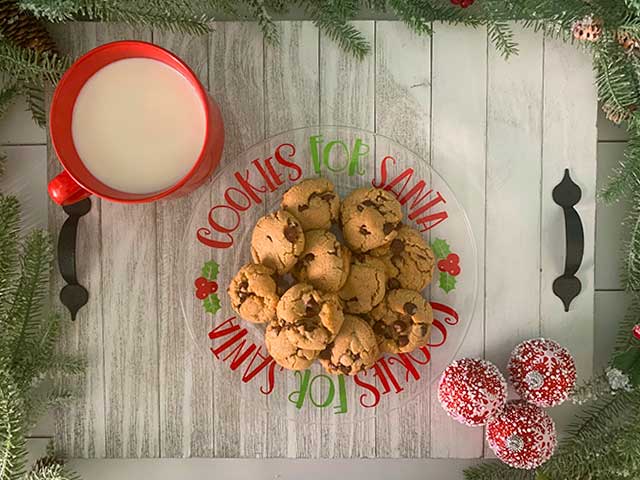
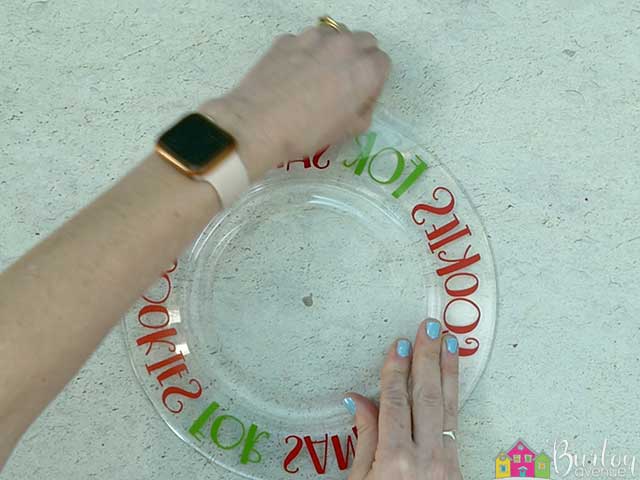
That’s it! Now you have a super cute (food-safe) plate for Santa’s cookies! I love plate because you can still see the cute design even when the plate is full of delicious cookies for Santa!
Handwashing is recommended.
Did you enjoy this post? Help spread the word! Share this post on your favorite Pinterest board. Thanks!
Want to make your own? Get the free cut file for this project in the resource library