Multi-color designs are fun to make, but sometimes layering adhesive vinyl can be a bit tricky. Did you know that you can add registration marks to your designs to make layering easy? Adding registration marks to your design eliminates the guesswork and produces a perfect layering job every time. Today, I’m going to show you how to add registration marks to your design in Cricut Design Space so it’s set up for a perfect layering job.
How to Add Registration Marks for a Multi-Color Design in Cricut Design Space
Start by importing your SVG into Design Space and resize it to the dimensions you need. If you need help importing an SVG, follow this tutorial. For today’s example, I’ll be using this Wake Up, Be Awesome, Repeat file. You can download the file for free here. After you’ve resized your design, we need to create registrations marks. On the left panel, click on shapes, then click square. A large square will appear by your design. The shape really doesn’t matter, you can pick a diamond, triangle, star, or anything else. Just follow the same steps with whatever shape you choose.
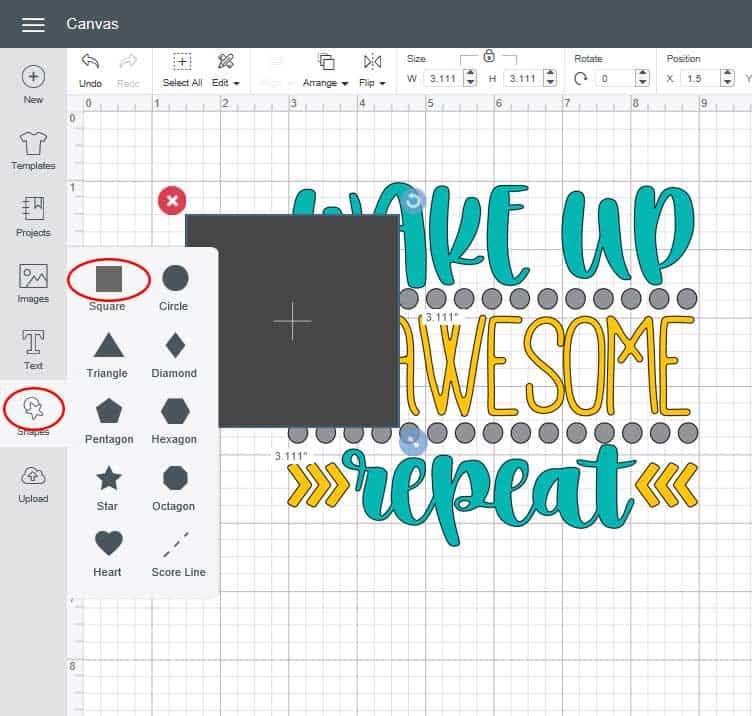
Now, you make your registration mark a little bit smaller. I resized mine to .5″. Also, the size of the registration marks doesn’t matter, either. Just pick a size that works for you. Once it’s been resized, drag the square and move it above and to the left side of your design. Make sure it’s not touching any part of the design.
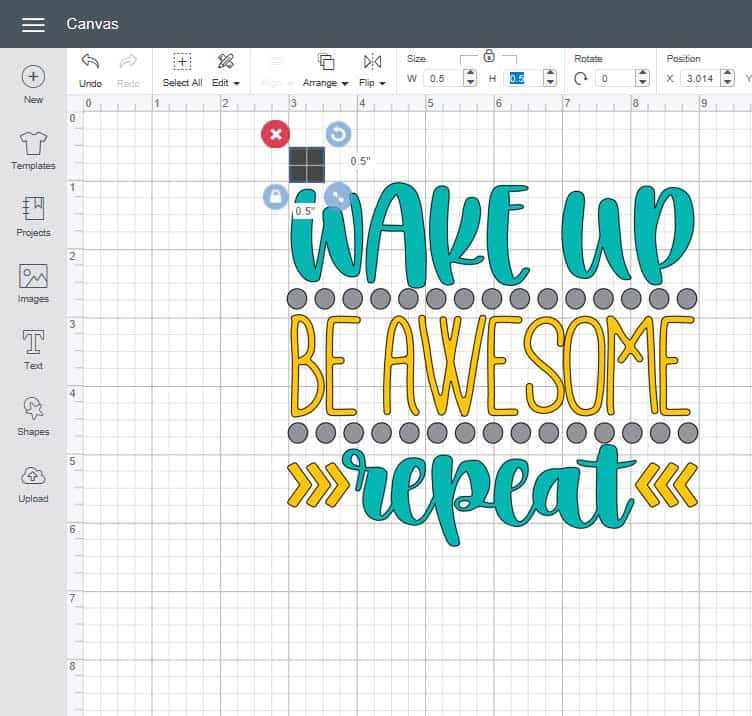
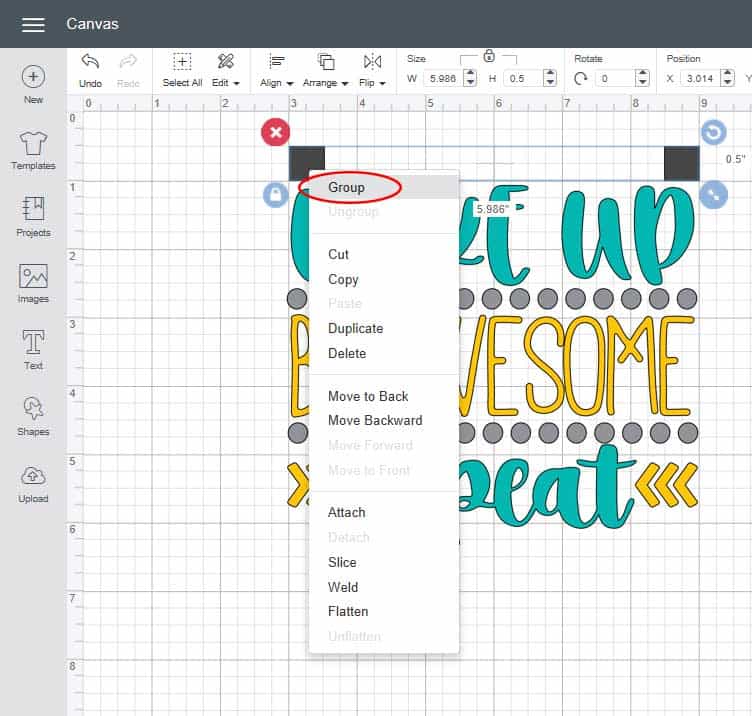
With the square still selected, right click and then choose Duplicate. This will create a second square.

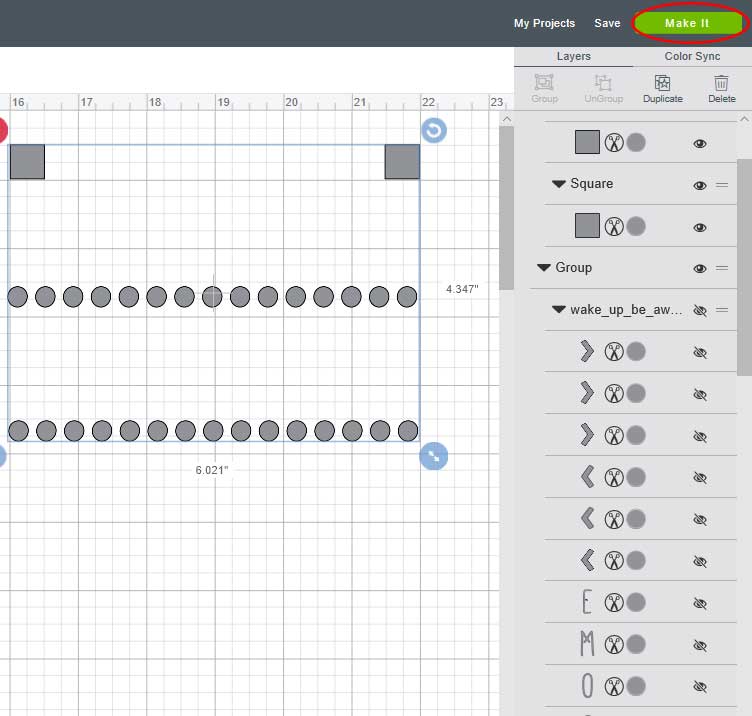
Select the second square and move it above and to the right side of your design. Then, select both of the squares, right-click, and choose group.
We are going to cut the gray layer first, but before we can cut, we need to hide the yellow and turquoise layers. On the right-hand panel, click on the icon of the eye next to the yellow layer. There is an icon of the eye next to each yellow element and then an icon of an eye above the yellow elements. You only need to click the top icon. This will hide all the yellow elements in the design.
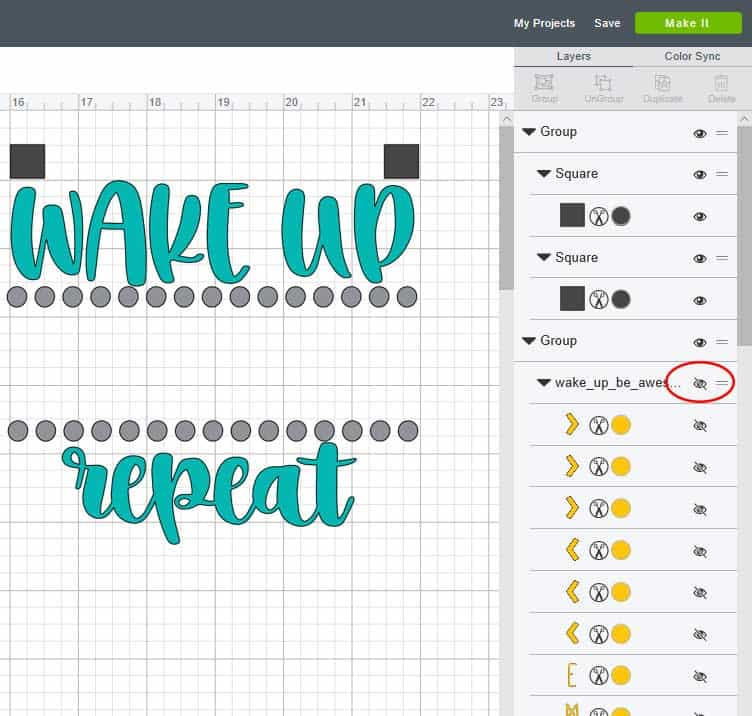
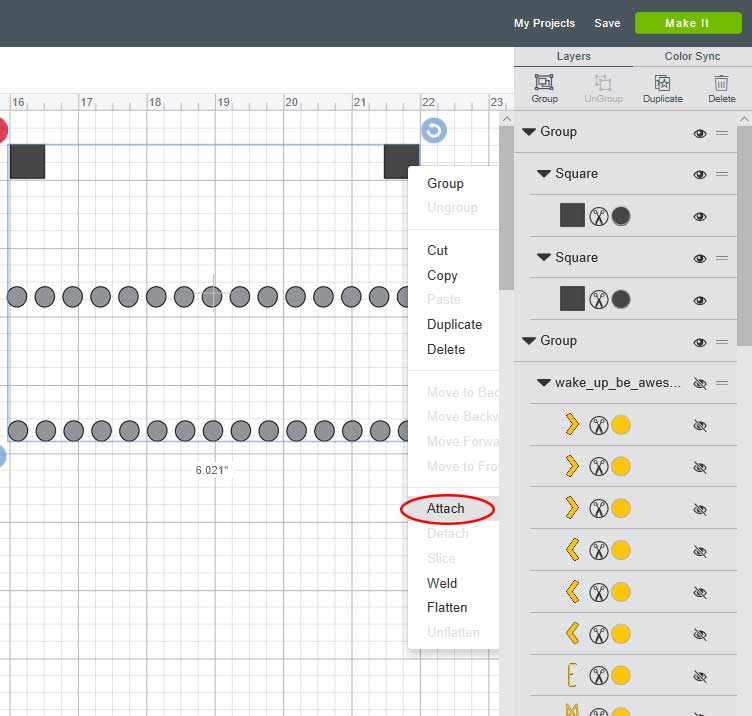
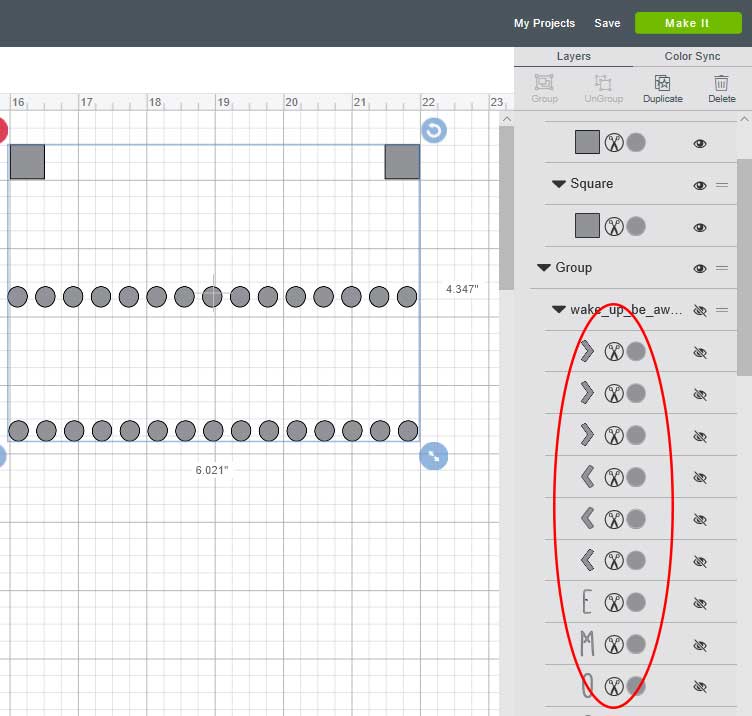
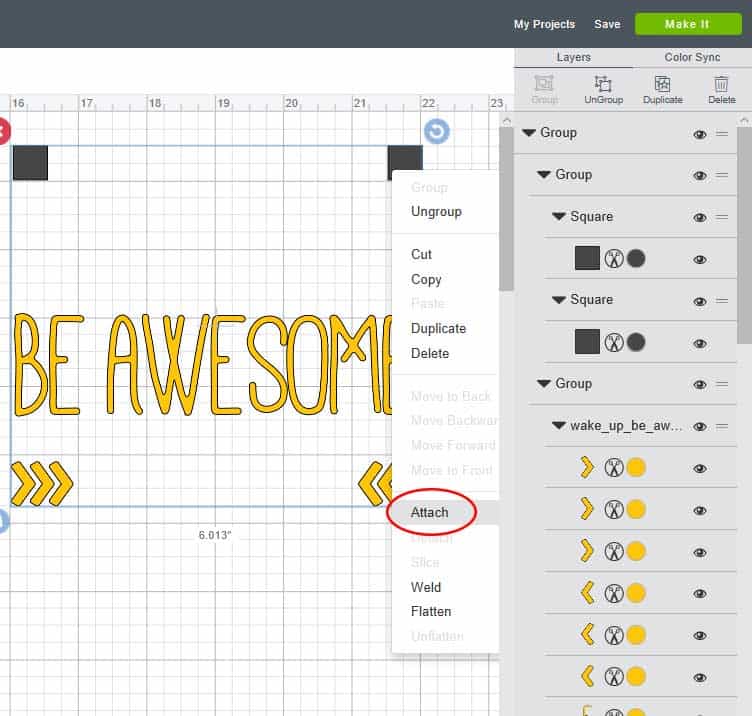
Now, we’re going to hide the turquoise layer. Once again, click on the icon of the eye next to the turquoise layer. All of the turquoise elements will be hidden. So, all that’s left is the gray layer and the registration marks. Select everything that is on the screen, right-click, and choose attach. Clicking attach will hold your cuts in the same position relative to each other. If you don’t click attach, the letters and elements will shift around when you send the design to cut
Notice that when you do this, everything changes to gray, even the hidden layers.
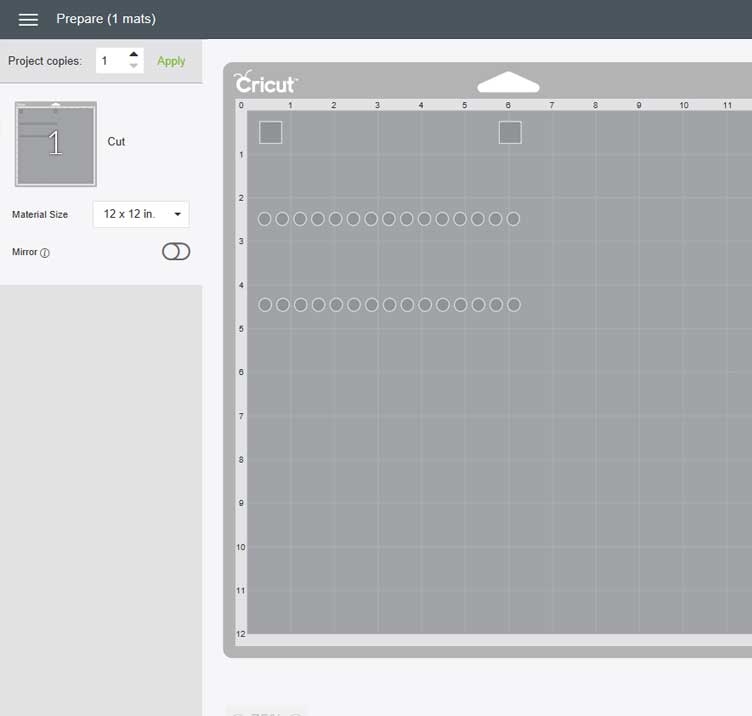
Now the gray layer is ready to cut. Click on the green Make It button.
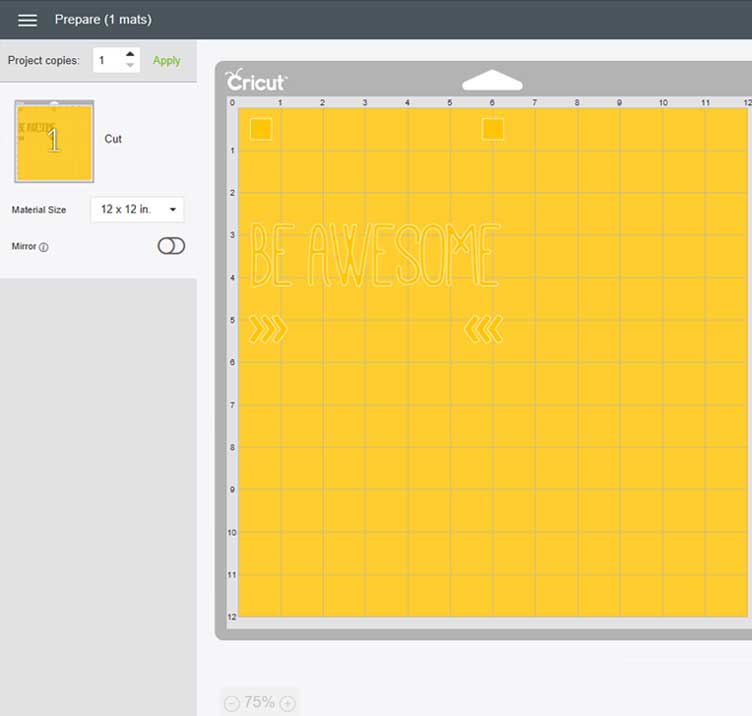
Only one mat should show up with the color you are working on (gray in this example). Since you’ve attached the design, all the elements will cut in the same position as they appear on your design screen. Now, you can cut your first color of the design.
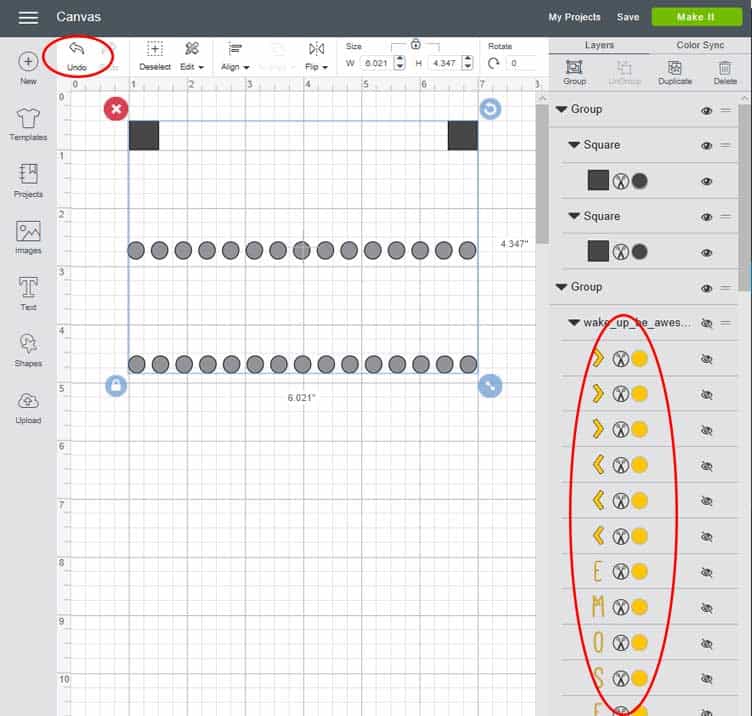
Once you’ve cut your first color, it’s time to move on to the next color. We need to detach the design and get our color groups back. Click on undo and your colors should appear back in the right-hand panel. If they don’t appear, try clicking undo again.
We are going to cut out the yellow layer next. So, on the right-hand side, click on the eye icon next to the gray layer. The whole design should now be hidden and only the registration marks will remain.
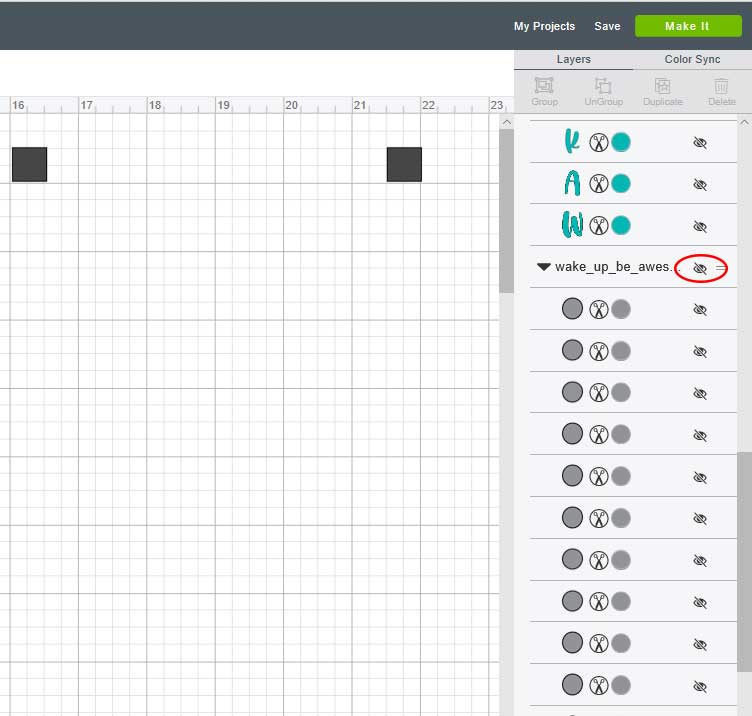
Now, let’s unhide the yellow elements. Click on the eye icon next to the yellow layer. The yellow elements will now show up on your design.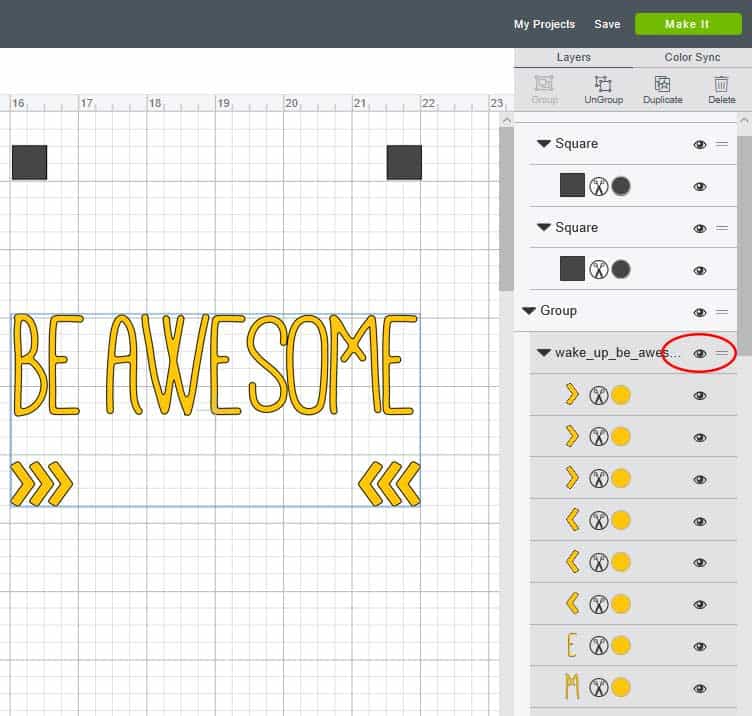
Select everything on the screen, right-click, and choose attach.
Now the yellow layer is ready to cut. Click on the green Make It button. Load your material into your machine and send the design to cut. Repeat the above steps until you have cut all the colors in your design.
 Once everything has been cut, it’s time to weed and layer the vinyl. Stayed tuned for a tutorial on how to layer the vinyl.