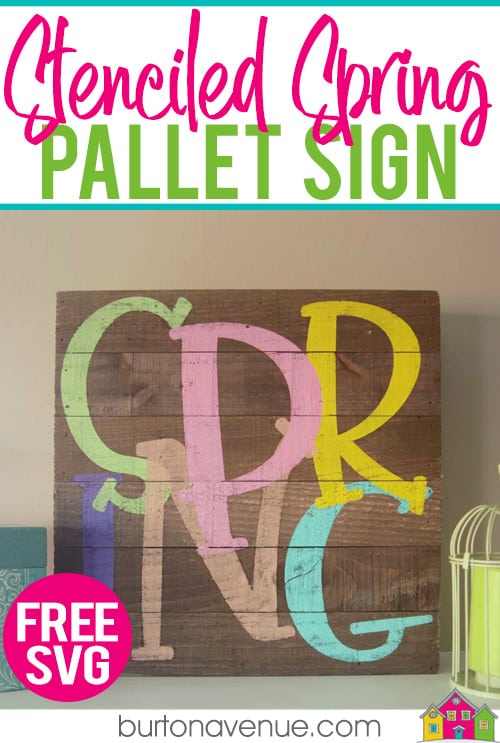
Anyone else totally ready for spring? We had some nice weather in the middle of February and it kind-of tricked me into thinking spring was here. And then we got hit with a huge snow storm and I realized winter isn’t quite over.:( Even though it’s not quite spring outside, I’m ready to get some spring colors up on the inside.
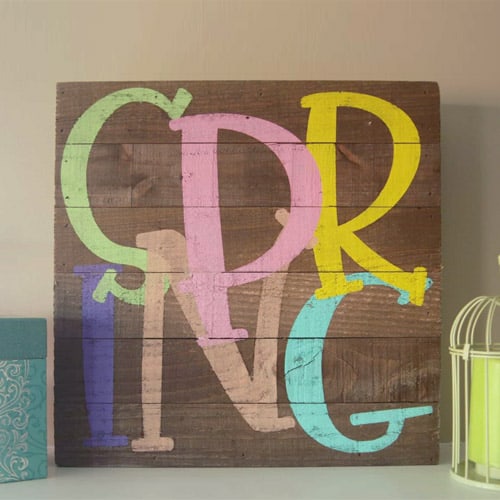 I love the look of pallet projects, but sometimes gathering the wood, cutting it all down to size, and putting it all together can be a pain. When I saw these wood pallets signs, I knew they would be great option if you want the pallet look, but not all the trouble. I purchased mine from Amazon, but I’ve also seen them at Walmart and Joann’s. Now I want to show you how stencil a pallet sign.
HERE’S WHAT YOU NEED
- Wood Pallet Sign (mine is 12″ x 12″)
- Vinyl (Color doesn’t matter)
- Transfer Tape
- Mod Podge (Optional)
- Paint (I used acrylic paints)
- Paintbrushes
- Electronic cutter (cricut explore, silhouette or other cutter)
- Cut File (available for free in my resource library)
HERE’S WHAT YOU DO
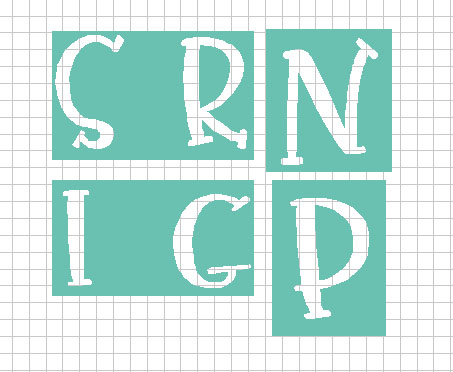
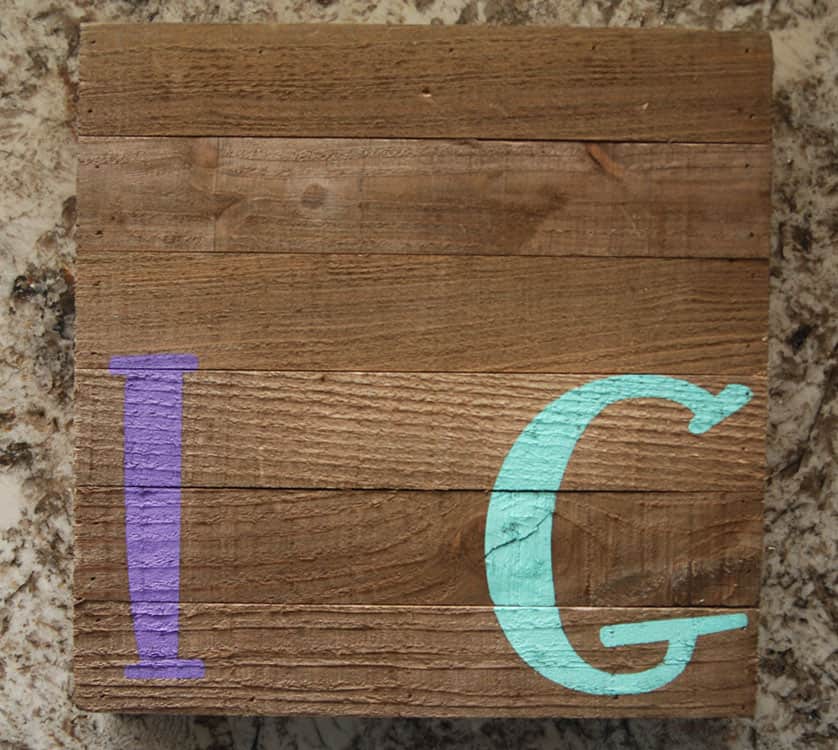
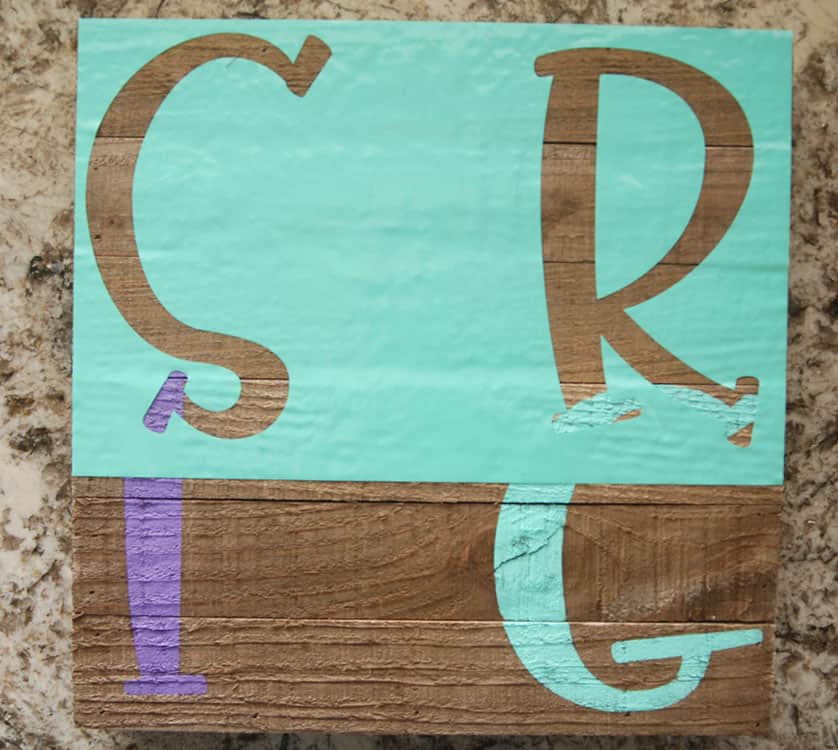
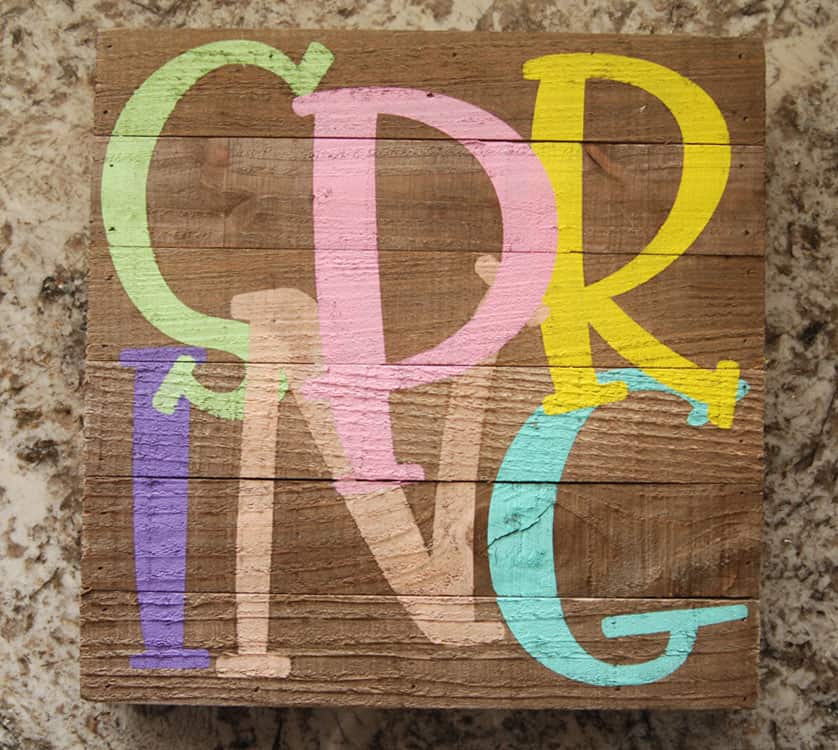
Use your electronic cutter to cut your stencil out of vinyl. I created 4 different stencils for this sign (layout shown below). You could do less depending on how you want the layers to look. Weed away the excess vinyl and apply the transfer tape.
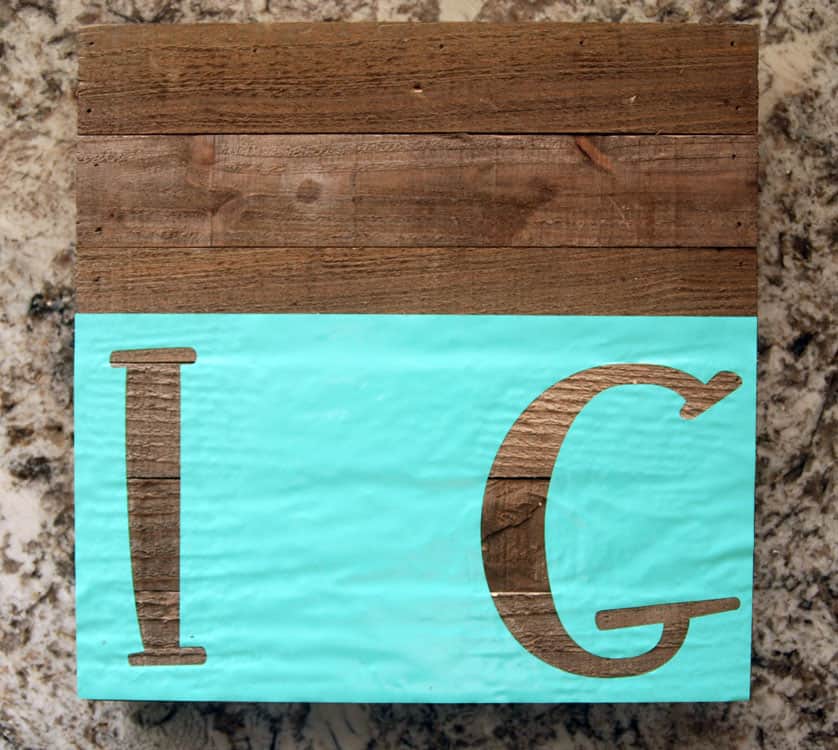
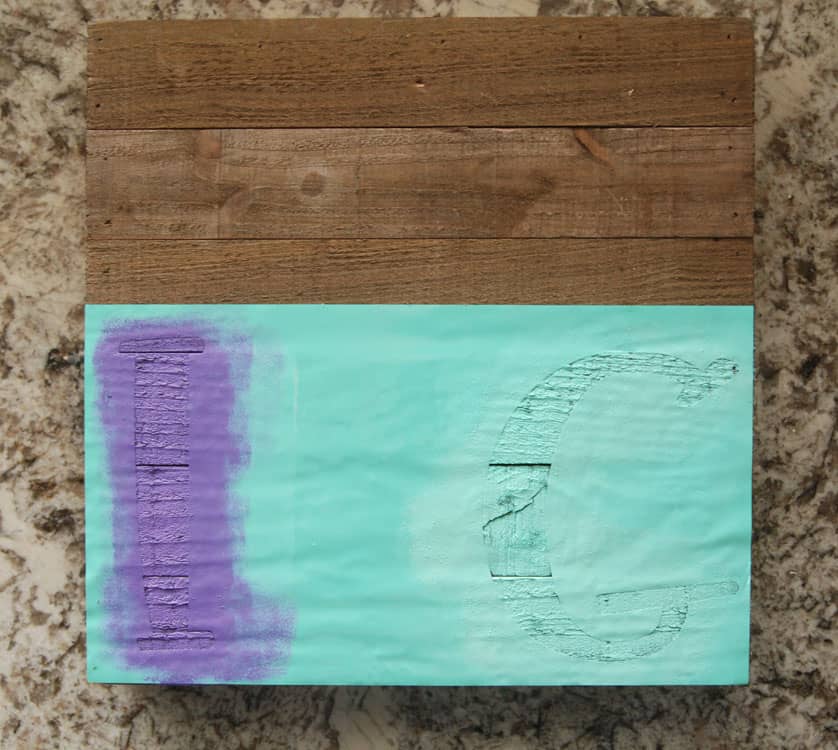
Apply the bottom letters to the wood first.
Did you enjoy this post? Help spread the word! Share this post on your favorite Pinterest board. Thanks!
Want to make your own? Get the free cut file for this project in the resource library
OMG, so you make a stencil with the vinyl! This is amazing!
How do you recommend sizing this if the board is 11×14? Really struggling!
Once you’ve opened the file in your software, ungroup the letters. Then, spread them apart so they fill up the space of your sign.
Ungrouping isn’t a option.
Make sure you are importing the SVG file and not the PNG.