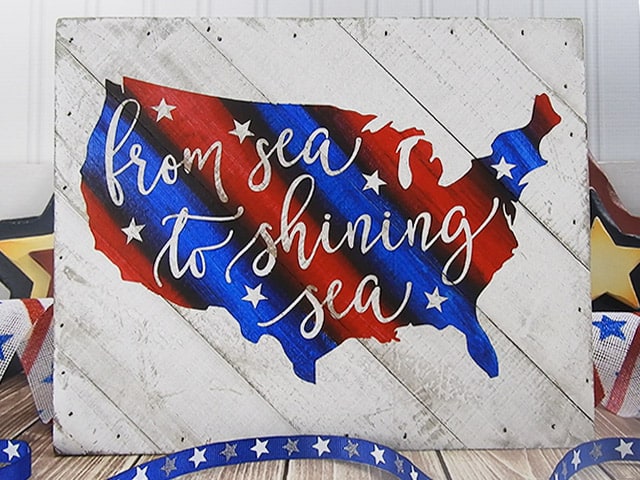
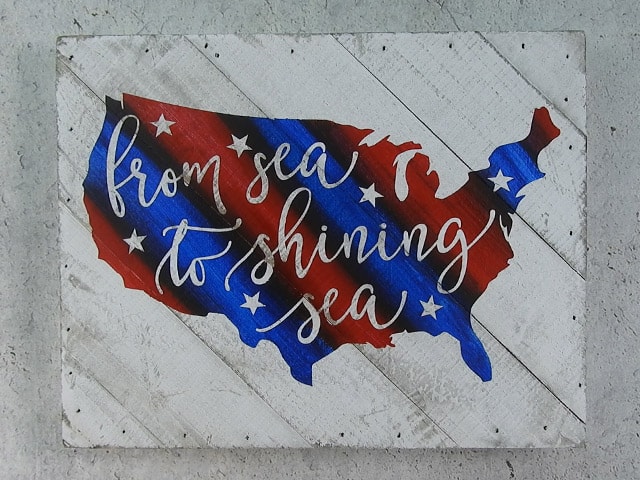
Today, I’m sharing another patriotic sign you can make with a Cricut or Silhouette. This cute sign is made from a distressed plank sign I bought at Walmart. I love the distressed finish and the angled slats on the sign. As soon as I saw it, I knew exactly what to put on it.
HERE’S WHAT YOU NEED
- Wood Plank Sign (8″ x 10″) I found mine at Walmart
- Stencil Vinyl (you can also use regular vinyl)
- Transfer Tape
- Acrylic Paint (Red & Blue)
- Paint Brushes (I used 2 foam brushes and 1 bristle brush)
- Application Tool
- Craft Knife
- Mod Podge (Optional)
- Weeding Tool
- Electronic cutter (cricut explore, silhouette or other cutter)
- Cut File (available for free in my resource library)
HERE’S WHAT YOU DO
STEP 1: DOWNLOAD THE FREE SVG FILE
The first thing you’ll need to do is get the free SVG file you’ll use for this project. I keep all the SVG files I use for the projects I make in my SVG Library. These SVG files work with Cricut and Silhouette machines, as well as many others. This library is open to everyone and is free! You can access the library here.
STEP 2: CLEAN OFF WOOD SIGN
Normally, before I apply vinyl to a wood sign, I sand it down so it’s nice and smooth. But, this wood sign already has a distressed finish that you don’t want to mess up by sanding. Instead, use a damp paper towel to clean off any dust or loose paint, so the vinyl will stick better. Make sure it’s completely dry before you put on the vinyl stencil.

STEP 3: CUT AND WEED VINYL STENCIL
Open the design in your software program. If you’re using a sign that is 8″ x 10″, you’ll want to make the design about 9″ x 5.5″. Then, you need to draw a rectangle around the design. Make your rectangle the same size as the sign (8″ x 10″) and center the design in the rectangle. Once everything is sized correctly, you can cut the stencil with your Cricut or Silhouette. Once it has finished cutting, weed away the excess vinyl.
Do you need more help with creating a vinyl stencil? Check out these posts with step by step instructions.
How to Make a Vinyl in Cricut Design Space.
How to Make a Vinyl Stencil in Silhouette Studio
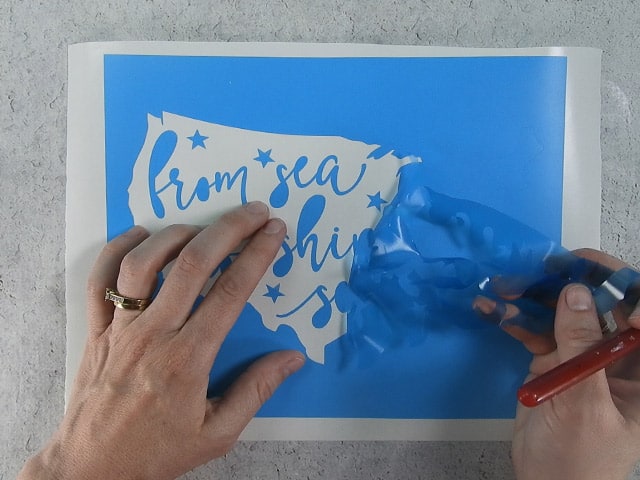
STEP 4: APPLY TRANSFER TAPE
Cut a piece of transfer tape a little larger than the design and place the vinyl on top of the transfer tape. I like to use this transfer tape. It comes on a roll and doesn’t have a backing. That makes it easy to just unroll the amount I need and not have to mess with pulling off the backing.
Use a scraper to rub over the design. Sometimes the vinyl needs a little help sticking to the transfer tape. Then, trim off the excess transfer tape.
![]()
STEP 5: REMOVE VINYL BACKING
Flip the design over and pull off the vinyl backing.

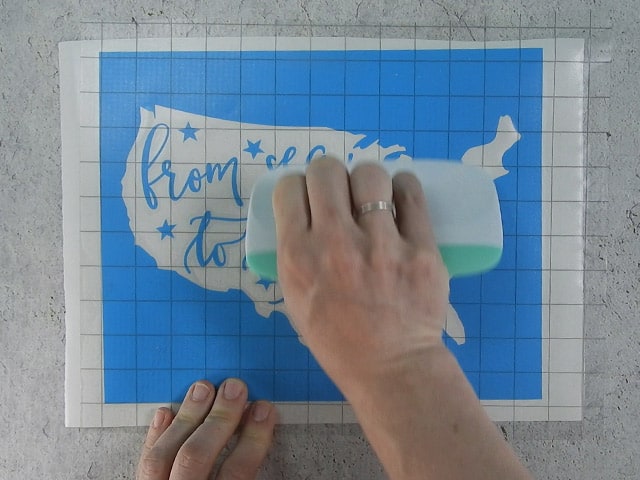
STEP 6: POSITION VINYL ON SIGN
Place the vinyl stencil on the wood sign. Line up the straight edges of the stencil with the straight edges of the sign. Rub over the entire design with a scraper.

STEP 6: REMOVE TRANSFER TAPE
Carefully pull off the transfer tape. Go slow and be sure the vinyl is sticking to the sign and is not coming off with the tape. Rub over the design again with a scraper. You can to make sure the vinyl is really sticking to the wood.
![]()
STEP 7: PAINT OVER THE STENCIL WITH MOD PODGE
To help prevent bleeds, paint a generous layer of Mod Podge over the stencil.
Why do we do this?
Sometimes there are small gaps between the stencil and the wood. Since Mod Podge dries clear, our hope is that the Mod Podge will fill in these gaps, instead of the paint.

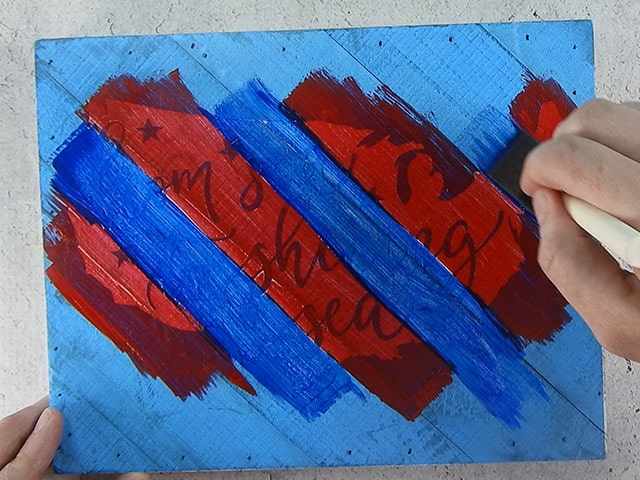
STEP 8: FILL IN THE STENCIL
Start by painting the red stripes. I didn’t measure or anything, I just painted until I thought it looked good.
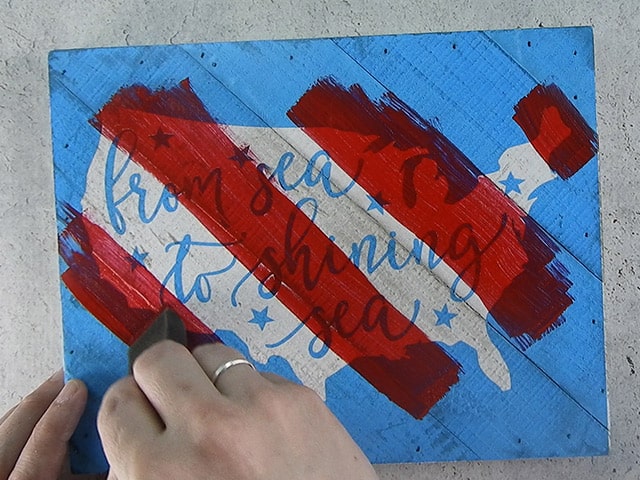
Then, go back and fill in the gaps with blue paint.
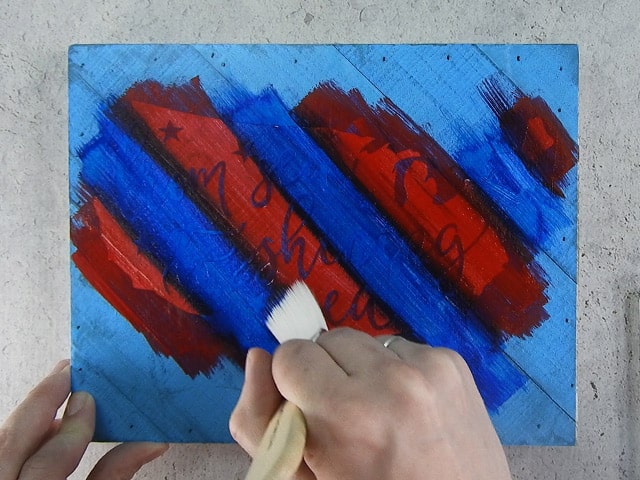
STEP 9: BLEND THE COLORS
Go over each stripe one last time to get the paint wet. Then, use a new clean brush to start blending where the red and blue meet. Keep going back and forth over where the stripes meet until you’ve achieved the look you want.
The blending line can get kind of dark, so I tried to keep it narrow. You also don’t want too much blue paint going on the red and changing the color, so be mindful of that.
If the paint dries too much, it won’t blend well and you’ll need to get the stripes wet again. You can also just dip the ends of the bristles in the red and blue paint.

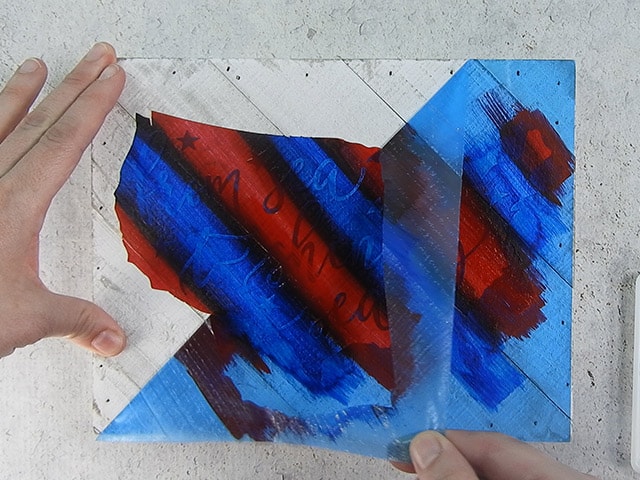
STEP 10: REMOVE VINYL STENCIL
Once the paint is dry to the touch, carefully pull off the stencil. You can use a craft knife or weeding tool to pull out the centers of the letters. If there’s any bleeding, you can scrape it off with a craft knife.
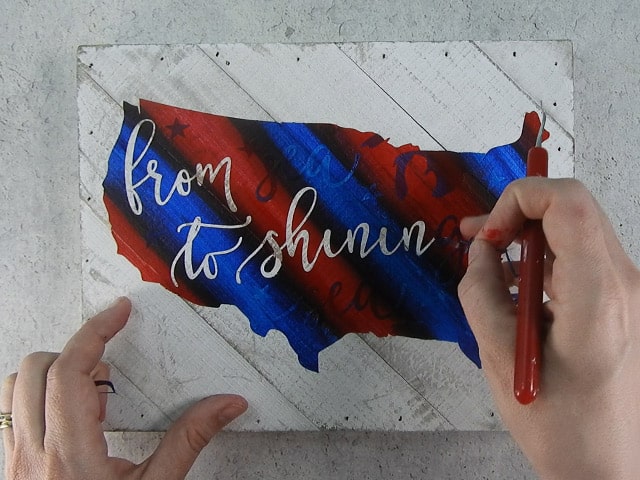
That’s it! Isn’t it cool? Now you’ve got a super cute patriotic wood sign you’ve made with your Silhouette or Cricut!
Did you enjoy this post? Help spread the word! Share this post on your favorite Pinterest board. Thanks!
