One of the great features of Silhouette Studio Designer Edition is the ability to import SVG files. A SVG file, short for scalable vector graphic, can be resized large or small without losing quality. I love SVG files because they can be used with almost every cutting software. Many designers (including me) will often give away free SVG files. But, you need to have the Designer Edition of Silhouette Studio to be able to use these files.

How to Unzip or Extract Files
When you download cut files online, they usually come in a zipped folder and need to be extracted before you can use the files. To extract, double-click the folder and then choose extract all. You’ll know the folder has been unzipped because you’ll see a new icon of an open folder in your directory. Now, you are ready to open the files in Silhouette Studio.

There are two simple ways to import the SVG file into Silhouette Studio. The first method will allow you to temporarily use the SVG file. The second method will add the file to your built-in Silhouette Studio Library.
How to import SVG files into Silhouette Studio Designer Edition
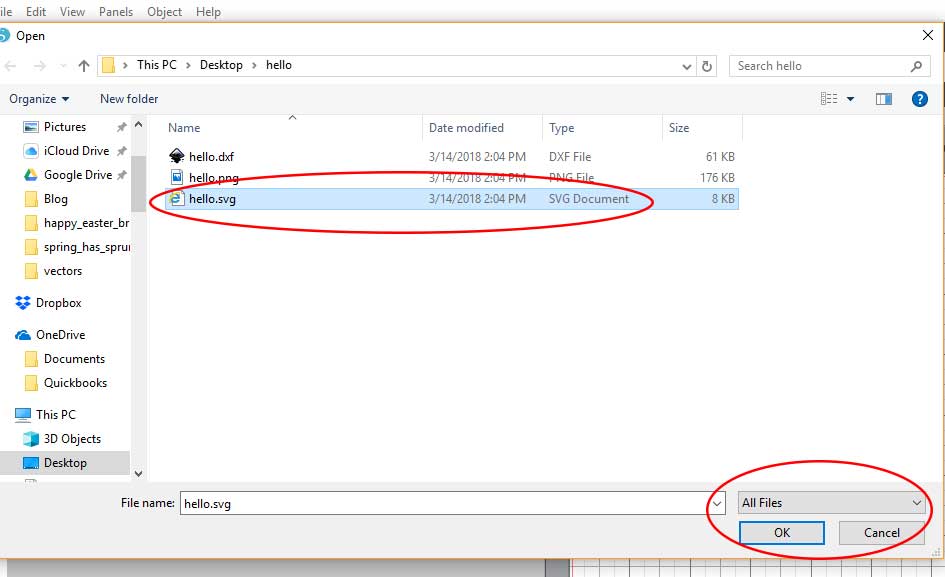
Once you’re in Silhouette Studio, click file, then open. Go to the folder where you’ve saved your unzipped files and find the SVG file. If you don’t see an SVG file listed, look for a Chrome HTML document or something similar. You might need to choose All Files in the bottom right corner before it shows up. Once you’ve found the SVG file, double-click the name (or select and click ok). This will import the file onto your mat.
How to import SVG files into your Silhouette Studio Library
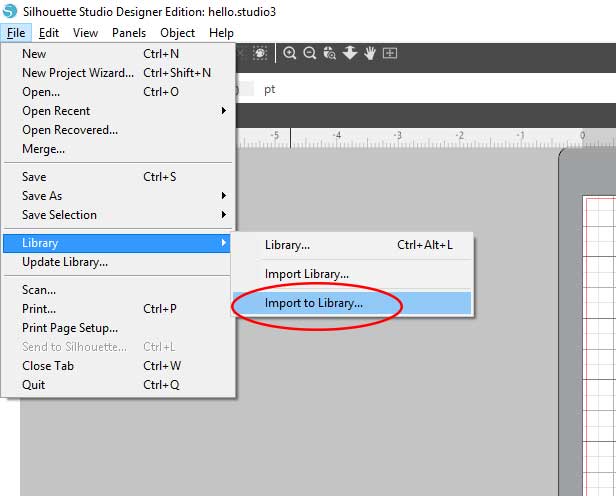
Once you’re in Silhouette Studio, click file, library, and then import to library. Go to the folder where you’ve saved your unzipped files and find the SVG file. If you don’t see an SVG file listed, look for a Chrome HTML document or something similar. You might need to choose All Files in the bottom right corner before it shows up. Once you’ve found the SVG file, double-click the name (or select and click ok). This will import the design into your library in the user designs folder. Double click the design to bring it onto your mat.
How to Cut SVG Files in Silhouette Studio Designer Edition
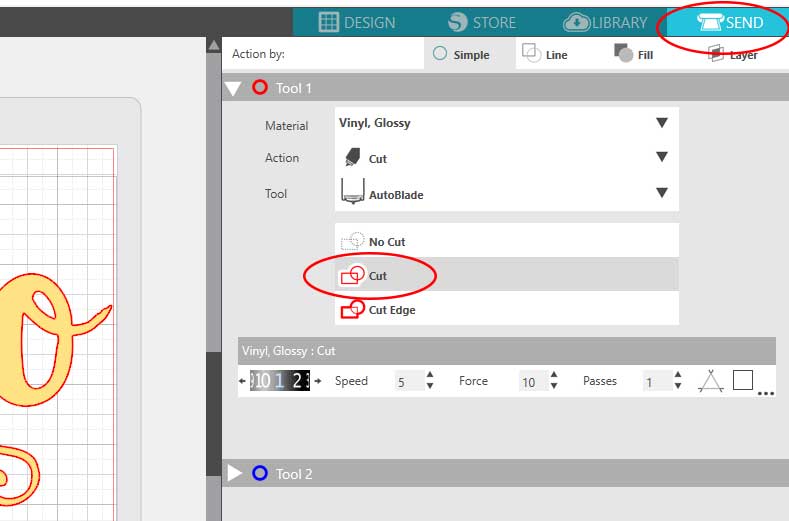
When you first import an SVG file into Silhouette Studio, you’ll notice there aren’t any cut lines. This is normal. Sometimes, it makes people think the file isn’t working right and will do a trace to get the cut lines to show up. But, you shouldn’t ever need to trace an SVG file. You can turn the lines on. Once your design is ready to cut, select your design and then click the send icon located in the top right-hand corner. You need to select cut. This turns on the cut lines and now you can send the design to your Silhouette.
I hope this tutorial was helpful and you start using SVG files with your cutter! Be sure to pin this post so you can find it again!
