If you own the basic version of Silhouette Studio and want to use cut files from somewhere besides the Silhouette store, you’ll need to use DXF files. There are several disadvantages to using DXF files. DXF files aren’t layered or grouped, they take longer to cut, and sometimes they have a mind of their own. If you ever have the chance, I would highly recommend upgrading to the Designer Edition. There are some cool upgrade features, but I would suggest upgrading simply to be able to use SVG files. But, if you only use non-Silhouette store files a few times, it might not be worth it to upgrade.
How to Unzip or Extract Files
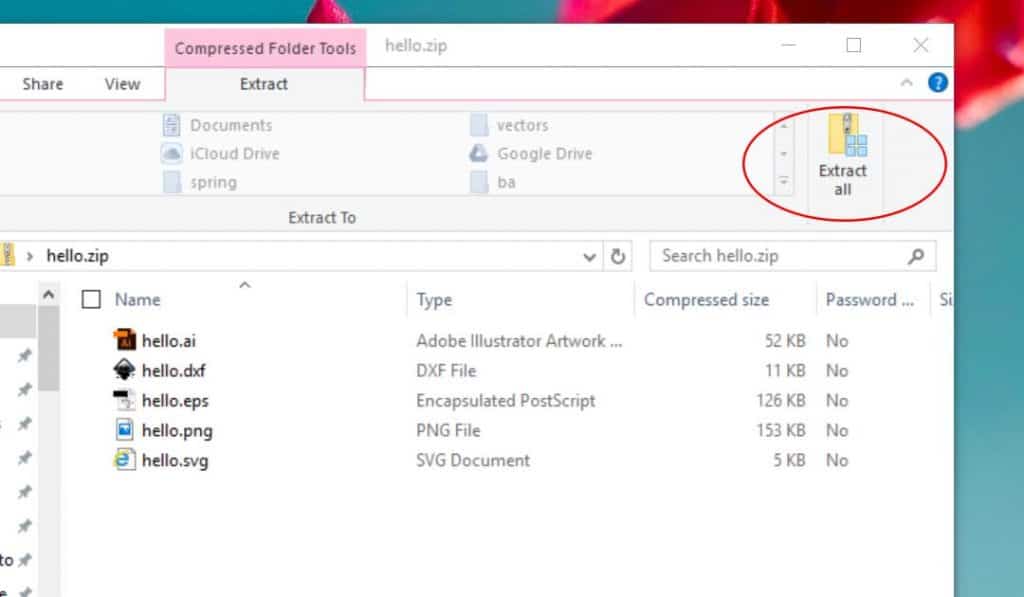
When you download cut files online, they usually come in a zipped folder and need to be extracted before you can use the files. To extract, double-click the folder and then choose extract all. You’ll know the folder has been unzipped because you’ll see a new icon of an open folder in your directory. Now, you are ready to open the files in Silhouette Studio.
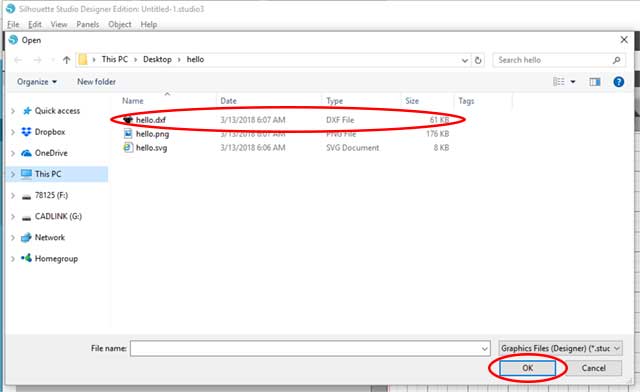
There are two simple ways to import the DXF file into Silhouette Studio. The first method will allow you to temporarily use the DXF file. The second method will add the file to your built-in Silhouette Studio Library.
How to Import DXF Files into Silhouette Studio
Once you’re in Silhouette Studio, click file, then open. Go to the folder where you’ve saved your unzipped files and find the DXF file. Once you’ve found it, double-click the name (or select and click ok). This will import the file onto your mat.
How to Import DXF Files into your Silhouette Studio Library
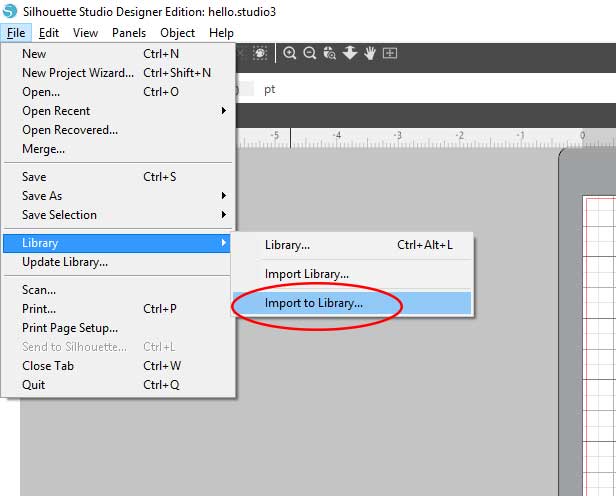
Once you’re in Silhouette Studio, click file, library, and then import to library. Go to the folder where you’ve saved your unzipped files and find the DXF file. Once you’ve found the DXF file, double-click the name (or select and click ok). This will import the design into your library in the user designs folder. Once the design is imported, it will show up on the panel on the right-hand side. Double click the design to bring it onto your mat.
How to Cut DXF Files in Silhouette Studio
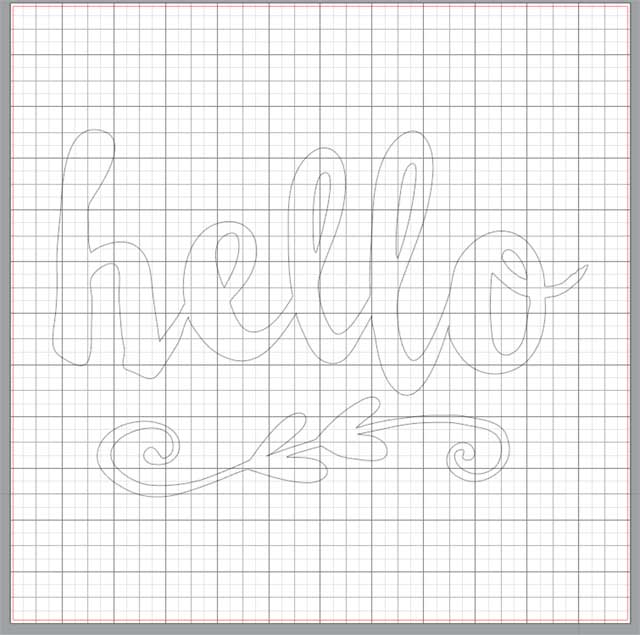
When you first import a DXF file into Silhouette Studio, you’ll notice it’s only an outline and there aren’t any cut lines. This is normal. Sometimes, it makes people think the file isn’t working right and will do a trace to get the cut lines to show up. But, you shouldn’t need to trace a DXF file. You can turn the cut lines on when you’re ready to cut.
Once the design is on the mat, select the entire design. Right-click and choose make compound path. Up to this point, all the shapes in the file are separate. The two circles inside the O are separate from the outside of the O and so on. When you make a compound path, it connects everything together. Once I’ve done this, I like to fill in the design with color. I think it just makes the design easier to work with when it’s filled in.
If you want to color different elements different colors, you’ll need to make the compound paths separately. So, let’s say we are going to make the word hello yellow and the flourish coral. Start by selecting all the parts of the word hello, including all the centers. Right-click, choose make compound path, and then fill it with yellow. Next, select the flourish. Right-click, choose make compound path, and then fill it with coral.
Next, double click on the image (if you have multiple colors, you’ll need to do one color at a time). You’ll notice all of the points will show up and a point editing window should open on the right. One of the reasons DXF files cut slower is because there are so many points in the files. Luckily, there is a simplify tool that automatically re-adjusts the image’s points and simplifies it to the smallest number of points without changing the shape of the image.
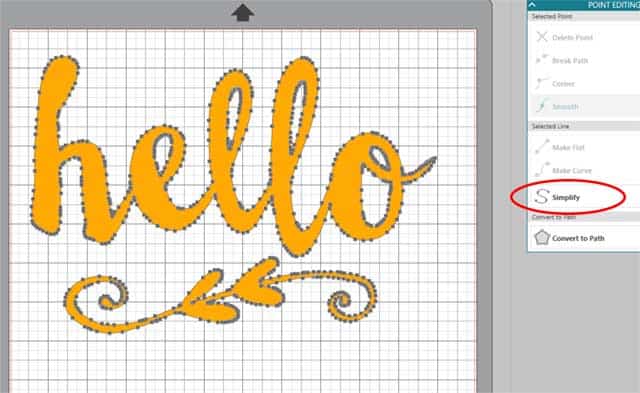
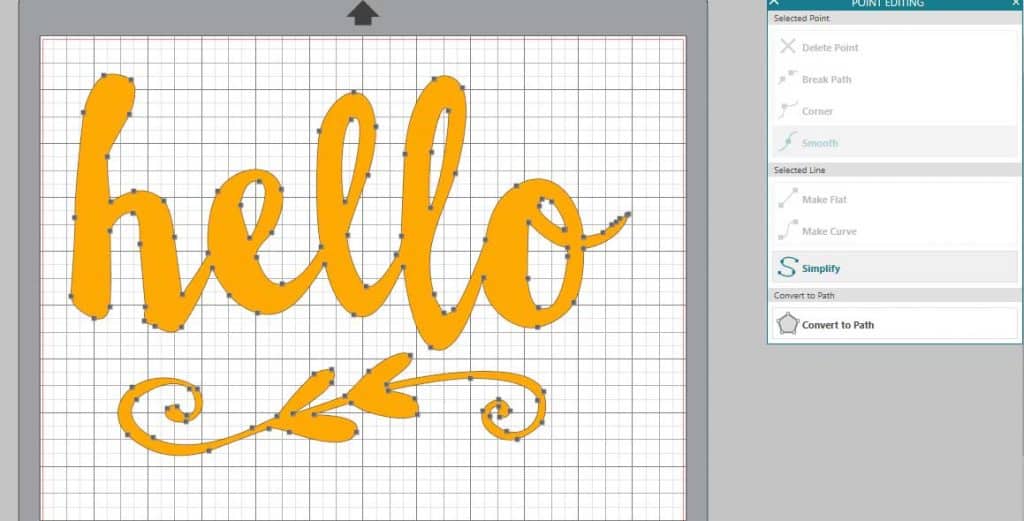
Click on the simplify icon and you’ll notice a bunch of the points disappear, but the shape of the image stays the same. This will help your machine cut the design much quicker. If you have a large or complex design, it might take some time for the design to be simplified, so be patient. It’s worth it in the end.
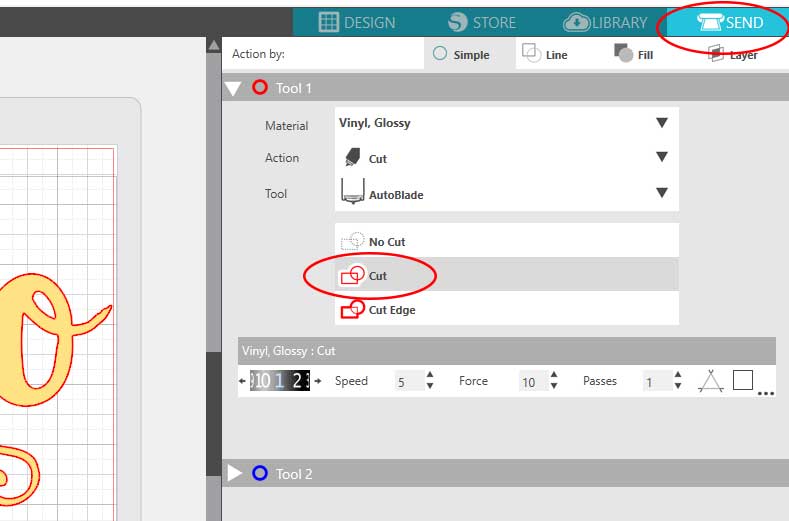
Once you’re ready to cut, select the entire design and then click the send icon located in the top right-hand corner. You need to click on the cut icon. This turns on the cut lines and now you can send the design to your Silhouette.
Now, you know how to import and cut DXF files in Silhouette Studio. Now, go make some amazing projects with your cutter!